When I told you we were going to do a guest bathroom remodel back in February, I bet you were thinking you’d get to see it finished before September. I’m sorry to keep you hanging, but the reveal will be totally worth it.
We finished the guest bathroom remodel in June, but I’m just now getting around to blogging about it. In this post, I’m going to show you how we overcame some obstacles to get the guest bathroom remodel of our dreams. Tomorrow, you’ll get to see the finished project! Are you excited?
Update: This guest bathroom remodel is complete! At the bottom of the post, you’ll find the updates plus all of our bathroom remodel posts so you don’t miss a thing!

In the intro post, we’d already done some of the guest bathroom remodel work. We painted the walls and ceiling white and built the alcove for the shelving. We also installed a new can light & led light. After that, we demo’d the entire space until we were left with a blank slate. Make sure you read that post to get all of the before pics! It’s worth it!
The Vanity Area
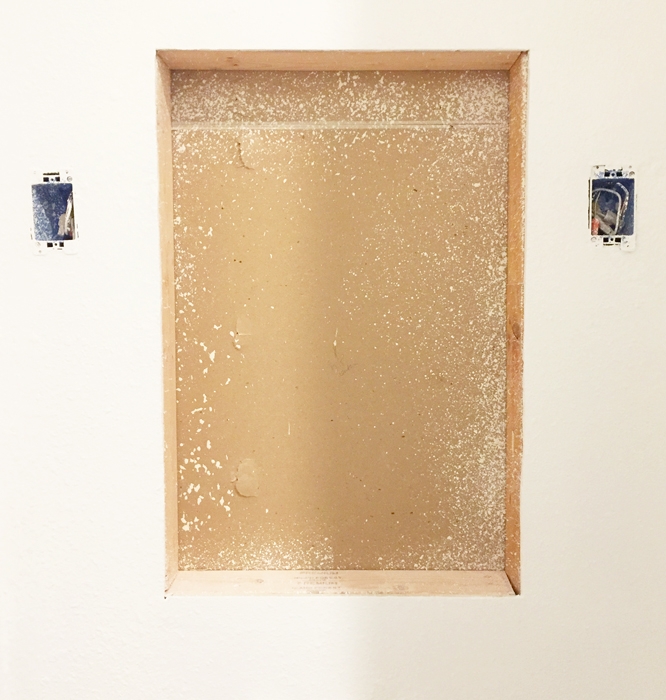
We had our plumber and electrician visit to install all of the valves and move the vent stack for the sink. The electrician came over to split the vanity junction box to accommodate 2 sconces. Doug also completed the framing & drywall repair for our Medicine Cabinet Mirror.
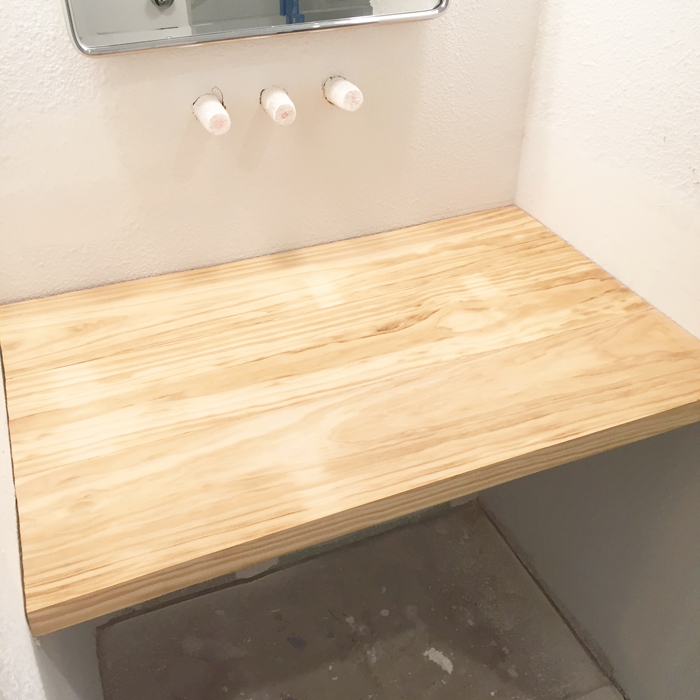
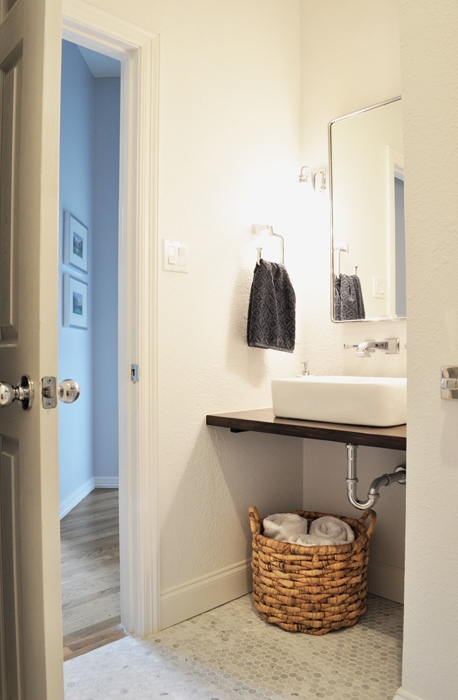
We sort of went out of order in the guest bathroom remodel at this point. We decided that we needed a sink back as soon as possible. I bought a cheap pine 2×10 for the vanity and 2 2×8’s for the shelves from our local big box store. We cut them down, glued & screwed using our Kreg Jig, sanded to smooth, and the $20 countertop was complete!
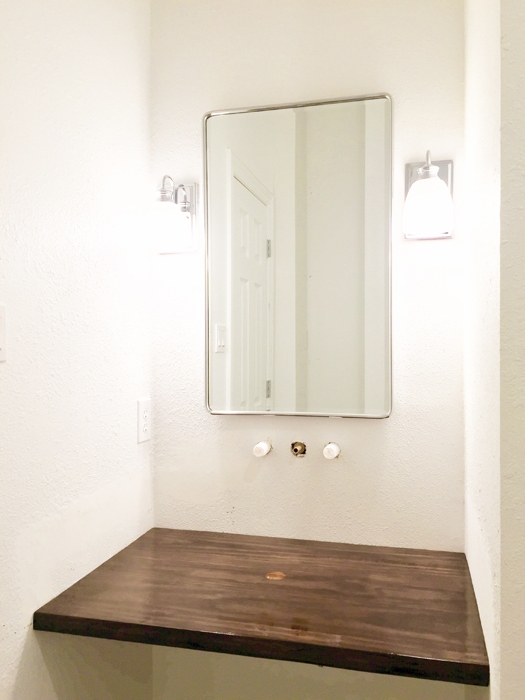
After several failed attempts at staining the pine (its really hard to get a uniform color with pine), we ended up using a gel stain. I don’t see the exact one, but its similar to this. 2 coats of gel stain, plus 3 coats of Waterlox Original Sealer plus one coat of Waterlox Satin, and the vanity is done!
The Waterlox products are really amazing! It actually waterproofs the wood. The regular sealer was a bit too shiny for me, so the satin toned it down a lot. I really love the look & the water just bubbles up!

Once we installed the vessel sink and wall-mount faucet (discontinued), we were back in business on this side of the guest bathroom remodel!
The Shower Area
With the vanity complete, it is time to address the floor & the shower pan issue in our guest bathroom remodel. If you remember, we were going for a curbless shower in this bathroom. We have a disabled child, and we want something that is safe for her to use now and in the future.
Normally to get a curbless shower, you have to go down in the slab 4″, which makes curbless showers on 1st floors in Texas very, very expensive. Most people just don’t do it, but I’m not most people.
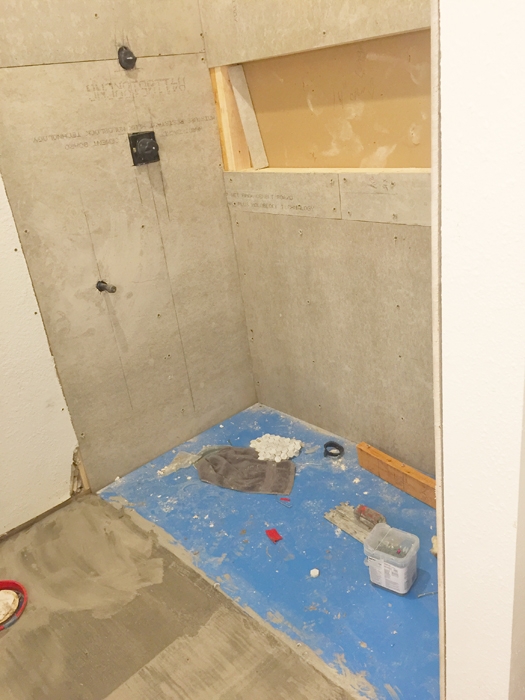
After scouring the internet, I found a product called the TrueDek by ARC Inc. It’s a manufactured curbless shower pan that is almost 1″ thick. It has the slope built into the pan, so all you need to do is secure it to the slab or floor joists, install your drain, waterproof everything, and tile on top.
Since we already knew we needed to raise the slab so that the tile floor would be an even transition with the hardwood in the hallway, I thought the ARCDek would work for us. Guess how much we needed to raise the slab for the even transition to the hallway? 1″. Can you believe it? It was meant to be!
The TrueDek system is NOT cheap. However, it is much less expensive & easier than removing 4″ of slab foundation for a 5′ shower. The shower pan plus the complete waterproofing kit was just about $1500 shipped to my door in less than a week. The kit included everything you need to waterproof the pan to prep for tile.
Our plumber was able to install the TrueDek shower pan easily. I just takes a little bit of thinset, plus some TapCon screws. The instructions are in the package, and there are also videos online you can watch as well. He did have to move the drain a bit, which added to our plumbing costs.
The picture above shows the TrueDek installed (it’s blue), and the slab raised to the same height. This picture was taken before waterproofing, which is the next step in the guest bathroom remodel. I had pictures of that process, but I misplaced the memory card.
Raising the Slab

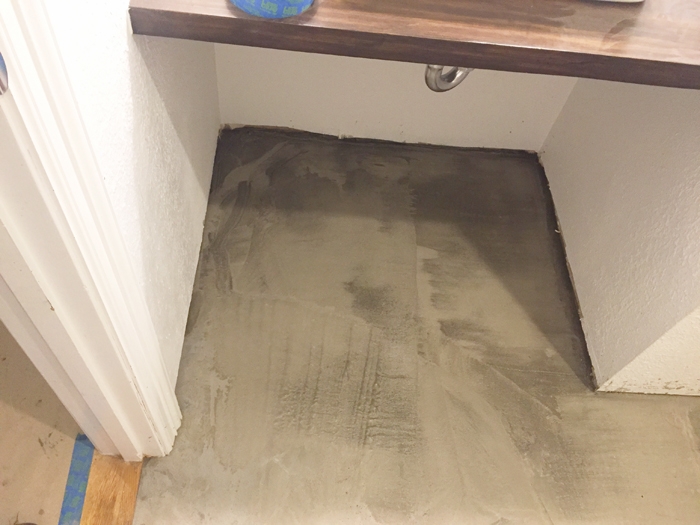
Once the plumber was done, Doug and I removed 2″ of the drywall all around the floor. Then, our contractor came in and added 1″ of concrete to the rest of the floor, right up to the TrueDek. Nice and flush!
After the floor was ready, our contractor tiled everything and we finished the guest bathroom remodel! But, that story will have to wait until tomorrow! I will leave you with this little sneak peek!
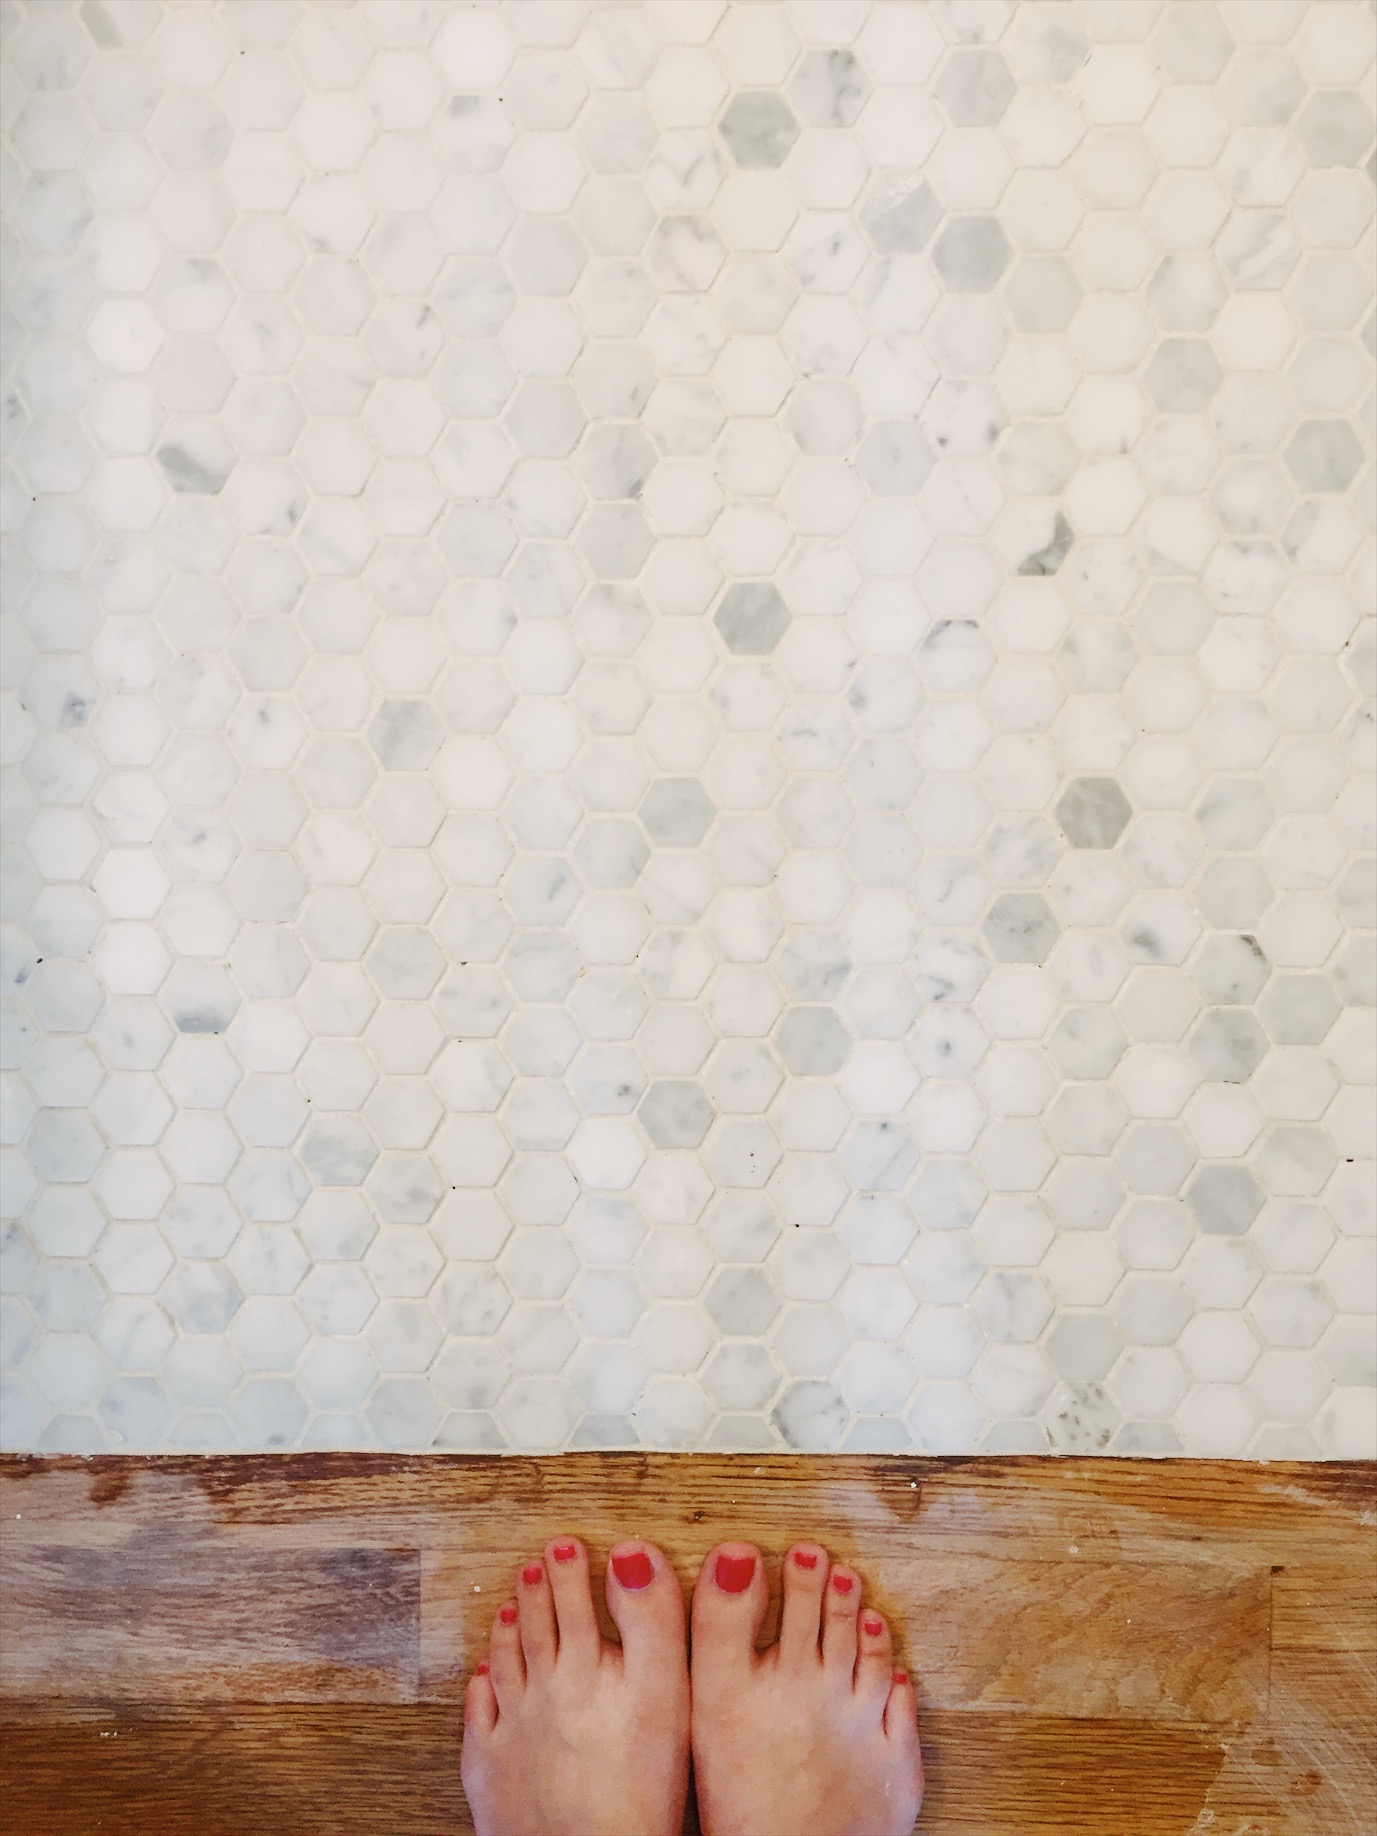
That flat transition is everything!!! There’s my hexagons!!! Make sure you are following me on Instagram for the latest!
Have you remodeled a bathroom? What challenges did you face in getting the bathroom of your dreams? How did you overcome those obstacles? Tell me in the comments!
Update
This guest bathroom remodel is complete! Make sure to check out the other posts so you can see it finished and how much we spent!
Also, don’t miss the Master Bathroom Remodel or the Kid’s Jack & Jill Bathroom Remodel!
Check out all of the Stacy’s Savings Total Home Makeover posts!

Leave a Reply