Okay, so maybe not a Total Yard Makeover, but definitely a Total-Where-The-Grass-Is-Supposed-To-Be Part of the Yard Makeover.
One of the things that we wanted to do when we moved into this house was to get new grass. The lawn had been severely neglected, just like the rest of the house. It was the worst on the street.
Before

I don’t have many before pictures, but here is a picture from my Son’s Birthday party in October of last year. Its hard to see, but there is nothing but weeds & dirt between the street and the sidewalk, there’s is visible dirt on the right between the hollies and the tree, and there’s only half a lawn on the left side of the walkway. Everything else is dirt.
We had a few obstacles before we could resod: money (duh, that’s always an obstacle), overgrown trees, wonky sidewalk, and drought. We were able to remedy the overgrown tree part last year, we’d made arrangements to have the sidewalk fixed in April of 2015, and we’d been saving money from each check for house projects with our new House Projects Savings Account & Automatic Transfers, but the drought was still a problem as the calendar flipped to 2015.
Then, this spring came, and with it, a ton of rain! Yay! The lake is (over)full, and we are no longer on watering restrictions. Yay! We decided this was the perfect opportunity to go ahead and re-sod the yard, even if we had to stretch the budget a bit or put off other projects.
The Plan
A couple months ago, a neighbor posted that she was expanding a flowerbed and had a bunch of free sod. This was pre-record rainfall. I scooped that up. Doug and I then planted it tiny piece by tiny piece on the left side of the front yard. We laid it in little patches so it would grow together eventually. But, that still left about a quarter of the front yard, plus the strips between the sidewalk and the street completely bare.
I had gotten some estimates done last year for re-sodding, and it was running about $450 a pallet installed. The local grass wholesaler sells the pallets for $200 including tax, but you have to do all of the work including soil prep, leveling & grading, fertilizing & pick up. We decided that the $250 savings was worth it, and that we could do the prep and installation ourselves.

Once the new sidewalk was in (because the machines would have torn up the new grass), it was time to get to work. We started by tilling the areas where we were going to plant the sod using our tiller attachment on the weed-eater. We cleared out all of the clumps of old grass, weeds and leaves, and and added some Scott’s Lawn Soil to mix in with the top soil. Then, we used a bow rake to level the ground to about 1″ below the sidewalk surface, and sprinkled in some Starter Fertilizer.
After that was done, we went and bought a pallet of grass at a local grass wholesaler. A pallet is about 450 square feet of sod. We ended up using about 80% of it in the front yard. We laid the sod in a brick pattern (to alternate the seems), filling in around the grass that was already there and growing. Finally, we watered it so that the pieces were soaking. We could have (and probably should have) rented a roller, but Doug didn’t want to do that, so we didn’t.
Additional Updates

While we were laying the grass, I decided to get rid of some ugly metal edging that was rusty and unsafe. I extended the retaining wall from around one of the Live Oaks to the bed that had some hollies surrounding a transformer. I rearranged the retaining wall stones that were already around the tree. Then, I took some from the back of a bed that isn’t seen from the street to complete the new layout. This created a slightly larger flowerbed. So I planted some impatiens and hostas in the new bed. I love how it looks! So much better than before, and honestly, we probably wouldn’t have been able to get grass to grow between the tree and the hollies anyway.
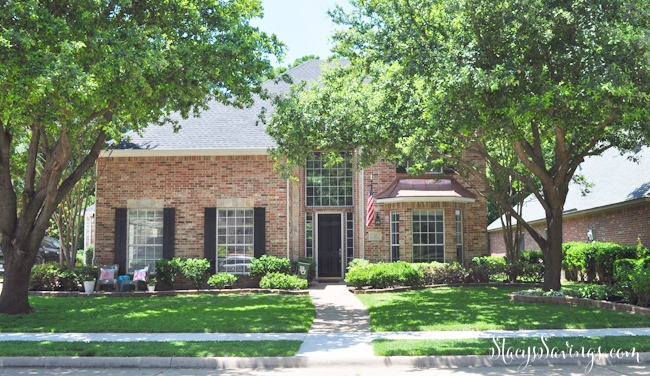

It’s been about a month since we installed the sod, and in that time, it rained about 10″! The grass is looking great, and we got free watering! There are still some bare spots here and there, mostly where the old grass is still spreading, but it looks so much better than I did before.
The bushes in the front yard are too mature, but we can’t do anything about that this year. That’s another project for another time.
The Back Yard
About a week after we did the front yard, we decided to go ahead and do the back yard. We had a spot of old grass that we babied last year. Its doubled in size from when we bought the house, but we really wanted a large yard for the kids to play. With all of the rain we’ve seen this Spring, we couldn’t pass up the opportunity. So we dipped into our House Projects Fund and purchased 2 more pallets for the back yard!
Here is what the backyard looked like last year:

And earlier this year:
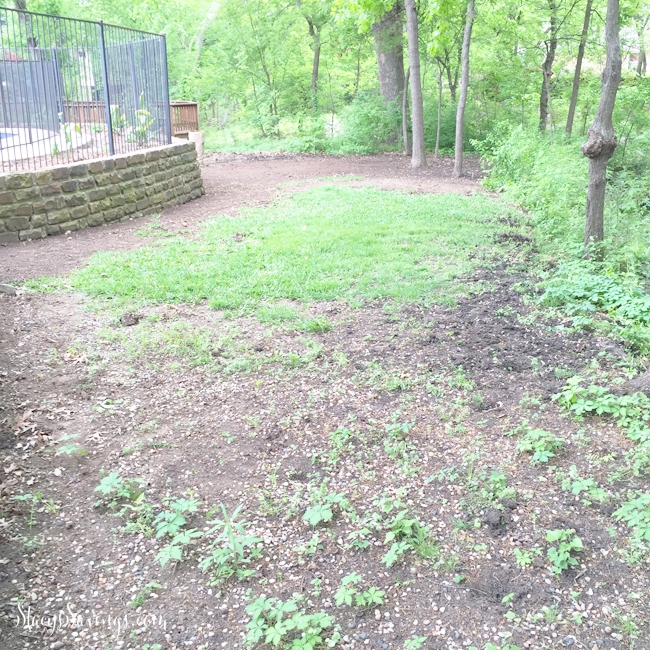
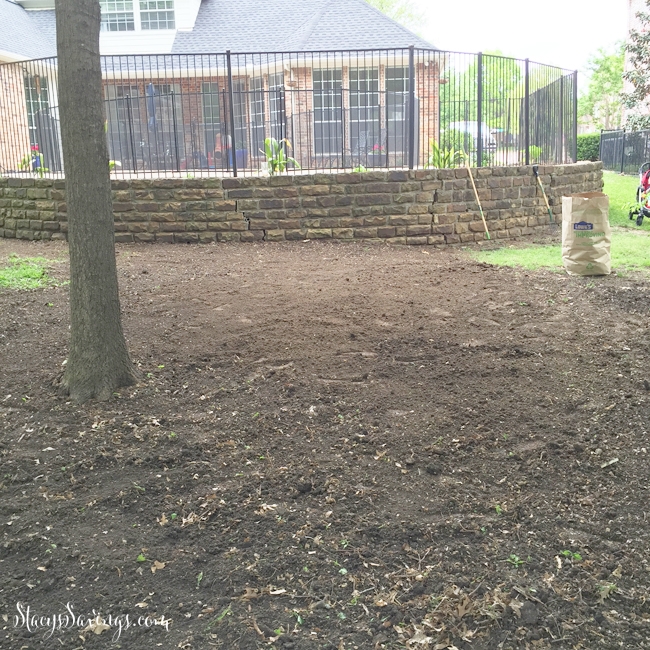


It was exhausting, but it looks fantastic! We actually worked on clearing some of the wild creek growth for a few weeks so we could expand the yard past the young trees a bit.
I’m so glad it’s done, and I hope it takes because I’m never doing that ever again. My arms still hurt just thinking about it.
Overall, we spent about $750 to resod the yard. That doesn’t include time, and it took us probably 3-4 days to do all of that. The patches that we got from the neighbor took the longest, because we had to actually plant those in the ground one at a time. By doing it ourselves, we easily saved about $650.

There’s a lot left that we want to do in the front yard, but here’s the list so far:
Get Sidewalk FixedRemove Magnolia & Trim TreesRe-sod YardInstall Flagpole HangerRepair & Paint Front Door- Change Out Door Hardware
Change Out Light FixturesCreate Seating Area- New Flowerbed Borders
- Replace Landscaping
New Copper DormerDarker Roof ShinglesReplace & Add Gutters
Well, now that I look at it, it looks like we’ve done a lot, but it doesn’t feel that way. Maybe because the new flowerbed bed borders and landscaping are big expensive and time consuming projects that are not going to be done any time soon. We got lucky (if you want to call it that) with a freak hail storm right after we moved in last year, so we were able to replace the roof, gutters & get a new copper dormer.
We’re going to cross off a few more of those things this year, but just the small things. Then, we’re calling it quits outside for a while.
Have you ever resodded your yard before? What did you think of the experience? Did you hire someone or do it yourself? I’ve got to say, its one of the better Instant Gratification things we’ve ever done. You go from no yard, to a full yard! Let’s just hope for some more rain so that we don’t have to pay for all of the water this lawn will need to get established, shall we? (I started writing this post weeks ago, and we’ve had enough rain now, thank you very much!)

I really should update the Total Home Makeover Graphic with all of the changes to the front yard…
There. What do you think?
Check out all of the Stacy’s Savings Total Home Makeover posts here!


john hutchens says
My wife and I re-sodded our yard last year and love the results. It was a time consuming task but we saved a lot. Your yard looks fantastic. You did a great job.
Stacy says
Thank you! It was a ton of work.