Thank you so much for all of the love on the Walk-In Pantry Reveal post last week! I’m getting excited to organize it when the budget allows for that. I can’t wait to show you! But for now, we’re going to talk about what I did with Peel & Stick tile to make my sink cabinets more functional and pretty! This project took me about an hour and cost under $25!

The Kitchen & Laundry Room Remodels have been going on for many months, and we’re finally in the final stages! Here are all of the posts you need to get caught up.
- Kitchen & Laundry Room Remodel Plans & Budget
- 3 Week Update
- 9 Week Update
- 13 Week Update
- Walk-In Pantry Reveal
I completed this project for both sinks in the laundry room and kitchen. Since I did the kitchen at night, and the laundry room during the day, I’m going to show most of the pictures from the laundry room. There may be a little back and forth.

The laundry cabinet did not have plumbing pipes in the way, because those come from the back wall. I used basically the same strategy (minus the intricate cuts in the laundry room) to complete both cabinets.
Why Am I Doing This?
A long, long time ago, when I first got on Pinterest, I found a pin of a lady placing vinyl tiles in her sink cabinet. I thought that was a cool way to protect the cabinet, since every single place I’ve ever lived had water damage to the base of the sink cabinet. So this project was in the back of my mind for a very long time.
And then we had trouble getting the plumbing cuts right in the kitchen sink cabinet.
Because the new kitchen sink cabinet is in the island, and we are DIYers, it was very difficult for us to cut the holes for the plumbing correctly. The plumbing pipes had a curve to them, and Doug couldn’t get the holes right. That left us with massive gaps in the bottom of the sink cabinet. Not only were they ugly, but I didn’t want stuff falling through to no-man’s land. We had to come up with a solution or go buy another cabinet. Since these are IKEA cabinets, buying another cabinet box wouldn’t have been expensive, but I didn’t want to spend the money on that.
I thought Peel & Stick Tile would be a good solution.
How We Fixed It

Doug found a piece of 1/4″ white board from another IKEA cabinet (I think it might have been a cabinet back from the oven cut out). He used this to cut better holes that were closer to the pipes, and he installed it to the bottom of the cabinet. Then, he set the cabinet on the base and installed it.
This was a decent solution, it stopped things from falling through, but it still wasn’t pretty. Also, things in the cabinet wouldn’t sit flat with a 3/4″ divot in the cabinet floor. It needed something to make it all one level.
That’s when I thought of vinyl peel & stick tile. By installing these tiles, I could fill the gap and get a level surface. I could also protect the cabinet from water damage. It was a win-win solution. As our electrician says “There’s always a solution.”
I didn’t want some cheap ugly vinyl tiles, I wanted something pretty. And since vinyl is all the rage right now, I figured there would be some cute options out there. I was right!
The Peel & Stick Tile That I Used

My first stop was to log on to Amazon and look around. I wanted something that would go with our kitchen, sort of a modern farmhouse vibe, but had a pattern to it. Cement tiles are cute, and I thought I would see if I could find a vinyl version.
Floor Pops makes all kinds of cute designs of vinyl peel & stick tile flooring, and this pattern jumped out at me immediately. I purchased 2 boxes so that I would have enough for both sinks. Each box comes with 10 tiles, but I needed 6 for each cabinet. I used a $25 gift card that I earned for free with Swagbucks to pay for these, so they were nothing out of pocket!
I received my peel & stick tile in 2 days thanks to Amazon Prime, and I couldn’t have been more pleased. The tiles are thick and sturdy, but they are easy to cut. They have a slight texture to them, but its not really visible from far away. The only downside is that the pattern doesn’t always line up tile to tile. You have to turn the tiles several times to get the best match, but it won’t be perfect. That’s why I only give this tile pattern 4 stars.
Installing the Peel & Stick Tile

Before installing, I went through all of the tiles in the box to find the best 6. The best 6 of the box were the ones that didn’t have any defects or scratches, and that when put together had the pattern line up as close as possible. I laid them out and did a dry run of the pattern and marked the backs of the tiles with their position number so I knew which is which.

To place these properly in the cabinet, I started with the front center tile. I measured the inside of the cabinet to find my center, and used a level to draw a line from front to back. From there, I eyeballed the center of my tile (you could measure & mark as well), peeled the back off, lined the front of the tile with the front of the cabinet, and pressed down. The front-center tile is the only one of the 6 that is installed whole. It does not need any cutting or trimming. 1st tile done!

From there, I did the tiles to the left and right of the center tile. I made sure to figure out which side was the one with the pattern that lined up to the installed center tile, and then I turned the tile 180 degrees. So that the side I wanted to keep was against the wall of the cabinet. Then, I marked where the overlap with the center tile stopped on both sides of the tile.

I used a level to connect those dots and that was my cut line for that side tile.
Cutting The Peel & Stick Tile

I used both a box cutter and an exacto knife to cut through the peel & stick tile, and I preferred the exacto knife better.

It was more precise, and it was easier to cut curves for obstructions like the 2x4s we used as supports for the farmhouse sink.

I used just enough pressure to get through most of the tile without going all the way through. Then I bent the tile with the pattern side up so that the cut was exposed.

After that, I ran my exacto knife down the cut one more time, and the pieces would separate.
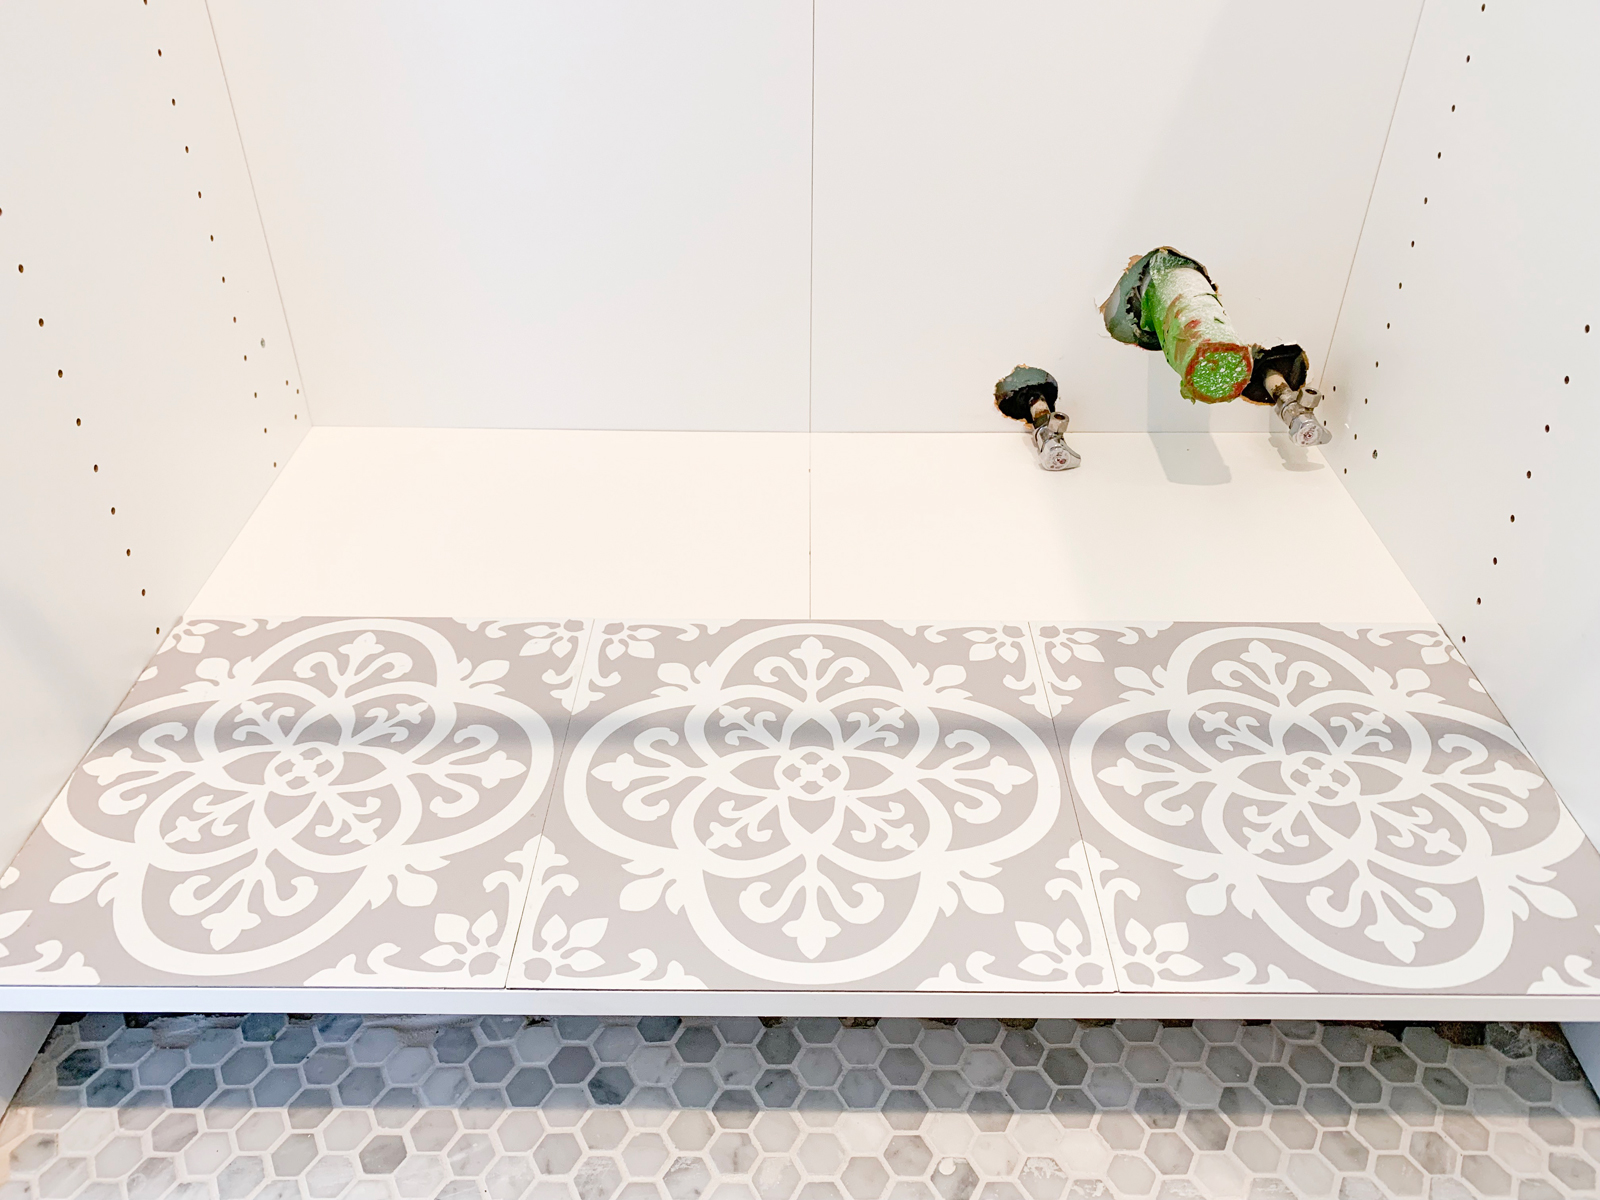
Then, I removed the backing, lined up the pattern & the tile with the front of the cabinet, and pressed down to install the tile. I repeated that process for the opposite side tile.
Installing The Back Tiles

For the back corner tiles, I had to cut a bit off both the side and the back of the tile. I did the same thing as for the side cabinets, but I also marked the overhang on what would be the back of the tile. Then I made my cuts and installed those tiles.
The back center tile in the Kitchen I left for last because it had to be cut around plumbing in the kitchen. This is where the divots are from the cuts to install the cabinets. I needed something to fill this void before I installed the tiles or the tiles would sag. I didn’t want to use anything liquid, so foam spray was out of the question.

In order to fill the holes with something that would support weight, I decided to cut tiny squarish scraps of 3/4″ wood. This would allow me to fill most of the void with something that was the same thickness as the cabinet. I placed as many pieces as I could before installing the peel & stick tile.
Cutting Around The Plumbing

To make my cuts around the pipes, I went one by one. I started with the front water supply because it was easy to pin point. I double checked the placement by measuring from the front and sides as well. When I was confident with my spot, I poked an X through the tile with my exacto knife. Then, I did a dry fit of the tile, cut a line to the closest edge, and used my knife to cut around the pipe for a tight fit.
I did the same thing on the back water supply line.

The drain was harder since I couldn’t slip the tile over the pipe. If you’re doing this for a cabinet with a sink already installed, this is how you’ll have to install the tile: You need to cut your tile into two pieces.
By cutting a line from the back and another to the side, I was able to get the tile in place (still with the backing on), and cut around the pipe. I did these cuts in places that wouldn’t be noticed, so toward the back of the tile. Also, the pattern helps hide the cuts because people are looking at the pattern.
This gave me the flexibility to make separate cuts to get as close to the pipe as I could.
Once I was happy with my cut outs, I took the backing off the biggest piece of the tile, lined up my pattern, and pressed to install. Then, I put the little piece in the back on, and this project was done!
The Results!

The kitchen sink took me about an hour because of all the cuts.
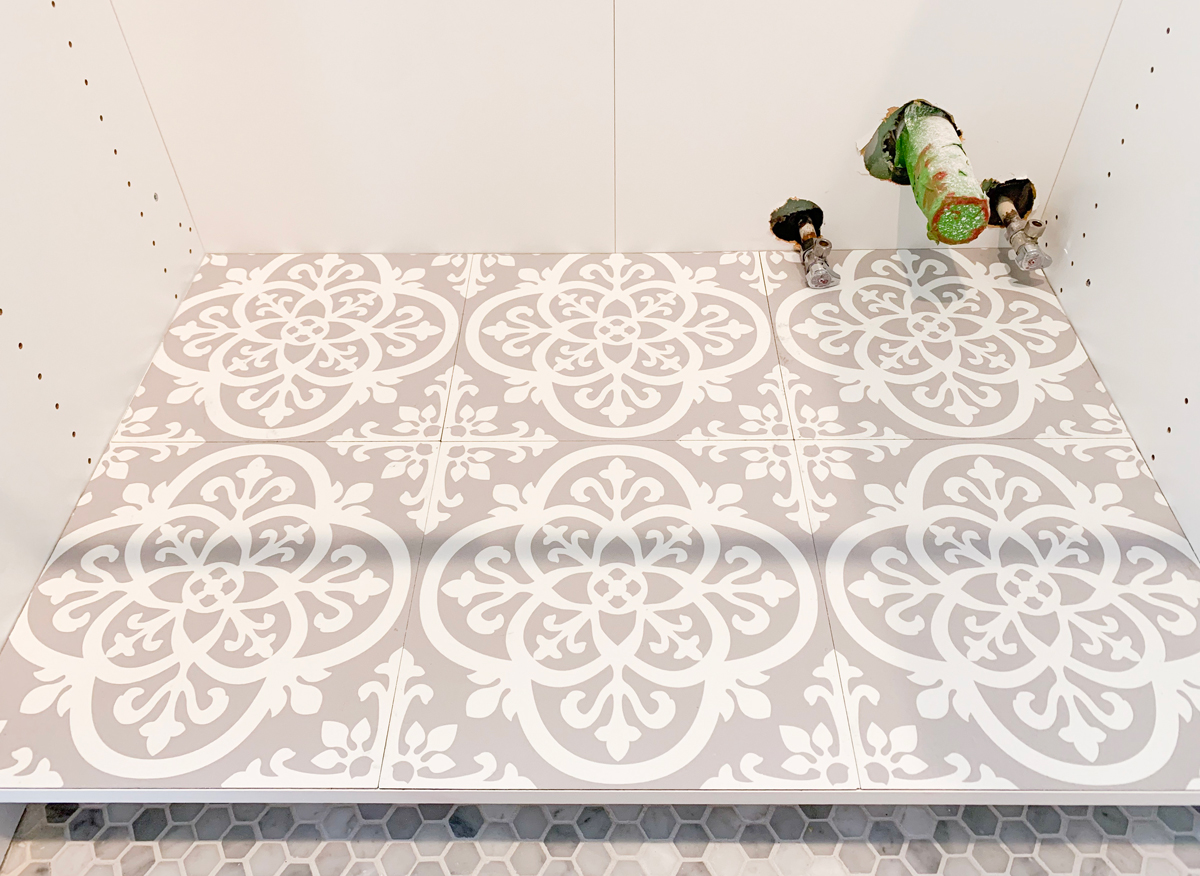
The laundry room sink’s plumbing comes out of the back wall of the cabinet, so I didn’t have any plumbing to cut around. That cabinet took me about 30 minutes to finish. I also did the sink cabinet first, so there was a bit of a learning curve. By the time I got to the laundry room sink, I knew what I was doing.


Overall, I’m super happy with this project! I love the pop of color and pattern that I get whenever I open the sink cabinets. It’s also nice to know that the peel & stick tile is going to protect the cabinet better than shelf or contact paper. The adhesive is very sticky, so I don’t think it will go anywhere anytime soon.
There are lots of pattern and color options for vinyl tiles on Amazon and even Etsy.
Here’s a pin for later!

Want to see more tips and tricks like this? Make sure you’re following me on Instagram for the latest in DIY, Home Decor & Organization!
So what do you think? It’s been about a month, and I absolutely love it. Everyone who’s seen it in person has an amazing reaction. I want to do it in the Kid’s Bathroom next! You should totally do it! What’s your favorite tile pattern? Tell me in the comments!


Leave a Reply