• Home
  • About
  • DIY
    • My Home Remodel
  • Organizing
    • Cleaning
    • Home Maintenance
  • Home Decor
  • Frugal Living
    • Save Money
  • Shop
    • Shop My Home
    • Amazon Storefront
    • LTK Shop
  • Contact

Stacy's Savings

Budget-Friendly Home Design & DIY

The Cleanest Garage Floor On The Block

DIY, Total Home Makeover · March 17, 2014

This post contains affiliate links. More information is available in my Affiliate Disclosure.

Have you seen those beautiful epoxy garage floors? Ever wanted to DIY one? Today on the blog, I’m going to show you our DIY Garage Floor Epoxy at the new house!
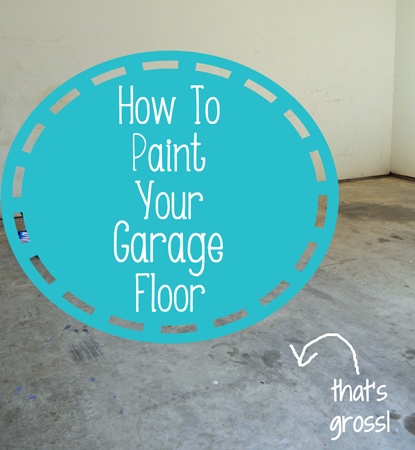
How-to-paint-Your-Garage-Floor

We lived in our little pink house for over 10 years, and we always wanted to paint the garage floor with an epoxy kit.  I actually bought one about 8 years ago, and it sat…for 8 years.  It never got done.

Garage-Floor-Before-1

So, when we bought this house, we knew that if we were going to epoxy the garage floor, we had to do it before we moved in and filled the garage with stuff.  After getting the keys, we immediately swept out the garage and got our supplies ready.  That’s normal, right?  The VERY FIRST THING you do after getting the keys is clean & paint the garage floor?  I know, we’re weird!

What Products We Used

Garage-Floor-Before

We used 2 Rustoelum Garage Epoxy Kits that we picked up at Home Depot.  Our new garage is 2+ car sized, about 500 square feet, so we used 2 1car kits (that’s all they had at Home Depot).  We went with the gray kit.  We also picked up some Behr Anti Slip Additive to make the finished floor less slippery and more safe.

Cleaning the Garage Floor

The kit comes with a DVD that shows you exactly how to do it.  First, you clean the floor with your favorite push broom or wet-dry vac.  Then, you mix the etching solution with water, using a watering can, and spread that around the floor, scrubbing and then squeegee-ing as you go.  We did all of that the first night, and then the next afternoon, we got started painting.

Painting the Garage Floor

Garage-Floor-1

After watching the DVD, we mixed the epoxy cans and added our anti-slip stuff (really easy, just stir it in).  While waited the 30 minutes necessary for the epoxy to do its magic, I separated the “sparkle chips”, as I called them, into 6 solo cups so that we could more evenly spread them around the floor.  They don’t really sparkle, but they do add some style to your floor.  

When the epoxy was ready, I did the cutting in around the edge with my favorite Wooster 2″ brush (super comfy handle!), and Doug rolled in 4′ x 4′ sections.  I then spread the chips.

Garage-Floor-2
garage-floor-after

That’s it!  We just let it dry for 24 hours before walking on it, and 36-48 before putting things on it.  It looks awesome and so clean!  It makes the walls look even more gross than they did before (we’re doing something about that VERY soon)!

garage-floor-final

Problems We Had

We did have one issue.  It seems that the second kit is a bit darker than the first.  We think the reason why is that Doug said the second kit had more of the anti-slip additive in it.  So if you want a more even look, maybe separate the anti slip stuff into two cups so that you can use an even amount in both batches.

The Budget

In total, we spent about $125 on paint & the additive, plus we spent $20 on a push broom & squeegee.  We use a roller, tray & brush that we already had, which would have been another $20 or so.  It’s a huge payoff for a little expense.  It looks fabulous!

I’m sorry that I’m only showing you this tiny corner of our garage.  The rest is currently covered by boxes, unorganized garage paraphernalia, broken down boxes, and a HUGE pile of debris to take to the dump.  Trust me, its an unorganized mess that is hive inducing.  Be glad I shielded your eyes from that wreck.  I’ll update this post when the garage is clean.  😉

At the time this was finished, this was the cleanest, most updated part of the house.  The walls on the other hand?  Absolutely disgusting.  The garage was so gross, covered in gecko poop (seriously!) and nasty cobwebs.  I had to buy one of these for my extension pole and go around the whole house, because every room had cobwebs and every vent and exhaust fan was caked in dust.  Gross!

Garage Door Updates

While we were doing this project, we discovered that the garage door/opener that was supposed to be in the process of getting fixed while we looked at the house, was never fixed.  We called our trusted Garage Door Repairman, who came out and told us that it was cheaper to get 2 new openers and 2 new doors.  So we did that.  He cut us a big deal on the installation of the openers, since we had two doors and we’d used him before, so that helped.  

What’s Next

Next up for this garage, paint with primer, some type of organization system, and ceiling loft storage!  This may be the first completely updated room in the house…maybe.

Stacy's Savings Total Home Makeover. See all of the work we've done, step by step, room by room, to remodel our 90's era home.

Check out all of the Stacy’s Savings Total Home Makeover posts here!

Do you have plans for your garage this Spring?  What are you thinking?  Anyone painting?  How do you organize?  Tell us in the comments!
You might also enjoy

The dining room ceilingThe Kid’s Bathroom & The Dining Room Ceiling
The appliance tower is one of your favorite parts of my pantry! Come learn the answers to your top questions!Your Top 7 Pantry Questions Answered!
MovingWe’re Moving!
« Greetings From The Oak Abode – Our Total Home Makeover Before Post
The Power of Paint »

Comments

  1. krystel says

    March 18, 2014 at 7:43 pm

    great post

    Reply
    • Stacy says

      March 18, 2014 at 10:15 pm

      Thanks!

      Reply
      • marcia monz says

        April 19, 2015 at 10:33 am

        What color did you paint the walls? Any pics of the walls?

        Reply
        • Stacy says

          April 20, 2015 at 9:06 am

          I’m getting there! I have a HUGE list of house update posts to do, and that’s one of them! We ended up painting it a very light gray.

          Check back in a few weeks, and hopefully, I’ll have the Garage Reveal up! We need to tidy it up and take some pictures first.

          Thanks for stopping by!

          ~Stacy

          Reply

Leave a Reply Cancel reply

Your email address will not be published. Required fields are marked *

About Me

Hi y'all, I'm Stacy! I'm a wife & mom of 3 from North Texas who is currently renovating our 90's Builder-Grade Fixer Upper with DIY Projects that incorporate Function, Organization and Style - all on a budget. At Stacy's Savings, you'll find ideas & strategies to save money transforming your home without sacrificing style. Never pay full price.

We are a participant in the Amazon Services LLC Associates Program, an affiliate advertising program designed to provide a means for us to earn fees by linking to Amazon.com and affiliated sites.

Follow Me

See how I organized my farmhouse pantry!

Our Farmhouse Pantry Organization Reveal!

See how I built this DIY Farmhouse Vent Hood Cover for less than $200! Vent Hood | Vent Hood Ideas | Farmhouse | Joanna Gaines | Fixer Upper | DIY | Modern Farmhouse | Kitchen Remodel | Kitchen Renovation | White Kitchen | Rustic Vent Hood | Farmhouse Vent Hood | Farmhouse Vent Hood Ideas | Farmhouse Vent Hood DIY | Vent Hood Over Stove | Wooden Vent Hood

How I Built My DIY Farmhouse Vent Hood Cover

Our completed garden shed!

DIY Cedar Garden Shed – No Kit & Built in a Weekend!

It's the Pantry Reveal! Check out how we designed and built a new walk-in butler's pantry complete with lots of shelving and a countertop!

Our DIY Custom Walk-In Pantry Progress and Reveal!

See what we think about our IKEA kitchen cabinets 2 years later. Its all on the blog.

IKEA Kitchen Cabinets Review – 2 Years Later

Browse

  • Privacy Policy
  • Affiliate Disclosure
  • Opt-out preferences

Get New Posts Delivered to Your Email!

Let’s Connect!

Happy 250th Birthday America! 🇺🇸 Happy 250th Birthday America! 🇺🇸
After an 11-year home remodel and a backyard renov After an 11-year home remodel and a backyard renovation last summer, we’ve spent a lot of time out here figuring out what actually makes pool days easier.

These are a few Amazon favorites we reach for again and again all summer long.

Do you have a poolside must-have I need to know about?

Shop everything in my Amazon Storefront, ShopMy & LTK.
School’s out for Summer & the pantry is ready! I School’s out for Summer & the pantry is ready!

I spent this week cleaning out & stocking the pantry, the pool bag, the craft cabinet & more. Let summer begin! ☀️😎
#ad | This is the only nail routine I’ve used for #ad | This is the only nail routine I’ve used for the past year.

I’ve always done my nails at home to save money, but I wanted something that actually lasted without damaging my nails.

The Dazzle Dry system dries in about 5 minutes, wears like gel (without the damage), and I can go over a week without chipping.

I’m using You’re Unforgettable from their Better Together spring collection, and I linked the full system + shades in my LTK so you can shop everything in one place.

@Shop.LTK #liketkit https://liketk.it/62QyO
@dazzle_dry #DazzleDryPartner
I’ve shared parts of this room before — but not th I’ve shared parts of this room before — but not the full evolution.

This is my 16-year-old son’s bedroom. I designed it back in the 2020 One Room Challenge with the goal of creating something we wouldn’t need to redo every few years.

Before that, it was a bright little boy’s room.
And when we first got the keys? Just a blank box.

Over time, we’ve upgraded it slowly — including replacing the carpet with hardwood last year to match the rest of the house.

The foundation hasn’t changed.
Just the seasons.

More books.
More Legos.
More personality.

Same room. Just evolving.

I’ll be sharing more spaces from our renovation — not in order, just as they come. Follow along for more. 🤍
This hallway was always one of those in-between sp This hallway was always one of those in-between spaces - finished enough, but never quite done.

Adding an art lamp was the final touch. It completely changed how this space feels, especially at night. ✨

Comment LIGHT below to receive a DM with the link to this post on my LTK ⬇ https://liketk.it/5QEdl
Design by SkyandStars.co

Copyright Stacy's Savings © 2026 · Log in

Manage Cookie Consent
To provide the best experiences, we use technologies like cookies to store and/or access device information. Consenting to these technologies will allow us to process data such as browsing behavior or unique IDs on this site. Not consenting or withdrawing consent, may adversely affect certain features and functions.

Besides, I wouldn't know how to access that info or what to do with it anyways! The Government makes us do this. ~Stacy
Functional Always active
The technical storage or access is strictly necessary for the legitimate purpose of enabling the use of a specific service explicitly requested by the subscriber or user, or for the sole purpose of carrying out the transmission of a communication over an electronic communications network.
Preferences
The technical storage or access is necessary for the legitimate purpose of storing preferences that are not requested by the subscriber or user.
Statistics
The technical storage or access that is used exclusively for statistical purposes. The technical storage or access that is used exclusively for anonymous statistical purposes. Without a subpoena, voluntary compliance on the part of your Internet Service Provider, or additional records from a third party, information stored or retrieved for this purpose alone cannot usually be used to identify you.
Marketing
The technical storage or access is required to create user profiles to send advertising, or to track the user on a website or across several websites for similar marketing purposes.
  • Manage options
  • Manage services
  • Manage {vendor_count} vendors
  • Read more about these purposes
View preferences
  • {title}
  • {title}
  • {title}