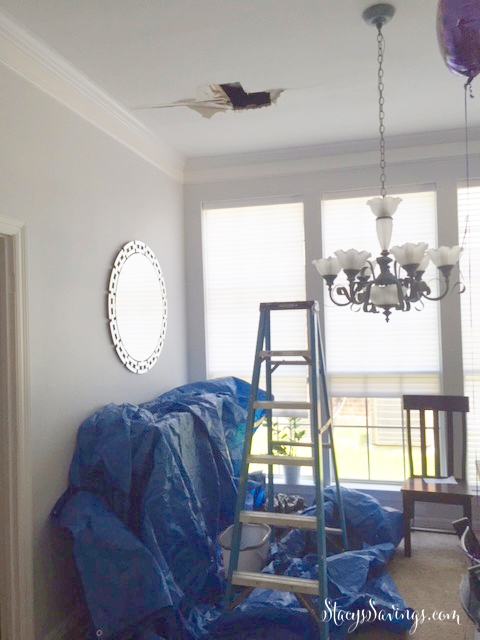
The Kid’s Bathroom and the Dining Room Ceiling. Not two things that are normally go together, huh? What does the Dining Room Ceiling have to do with the Kid’s Bathroom? We’ll get to that in a moment.
Right now, we’re in a pattern of DIY around the house that is more a little bit here, a little bit there. We’ve gotten to that point in the year where the budget will not allow us to do a complete project start to finish, but we can do partial projects that we can live with for a while. This is the case with the Kid’s Bathroom.
The Kid’s Bathroom Remodel Step 1 – Removing the Wall
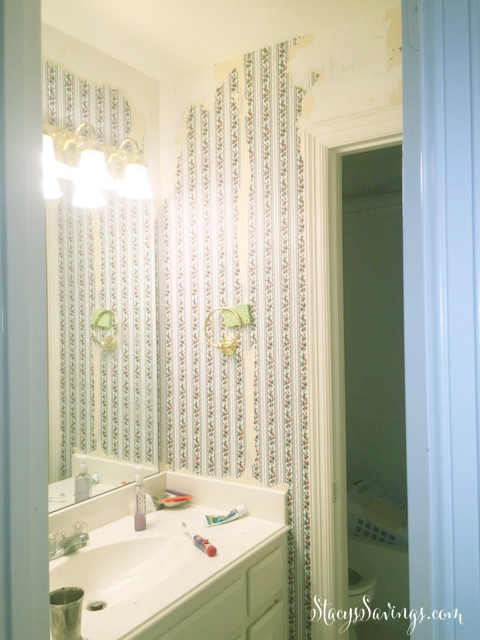

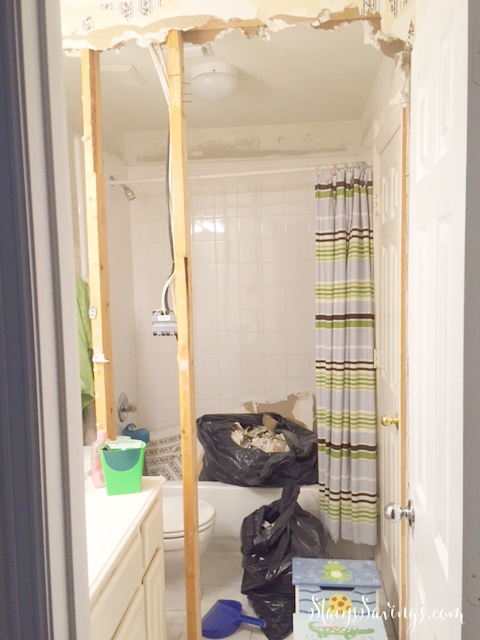
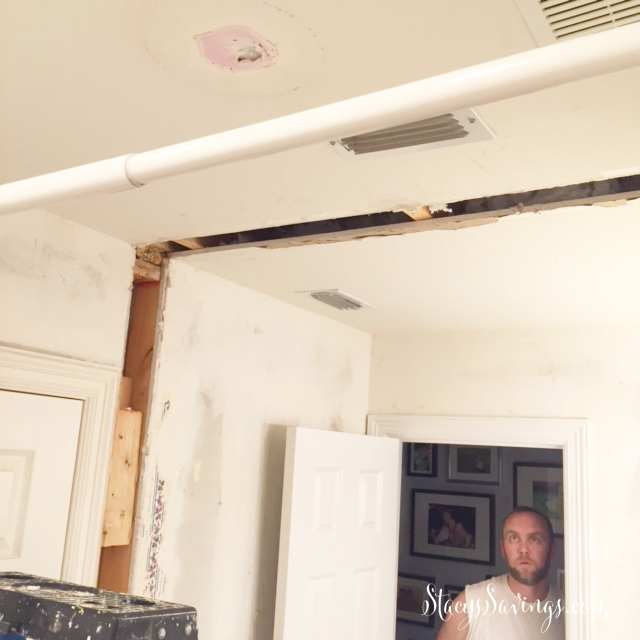
If you follow me on Instagram, you’ll know that during the never-ending rain, we removed a wall and doorway from the kid’s bathroom. Specifically, the one between the vanity that leads to the hallway and the toilet/shower area. We had removed the door between them when we moved in, because the doors swung into each other, like this:
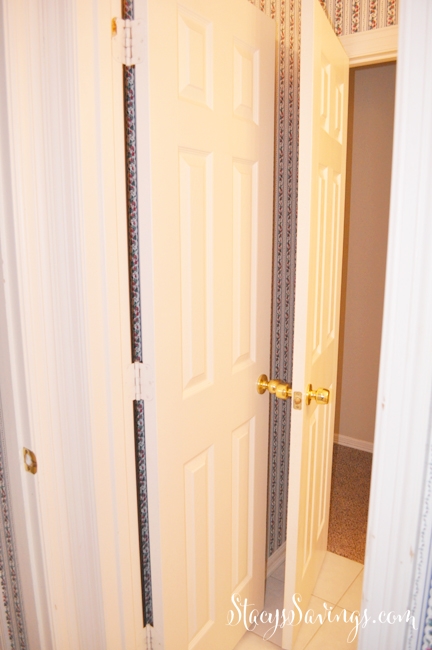
The wall isn’t bearing any load at all (we have exposed attic above, and nothing was on it/no sistered studs), makes the room feel cramped, and it does’t allow for much in the way of a vanity or storage.
The cabinets in the side that leads to my daughter’s room are broken, the drawers stick, and there’s an odor issue. I’ve been wanting to replace the cabinets since we moved in, but the size of the vanity area on the hallway side was too small for most stock cabinets, and custom is out of the question due to budget constraints.
The Remodel Plan
My plan with the rest of the house is to use IKEA Sketion cabinet boxes and hardware with custom solid-wood doors. I like putting IKEA stuff together, the cabinet system seems pretty easy & gets great reviews, and they use high-end hardware. Also, you can purchase them without the doors and drawer fronts.
I’m going to order custom doors and panels will camouflage the IKEA-ness of the cabinets. Plus, the price is right. I calculated that if we removed the wall, we could get about 6-7 more inches of vanity, which would allow me to have the same size, 51″ vanity in each part of the bathroom. It would also make the toilet more centered between the vanity and the bathtub. Wins all around.
Repairing the Walls
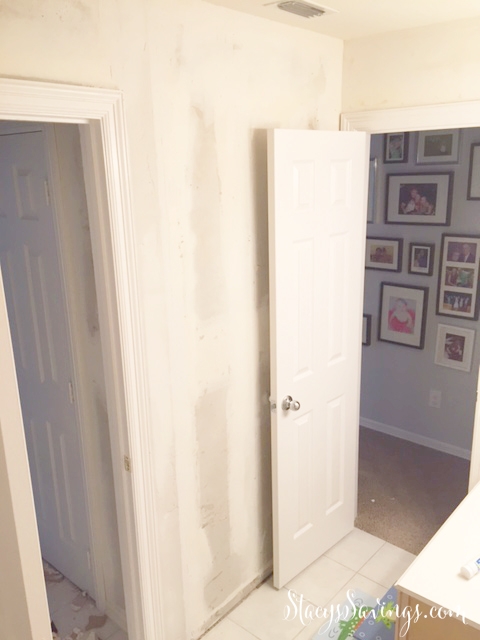
Over the last two weeks, we’ve slowly repaired the kid’s bathroom walls. As with any project, unexpected problems pop up. In this case, it was the wall behind the sink. It wasn’t on the same plane as the wall behind the toilet. There was a 3 inch difference in depth because of the linen closet in the hallway that is perpendicular to this wall.

So, before we could put up drywall, we had to build a mini-frame that would allow us to attach the drywall. But of course, a 2×4 is 3.5 inches wide, not 3 inches. We ended up having to use some very curved 2×3 fencing studs, which meant a TON of shimming in order to get everything flush for the drywall.
Framing the wall and installing the drywall took us the better part of 3 trips to Lowe’s and one day. 🙂 I don’t have any pictures, because it was such a pain in the butt that we just wanted it done. We built a box and shimmed it.

Next, it was time to tape and mud the drywall. This is my first try at it, and it really isn’t as hard as I thought was going to be. I mainly just googled how to do it, but it was very similar to frosting a cake. I did one coat, then cleaned up the bathroom and went to bed.
The Dining Room Ceiling Issue
The next morning, our son came in our room at 7:30 saying he was scared of a clicking sound. He said he followed the sound but couldn’t find the source. A little while later, he came back in and said he found the source: some white stuff dripping from the Dining Room Ceiling. There it is! I knew you were waiting for it.

Yes, we had sprung a leak in the Ceiling. It was coming from the Kid’s bathroom. This is our first experience together in a two-story house, so when I told Doug to get the drywall knife and see what was going on, he was very hesitant. I had just conquered the bedding & taping demon, so I wasn’t afraid of cutting open the ceiling. Drywall is cheap.
We weren’t sure what the leak was. We thought maybe we hit a pipe installing the frame for the wall. I thought maybe the moisture from the joint compound was leaking. Somehow, we had caused this. It wasn’t a coincidence that it was raining in our dining room not 12 hours after we were working on the very same bathroom that was now currently leaking, right? We had no idea.


Doug cut a hole in the ceiling, and found some interesting things. First, there was a sheet of plywood over the ceiling drywall. Not sure if that’s normal. Second, a bunch of nasty, black stuff fell out of the hole. Third, there was clear water dripping from the toilet drain. So totally gross!
What We’re Going To Do
Thankfully (or maybe not definitely not), we still have our Home Warranty. They’ve determined that the floor in the bathroom is warped and uneven, and we think it’s unsafe. That is causing the wax ring on the toilet to not get a proper seal, and its been a slow leak for a long, long time. Final verdict: we have to replace the floor & subfloor.
We’re still waiting to hear what they will and will not pay for, but we know we can no longer do a slow bathroom remodel. We’ve got to kick it into high gear and get it done. Hopefully, the warranty company will give us a decent amount of money to put toward the remodel for the floor expenses (we’re going to do the labor ourselves), but I’m not holding my breath.
I’m going to do a proper initial remodel post with lots of before pictures next week, but I had to jump ahead a bit to explain the ceiling situation, since that is happening real time.
What We’ve Done So Far
So far, we’ve removed as much wallpaper as we can, removed the wall, replaced the light fixtures, added recessed cans over the shower, painted the doors & replaced the hinges and knobs, and repaired the walls.
Our original plan of finishing in the Fall is over. I We’ve got to get the cabinets & new bathtub in before we can retile the floor, so all of that has to be done now. I think we’re going to hold off on countertops and cabinet doors/drawer fronts for a while, and just try to do as much as we can to get the floor done and the toilet installed.

Oh, and I had to buy new tires today because of my flat on Friday. Yikes. When it rains, it pours…literally in my house.
Update
This project is complete! Make sure you check out all of the posts so you don’t miss a thing! This was the first time we’ve ever remodeled a bathroom on our own (except plumbing), and we learned a lot. Plus, we were able to do it on a crazy low budget considering we had to replace everything including two separate vanity areas.
- Jack & Jill Bathroom Remodel Before Photos, Plans & Inspiration
- Kid’s Bathroom Demo & Choices
- Jack & Jill Bathroom Remodel Progress
- Completed DIY Kid’s Bathroom Remodel
Have you ever had a second floor leak into your first floor? What happened? How did you/they fix it? Tell us all about it in the comments!

Check out all of the Stacy’s Savings Total Home Makeover posts here!
Leave a Reply