We’ve been renovating our kitchen for many weeks now, and I really want to start organizing. I don’t want to bring in any of the things that need to be washed first, like glassware or anything you eat off of, so I decided to start with the medicine cabinet to scratch the organizing itch. We’ve always had a medicine cabinet in our kitchens, and for a few reasons, I wanted to make it much more functional for our family. In this post, I’m going to show you how I organized the medicine cabinet with $100 and one trip to The Container Store.
This post is not sponsored, but affiliate links are used for your convenience. Please see my disclosure page for more information about affiliate links. I really love The Container Store. It’s on par with Disneyland for me. 😉
What We Need in a Medicine Cabinet

Having a member of your family on daily maintenance medications makes it important to have a system in place for your meds. Having those maintenance medications be in liquid form and 90 day supplies means you have to have lots of back stock storage. In our old kitchen, the back stock for our daughter’s meds took up a full shelf in one of our main cabinets. The daily use bottles were permanent fixtures on our countertop, which is not the prettiest kitchen decor. Plus, it’s a privacy thing. In the new kitchen, I wanted to create a space where the back stock wasn’t taking up prime real estate, as well as make a concealed space for the daily use bottles that was easy for us to use & maintain.
The Medicine Cabinet Space

Our new kitchen has a Butler’s Pantry area near the Pantry that will house our coffee maker. Since this zone will be a first stop in the mornings, it only makes sense to put all of the morning meds over here too. Our space is about 55″ wide, so we used a 36″ wide cabinet and an 18″ wide cabinet so that the doors would all match across the wall. Just like in the rest of the kitchen, we added 20″ cabinets above the wall cabinets to take the storage to the ceiling. The 18″ wide cabinet is next to the doorway to the dining room where we eat most of our meals, so this made it the perfect candidate for the medicine cabinet.
Daily Medication Organization
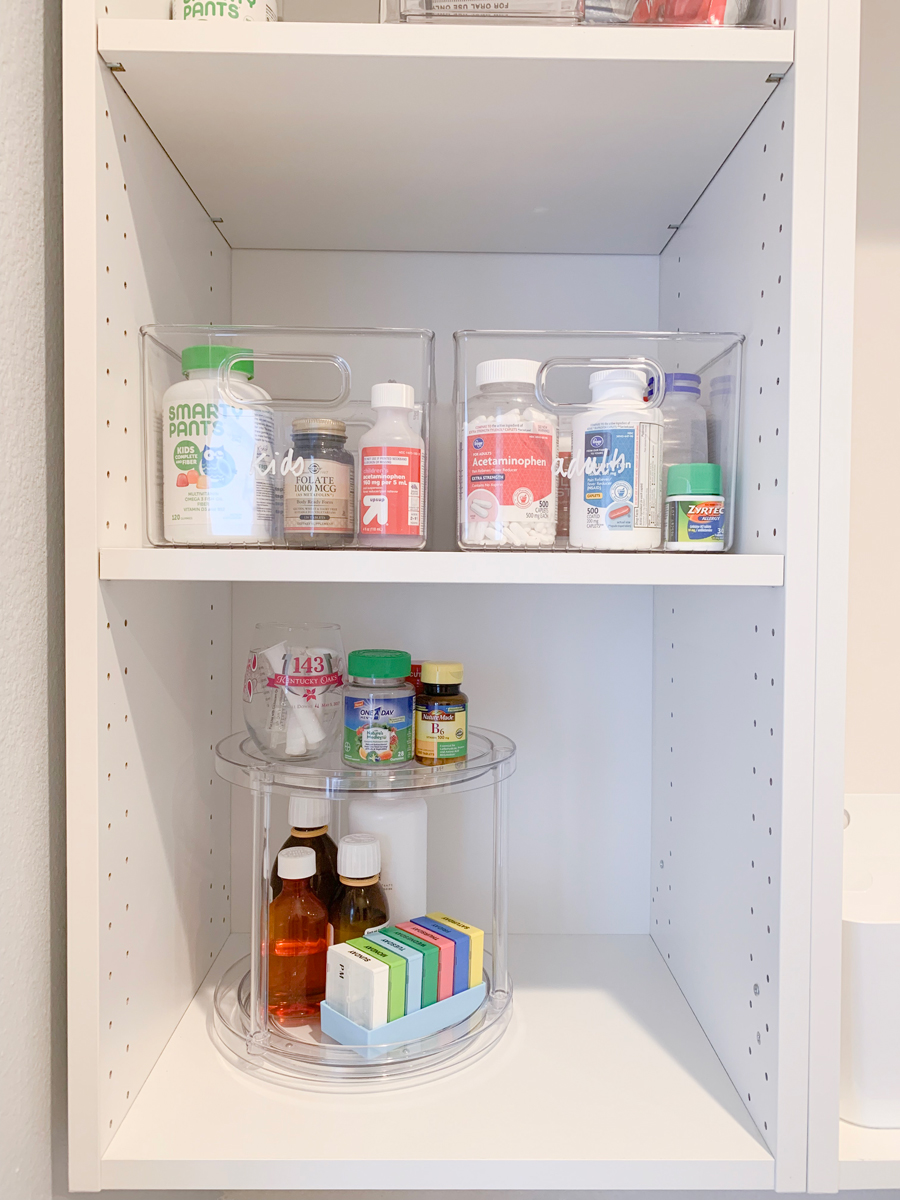
The bottom shelf of the cabinet is where we keep the daily meds & our vitamin box for easy reach. I purchased The Home Edit’s Clear 2-Tier Lazy Susan to keep the large bottles underneath and the small bottles, pill cutter/crusher, and a glass of syringes on the top. I repurposed an old stemless wine glass that we got on our trip to Churchill Downs a few years ago for our syringe storage.

The pill box is great because there is a box for each day, and each box has two compartments. Our daughter requires a certain vitamin in powder form twice a day. Every Sunday, I crush the vitamins and fill up the box accordingly, so that it is ready to go for the week. Plus, its cute & colorful! This box has a much smaller footprint than the old one we were using, and I like that it fits on the carousel.
There’s a little space left over on the right side of the shelf where I’m thinking I will line up a bottle of each of our daily gummy vitamins. You could also keep anything medicinal that you need in the morning or add to your coffee here, like collagen powder, for example.
Adult & Kid Medicine Storage
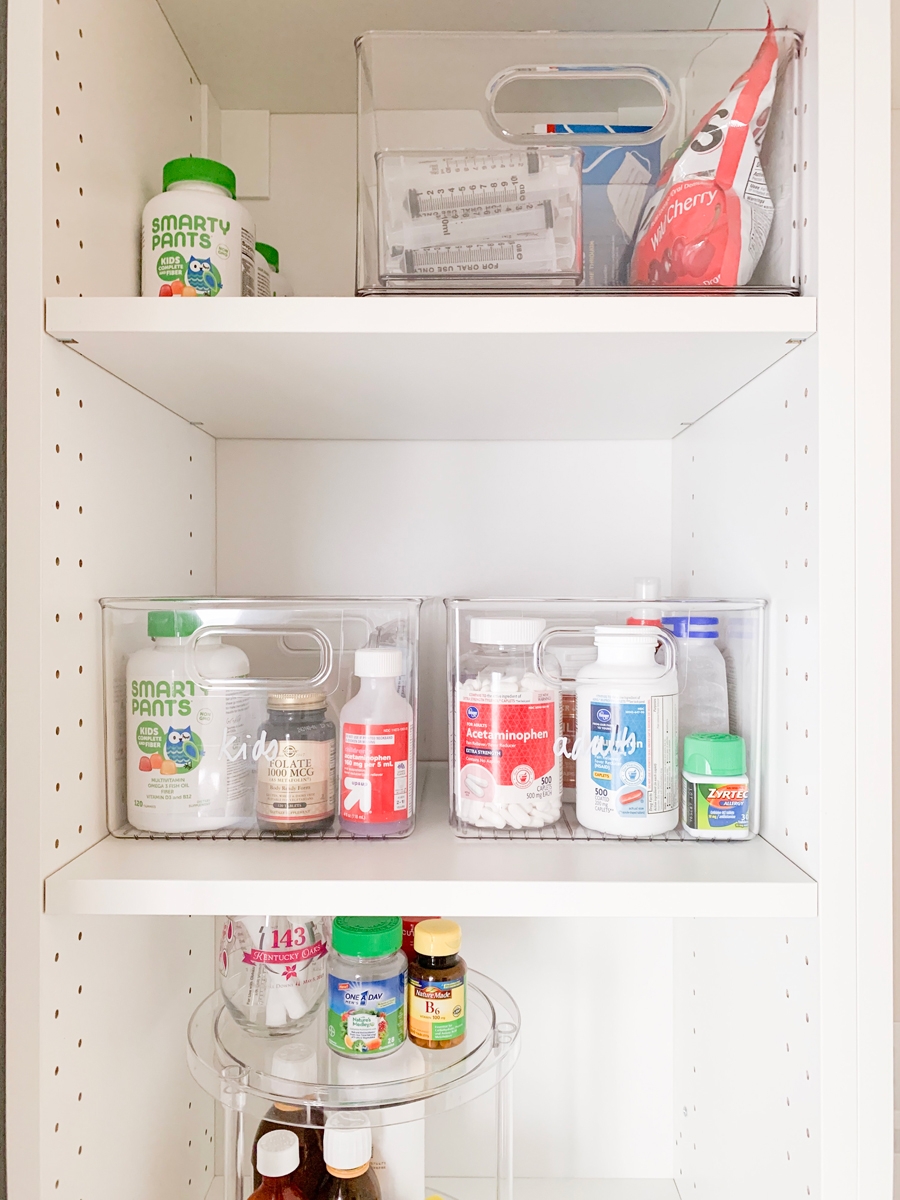
The second shelf fit two InterDesign Linus X-Large Pantry Bins perfectly side by side. I prefer the pantry bins because the sides don’t taper. Straight sides allow you the maximum storage area and less wasted space. Plus, it contains the products better without letting them topple as easily when you move the box. It also doesn’t hurt that they were on sale!
These medicine bins are for ailment medicines for pain, illness, cough, etc. They basically contain things we would reach for more often than others. There is one bin for kids and another bin for adults. I used a Sharpie Oil-Based White Paint Pen to handwrite the labels on the bins. If you don’t like your handwriting, The Home Edit has sets of labels for sale, as well as some freebies in the back of their new book! You can also check Etsy for custom labels.
First Aid & Other Medications
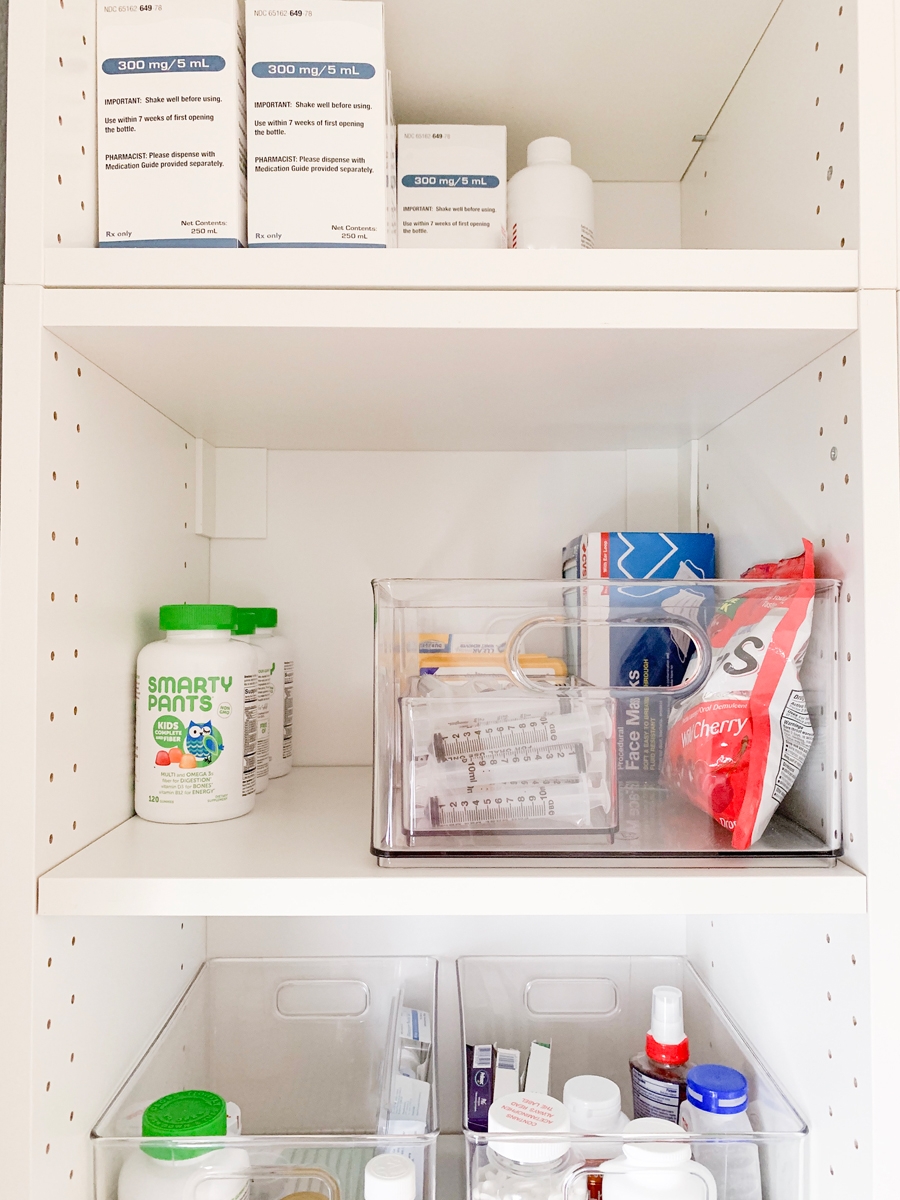
On the third shelf, I used The Home Edit’s All Purpose Deep Bin With Divider for products that fall into the First Aid Category, as well as a few bulky items. Before, I had an adult bin that contained items from the second shelf AND all of this stuff. Separating it out allows everything to breathe a bit. It’s also easier to grab just what you need.

In here, I have The Home Edit’s Medium Bin Organizer for extra syringes, cough drops, face masks, and other various first aid items.
To the left of this bin the back stock of kids vitamins. I decided to put these here because we have 3 kids, so we have to reach for the back stock of these more often than the other items.
Back Stock

In the 20″ cabinet above the medicine cabinet, I’ve organized all of the back stock for our daughter’s medications, as well as adult vitamin & supplement back stock. I didn’t use any bins up there. The boxes and bottles are all lined up by product and then by expiration date. It’s neat and tidy and looks like a pharmacy. I was able to get one shelf in this cabinet to double the storage space for back stock.
Side Note – We really love SmartyPants Vitamins for the whole family. They have Folate instead of Folic Acid, which our daughter’s Neurologist recommends. Plus, they’re tasty!
The Medicine Cabinet Budget

I purchased everything for this cabinet except the wine glass, and I spent right at $100 including tax. The daily vitamin box was $11.99, so if you didn’t need to purchase that, you’d be under $90. My husband thought it was a little expensive, but these acrylic items are very sturdy and high quality. I did save a little money by using Gift Cards that I purchased on Swagbucks in order to earn some cash back.
You can also sign up for the free POP! Perks reward program at Container Store to get 15% off your first order. You also get a 15% off coupon for your birthday! By signing up through my link, you get the 15% off offer and I get a $10 reward so that I can buy more bins. 😉
The Results
We’ve been using our new organized medicine cabinet for a week or so now, and its already so much easier in the mornings! Everything is right there at our fingertips. There are only two things that would make this space better & easier to use: a cabinet door (long story), and running water to wash out syringes. Using the powder room sink is getting old. Maybe in a few weeks, we’ll have running water in the kitchen again.
So what do you think? How do you organize your medicine cabinet? What is your favorite part of the project? I have to say that I love the InterDesign products. They are all wonderful. I’ve used them before in the fridge and pantry, and I can’t wait to get more for the new kitchen. The Home Edit’s line at the Container Store is made in partnership with InterDesign, so you know the products are quality. These are definitely worth the investment.


Jay says
Hi just windering how you did your shelves in the corners? were they cut straight and butted together or did you cut the ends on an angle? Silly question but i have had trouble with this in the past and wondering what the better way to do this is. Thanks so much
Stacy says
Hi Jay,
Thanks for your question! We actually made L’s with the plywood this time. I figured that was stronger than butting two rectangles together. It made it a little tricky to install, but we figured it out.
~Stacy