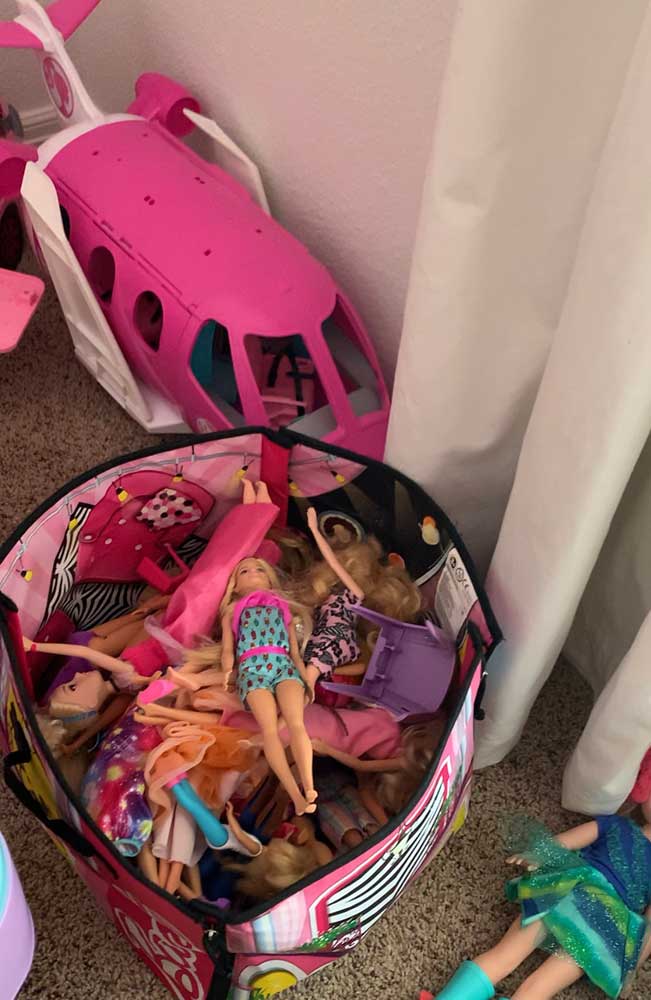
Do your kids have an abundance of Barbie dolls like mine do? Does the hair get all matted and tangled from laying down in a bin? I finally figured out a way to combat that & make it cute at the same time! Follow along to see how I made some Anthropologie-Inspired, look-for-less DIY Barbie Organization wall racks!
The Inspiration
Way back in 2014 when we moved into this house, I wanted to get my son’s room set up first. One of the blog posts I wrote back then was about how I organized his trains and bridges to double as wall decor. Those pins went viral on Pinterest all those years ago, and they still bring traffic today.
We’ve tried every form of organization for Barbie dolls, and nothing was working. So, I thought back to that post of my son’s room and was inspired to figure out a way to get the dolls on the wall. After all, using kid’s toys as wall decor in their room is one of my favorite tricks!
One day, while perusing the Anthropologie site, I found these magazine racks. They are gorgeous, but the large size has a ridiculous price tag of $118 per rack! I thought a magazine rack could work for what I was envisioning, so I set out to make some that would hold ALL of her Barbies without breaking the bank. They can always be used for magazines or albums or something else when she’s done with Barbies.
Let’s make these Anthropologie-inspired magazine racks to hold our Barbie Dolls (or whatever you want) for $15 a piece, shall we?
First, Why Do You Have So Many Barbie Dolls?
Ok, I’m going to address the elephant in the room. I know, this is an excessive amount of Barbie Dolls.
Some of these Barbies are mine from the 80’s. Bonus points if you spy Peaches & Cream Barbie. She’s my fave. Then, my daughter had to collect all of the Disney Princess dolls from Target. Finally, remember how in the 80’s the Barbie furniture sets DID NOT come with a Barbie? Like you just bought Barbie’s separately? Well now, Mattel throws a Barbie IN EVERY SINGLE SET. See what I mean?
Hence we have 41 Barbie dolls. In reality, I did this project 2 years ago, and I’m just now getting around to writing the post. I bet we have 45 at this point.
Now that that embarrassing admission is out of the way, let’s build something to organize the Barbie Dolls!
Barbie Doll Organizers Supply List

These Anthropologie-inspired wall racks that we are going to use as Barbie Doll Organizers are fairly simple. There are only a few tools and a few supplies needed. This is an easy weekend project, even for a beginner.
Supply List:
- 1x4x8
- 1x3x8
- 7/16″ dowel rod
- Orbital Sander
- Primer/Paint/Paint Brushes
- Gold Spray Paint
- Drill
- 1/2″ Forstner Bit
- Wood Glue
- Saw (I used my miter saw)
- Kreg Jig & Pocket Hole Screws (optional)
- Keyhole Hangers
- Router (optional)
- Brad Nail Gun (optional)
The 1×3 piece is what makes the sides and bottom of our racks. The 1×4 is for the back for stability and to make the unit square. The dowel is what holds your Barbie in place. You want to make sure you get the straightest dowel you can get. You can also use a metal rod, wooden dowels are cheaper. The dowels might be cheaper at the craft store. That is where I bought mine.
I built these wall racks in 2021, and at that time my supply cost was $43.91. I already had the tools, screws and paint, so I only had to purchase the wood & dowels. That made my Anthropologie-Inspired wall racks $14.64 each.
That beats $118! Building 3 saved me $310!
Measurements
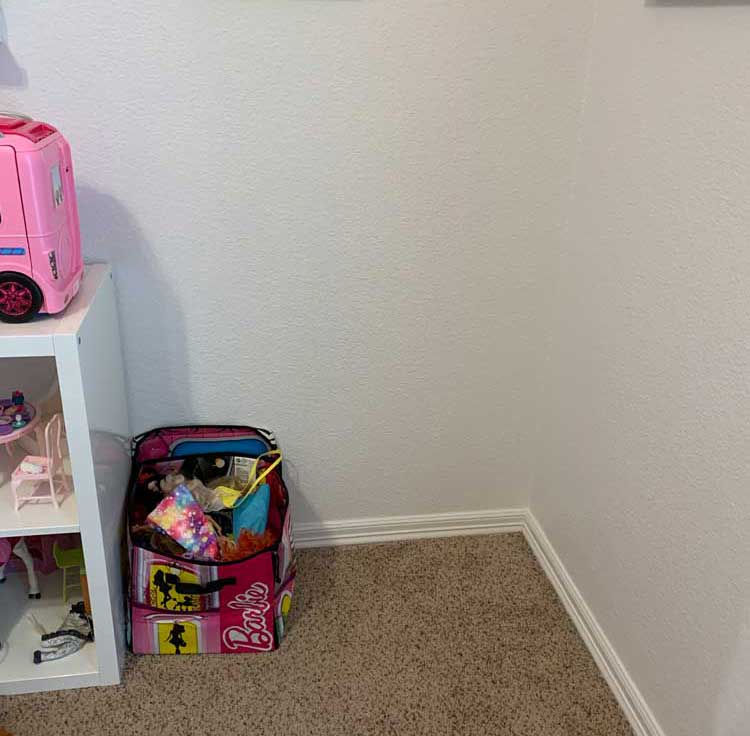
The first thing you want to do for this project, like any other, is measure your space. My racks are going in a very particular constrained space in my daughter’s room. We have an insane amount of dolls, and I plan on utilizing all the vertical area available. My measurements are going to be different than yours.
Lay your Barbie collection down shoulder to shoulder, a bit snugly, and measure to see how long that span is. You also want to measure the height of your dolls. Barbies are 12″ tall and their hips are about 7″. The hip measurement is important for placement of the dowel so Barbie stays upright in the rack.
I had the space (and the dolls) for 3 racks that are 36″ wide. Things look better in 3’s anyway. Each of my racks holds about 14 Barbies comfortably.
You want to keep a Barbie with you in the work area to double check your measurements as you go. I chose one of these swim Barbies that had her swimsuit painted on her because she’s easier to clean.
Make Your Cuts
It’s time to make all of the cuts for your Anthropologie-Inspired Barbie Organization racks. I used my miter saw. However, DO NOT CUT YOUR DOWELS. The dowels do not get cut down until assembly. This is very important.
Your 1×4 back piece and the 1×3 bottom piece are going to be the same length. You want to subtract 1 1/2″ from the total width of the rack to get that measurement.
For the sides, the Barbies are 12″ tall, so you want to add 3/4″ to take into account the bottom piece, +/- whatever you want for where you want the tops to be. I liked the look of the top being right at the crown of her head, with her hair sticking up over that, so my sides are 12″ tall.
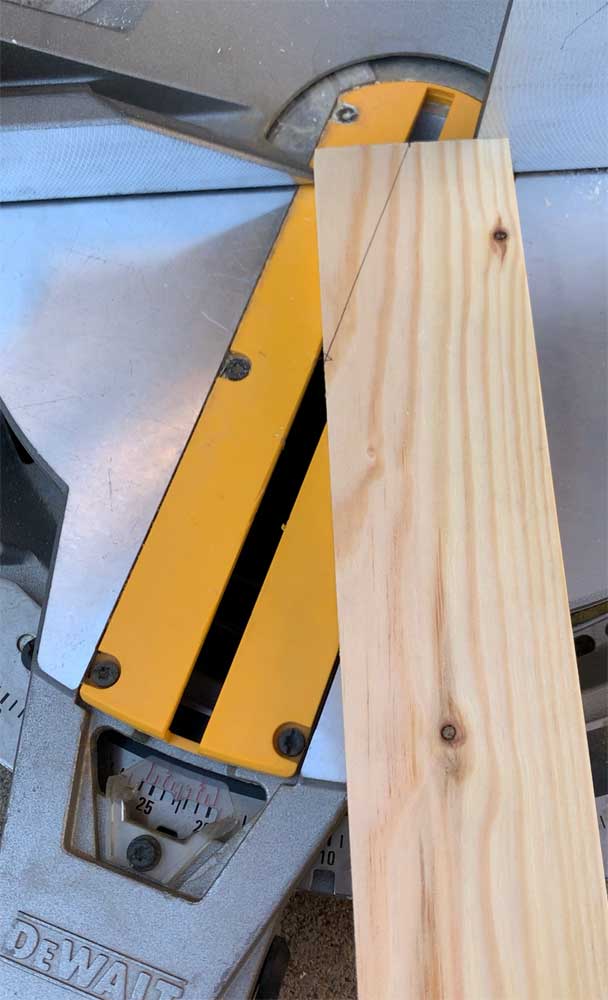
The Anthropologie inspiration picture has 90° corners on the top of the side pieces. I wanted to angle the those to get rid of that harsh corner. This makes it a little safer & I think it looks better. I drew on my piece of wood an angle that I liked, and then took it over to my miter saw. It was 22.5°, and I started my angle cut 1″ out from the back of the piece. You don’t need a miter saw to make that cut, but it is a bit easier to make them all uniform.
Once you’ve got your cuts made, give your pieces a sanding to make sure there are no splinters or rough spots. This will also help achieve a professional finish after painting.
When sanding, I always sand 3 times, each with a different grit starting at 80 and working up to 220. I like my orbital sander for stuff like this.
You didn’t cut your dowels, did you? Good! Let’s move on!
Time to Paint
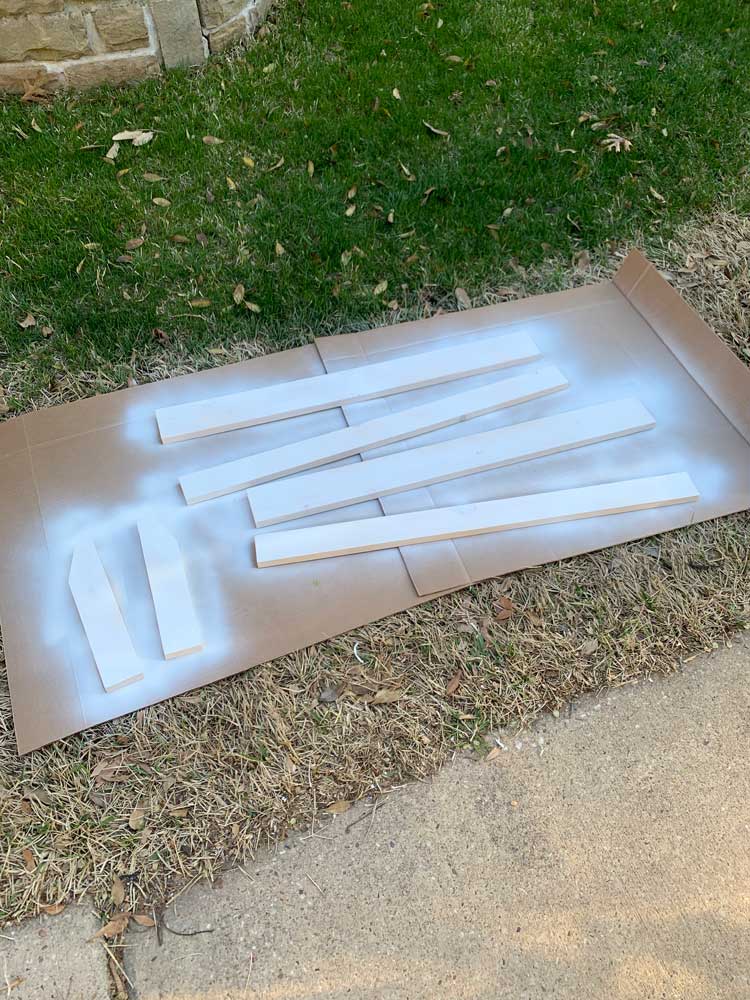
Because of the way you have to assemble these Anthropologie-Inspired Barbie Organization Racks, you have to prime and paint at this point. It’s way easier to prime and paint before you assemble. You will also get a better finish.
I used Zinzer Cover Stain spray to prime. This is important because only an oil based primer will keep the knots and tannins from coming through the paint in the future. I use this Primer exclusively for all of my bare wood painting projects.
After lightly hand sanding and cleaning the primer coat, its time to paint. I used the same paint that I use in the rest of my house for cabinets, trim & doors. It’s Benjamin Moore’s Advance line in the color Decorator’s White. This is a really excellent water-based aklyd paint for trim, cabinets & doors, and the satin finish was exactly what I wanted for these Racks. It’s a little pricey, but totally worth the money. I’ve used this exclusively for over 9 years. Plus, I already had it on hand.
Our inspiration picture from Anthropologie has a gold metal rod across the front. That is probably one of the reasons it cost $118. We’re going to fake that with a wood dowel and some spray paint. I first primed the rods with the Cover Stain spray. Once that was dry, always lightly sand with 220 between coats.
I used Krylon Metallic Gold Leaf Spray Paint for the dowels. This is the best looking gold spray paint & the only one you need for any project. You could probably use Rub n’Buff too (I like Antique Gold), I just had this on hand. 2 coats of gold, lightly sanding in between.
Halfway done!
Pocket Holes
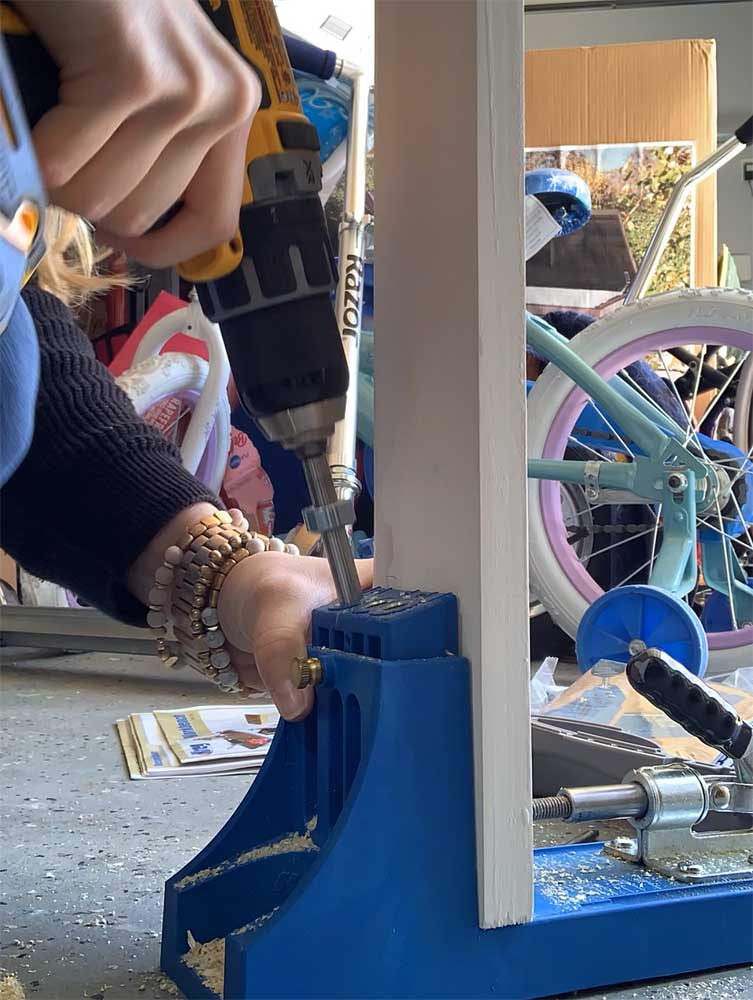
We’re going to use pocket holes and screws to assemble our Anthropologie-Inspired Barbie Doll Organization Racks. This way, the fasteners are hidden from view. So it’s time to break out the Kreg Jig. These are really easy to use to make pocket holes if you’ve never used one before. If you’re going to do any kind of woodworking, I highly recommend getting one. If I was getting one today, I’d get this little compact version they just came out with. He’s cute.
Before making any holes, do a dry fit assembly so you know where your pieces connect to each other. Feel free to mark with a pencil where the pieces connect. You can always erase your marks before the final assembly.
I drilled 2 pocket holes on each side of the back of my back pieces. Do not assemble anything. At this point, we’re just making our holes.
Do you have to use pocket holes? No. You could use regular screws, countersink the heads & fill with wood filler. Pocket holes look better and are stronger.
Dowel Rod Holes
This part is the most crucial part of the process of making these Anthropologie-Inspired Barbie Doll Organization Racks. We have to figure out where to drill the holes for the dowel. They also have to be in the same place on both side pieces, but mirroring each other. This part is what makes the Anthropologie inspiration piece so special, so we have to get it right.
Barbie’s pelvis is about 7″ up, so you want your dowel to be a bit higher than that. We don’t want any creative gymnastics, know what I’m saying? We want her to stay standing in the rack. This is especially important for the new Barbies with the flexible knee and ankle joints.
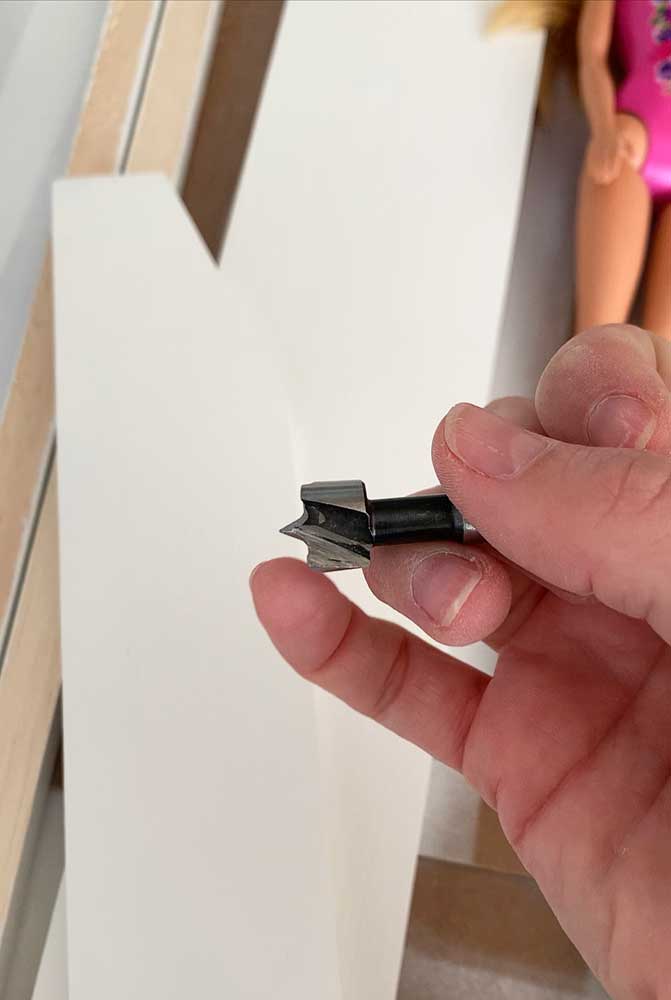
I placed my holes at 7 1/4″ & I used a 1/2″ Forstner Bit to make them. These bits have a small center bit that sticks out higher than the hole saw part. I measured that center 3/8″ from the front face of the piece. That leaves 1/8″ space between the front edge and the hole for the dowel rod.
I carefully marked the hole for each piece & triple checked that they were going to be level when the dowel was installed. Remember, the sides mirror each other, and you want the holes on the inside side of the sides.
Once you’ve quadruple checked your holes, drill them. Make sure you don’t go through the wood. You just need it deep enough that the dowel won’t come out.
Now it’s time to cut down your dowel. Make sure you know the depth of both holes and add it to the length of your back piece. Then subtract a bit to give it some room so it isn’t tight. It doesn’t have to be perfect, it just has to fit and not come out.
Assembly
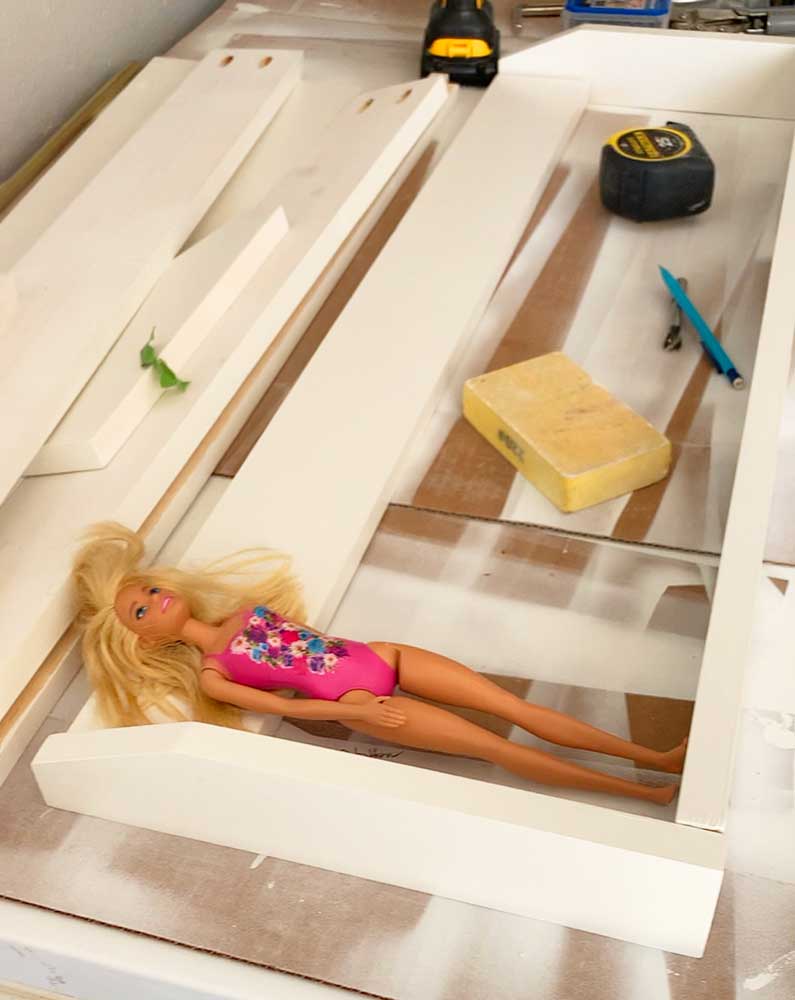
It’s finally time to assemble the Anthropologie-Inspired Barbie Doll Organization Racks! Woo hoo!
Take one of your side pieces and lay it down on your flat work surface. Then, take your back 1×4 piece and get your pocket screws ready in the holes. Dab a little wood glue on the end and connect those two pieces. Don’t over tighten your pocket screws!
Once that piece is in place, you want to get the other side piece started. Before you tighten the other side, put your dowel rod in the holes on both sides. I did not use any glue or fasteners for the dowel rod. It can roll and move, it just won’t come out.
Once you have the dowel in, you can finish attaching the pocket screws. Again, don’t over-tighten the pocket screws.
I attached the bottom piece with some wood glue and my brad nail gun from the outside. I used 1 1/2″ nails. You can totally use screws if you don’t have a nail gun. Just make sure you countersink your pilot holes in the side pieces so that you can sink your screw heads. That way you can cover them up with wood filler and sand/paint so you won’t see them.
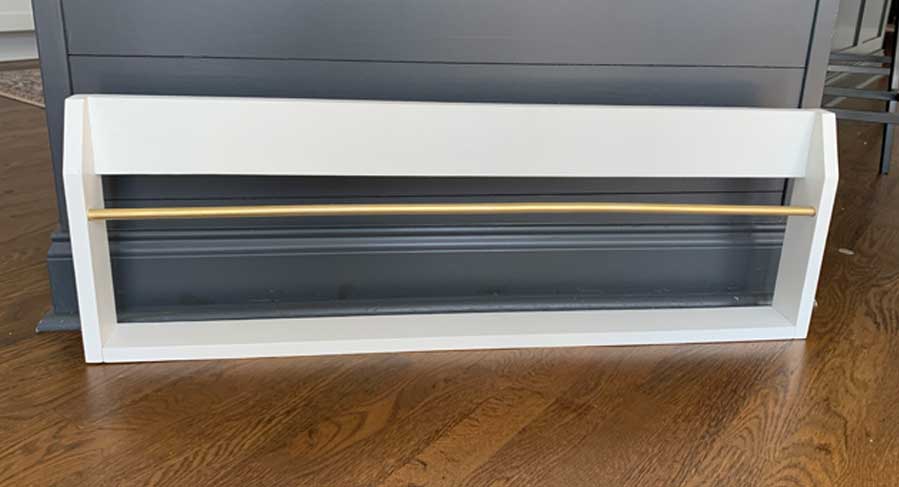
That’s it! Your Anthropologie-Inspired Barbie Doll Organization Wall Racks are assembled!
I will note here that I purchased and prepped a 1/2″ square dowel to put at the front of the bottom piece to keep Barbie’s feet back, but I ended up not needing it. I’ll explain why a bit later.
Hanging Your Barbie Doll Organization Racks
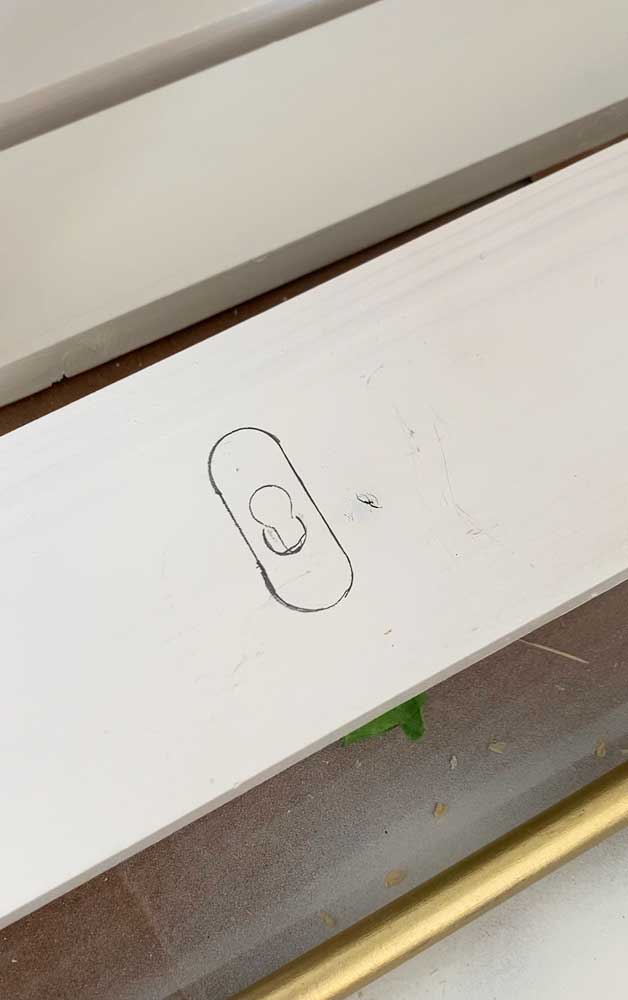
I wanted to hide how the racks hung on the wall, so I chose to use keyhole hangers. I had never used these before. It was a bit of a learning curve.
First, I traced the hanger where I wanted it on the back of the wall racks. Then, I routed out that oval I made with my Dremel. You don’t need a router but it makes it easier. I use the Dremel with the router attachment for stuff like this. You don’t want the oval too deep, just enough that the hanger is flush with the wood.
Next, you’ll need to trace the keyhole out of the center of the hanger. That’s where your hanging screws are going to go, so it needs to be deeper. I did the same thing with the router to achieve that. You could probably do this with a drill bit if you are careful. They also sell keyhole router bits, but I didn’t want to spend the money. No one is going to see this anyway.
Then just attach your hangers to the wood with the provided screws & you’re ready to install!
I like to use these self-drilling metal drywall anchors for all of my hanging projects. They are just easier to use and much stronger than plastic anchors. Plus, they come with screws.
Use the painter’s tape trick to save time hanging your racks. Take a piece of painter’s tape the span of your keyholes, mark the keyhole shape with a pencil. Then, remove the tape and place on the wall where you want your racks. Make sure your marks are level and have the correct spacing you want. Then install your anchors & screws through the tape. Remove the tape and hang your Anthropologie-Inspired Barbie Doll Organization Racks!
You’re done!
Completed Anthropologie-Inspired Barbie Doll Organization Racks

Now is the fun part! You get to organize the Barbie dolls!
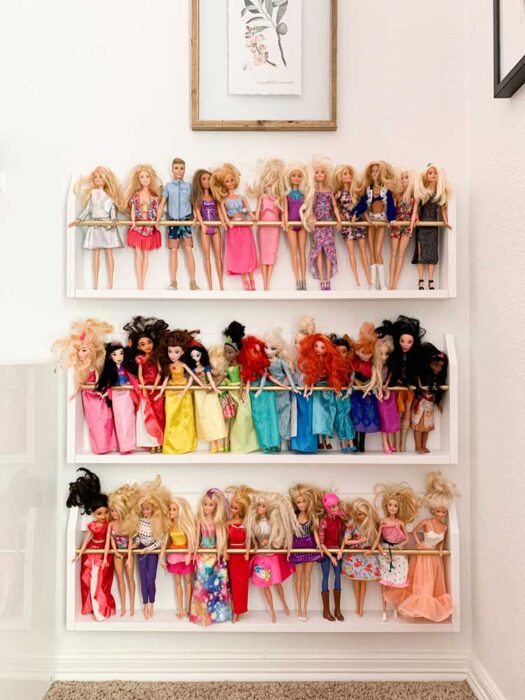
At first, you’ll think these Anthropologie-Inspired racks are too thin to hold the Barbies, but trust me, they are perfect. You need to use Barbie’s arms to hold her in the racks. See the picture above? All of Barbie’s wrists are in front of the dowel rod. This keeps her standing straight. You have to play with it a bit for the more flexible Barbies, but I promise they stay upright.
We have a rule in our house that all Barbies must be clothed. No naked Barbies on the rack! My Daughter prefers her Disney Princess Collection to have its own rack. We organize those by dress color.
The other two racks are whatever. She puts my old Barbies on the bottom shelf because she doesn’t like them. Whatever. Peaches & Cream Barbie is the greatest there ever was. You can fight me on that. Ha!
In Conclusion
Having your Barbie dolls displayed like this on the wall keeps their heads from rubbing together. Storing them horizontally in a bin, or on the floor, is what causes their hair to get tangled and knotty. I’m still working on perfecting my Barbie hair detangling recipe. I do a combination of conditioner and water in a little spray bottle, and brush it very delicately with a doll brush. Here’s a budget-friendly combo kit that has the brush & spray bottle.
These Anthropologie-Inspired wall racks don’t have to be for Barbie dolls. You could actually use them for magazines! They would make a cute book holder too, though you probably only want to use a 1×4 for all of the pieces for to give a little more room for picture books.
If you’d like to see how to make these in a video, go over and follow me on Instagram! I have a whole Barbie Rack Story Highlight Saved on my page there. Some day, I’ll compile a video and put it here. Make sure you read this first, then go watch the step by step process over there. I don’t have the measurements and links there.
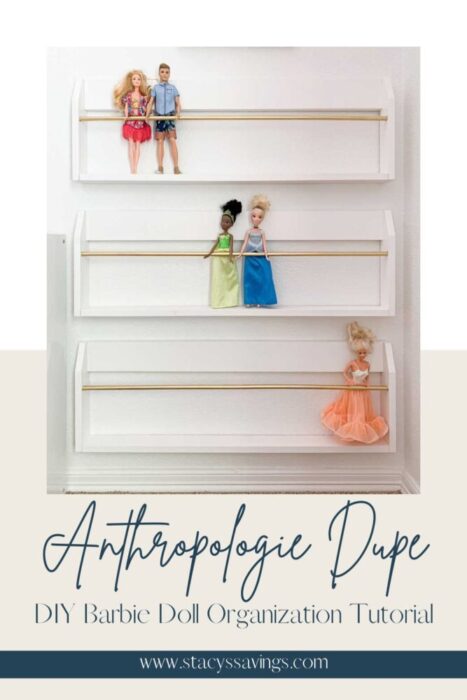
So what do you think? Is this something you’ll try? It’s an easy weekend project & its fun too! Tell me what you think in the comments!
Want more Girl Room DIY Inspiration? Check out the other projects I’ve done in this space (with more to come!)


lauren taylor says
Genius!!!! Was looking for ideas on Google, was thinking about kids book racks and spotted STACEY. Brilliantly written article. Think we’ve a few hundred barbies so this will be great.
Kristyn Wentz says
I am a mother of three small kids and don’t have time for DYI… Do you make these and sell them?
Stacy says
No I do not. I’m so sorry.
~Stacy
Cathy King says
Great idea! Barbies everywhere are driving me crazy!! I need to get busy. Thanks for the tutorial!
Stacy says
You’re so welcome! Have fun building!
~Stacy