I started to write my DIY Built In Bookshelves post, and then realized it was going to be long. Really long. Even more wordy than my usual wordy. So I decided to split it into 3 or so posts. Yes, they’re done, and I can’t wait to tell you about them because I’m SO proud of myself. But you’re going to have to wait. Sorry!
To get you caught up, here’s how this room started. Here’s how we got to where we were before we started this project Part 1 & Part 2. It looks NOTHING like it did before! Ah, but you’ll have to wait.
Or, you can scroll down to the bottom of this post for an update.
The Problems Before

Just like every room in this house, I want to expand the storage capabilities to something that was custom for how our family uses the space. This area is where I work on my blog, store all of my craft supplies & where guests sleep. We don’t have too many guests, and we like it that way. So we really wanted to make sure this space was usable for us. It will mainly function as my office and crafting space.
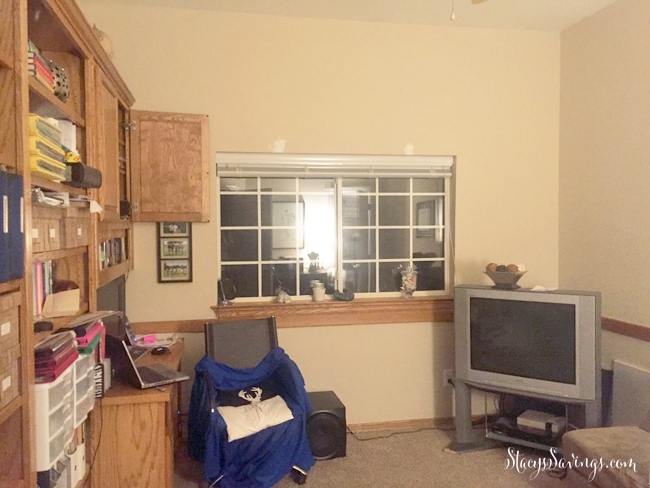
When we bought the house, there were small built ins along the Southern Wall. That’s the wall to the left when you walk in the door. The window is on the West wall. This window looks out on to the creek in the backyard, and the view is really pretty. That’s a huge focal point. So I always thought it was strange that the built ins were on a competing wall.

Another problem I had with this room was those built ins are really small. The shelving is about 11″ deep, so my scrapbooks and larger items hang off the shelves. That little desk is way too tiny for anything. Plus, all of that oak. Yuck! The previous built ins are about 8′ tall, and the ceilings in here are 10′. That’s just a lot of storage that didn’t store much.
The whole room feels very long with the built ins running along a longer wall. It also feels very tall, since the ceilings were so tall. It’s weird.
So, my plan is to fix all of that with some DIY Built in Bookshelves on a different wall.
DIY Built In Bookshelves – The Plan
I decided that the best way to orient the room was to build DIY Built In Bookshelves on the window wall. That would combine the focal points of the built ins and the window. It would also pull out that window wall to shrink the long walls and make the room more square shaped.
I like to make the most of vertical space for storage. So I knew I wanted to build something that went to the ceiling. I also knew I wanted it white to brighten up the navy wall. Finally, I wanted to add crown molding around the entire room to try and visually bring the ceiling down a little bit.
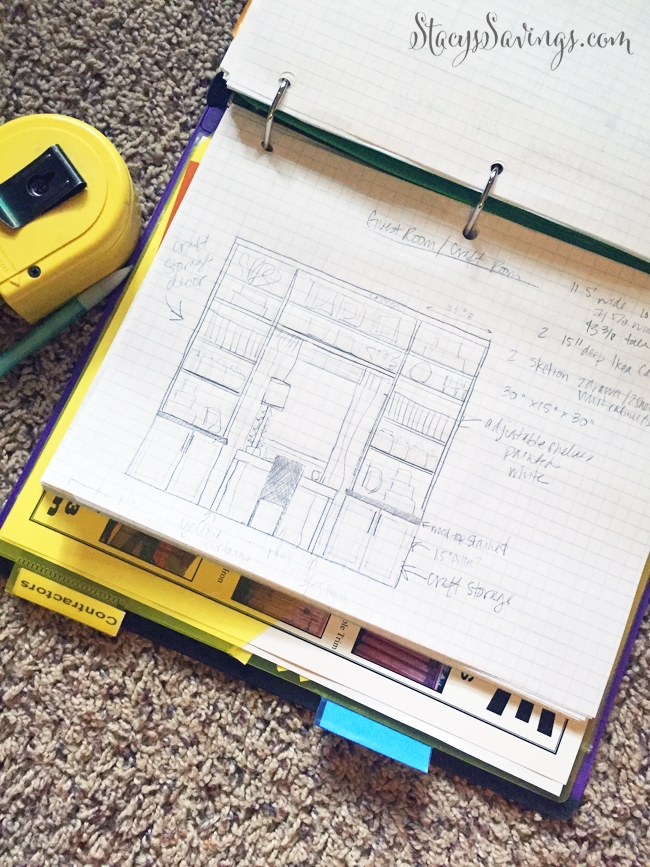
One rainy day last year, I drew this sketch of my DIY Built In Bookshelves. This is basically the plan. Now was time to turn it into a reality! The only issue was, I’ve never done anything like this before. This is super intimidating. I had the tools. I’m OCD enough to keep everything level. But keeping things square and getting it to turn out how I could see it in my head, like a pro had done it, was really scary.
Hiring this out crossed my mind a few times, but then I looked at my budget and said “Screw it. Let’s build it.”
DIY Built In Bookshelves – The Specs
The basic plans for my DIY Built In Bookshelves are two 15″ deep bookshelf towers sitting on top of the cabinet counter tops. I also want a 12″ deep shelf spanning the space between the two towers above the curtain rod & window.
I measured all of the stuff I wanted to put on these shelves and decided those measurements would be the best configuration. 15″ gives the scrapbooks plenty of room to be fully stored on the shelf and not hanging off. The 12″ deep shelves in the middle are great for smaller things, like books. I also like the visual interest of having the crown molding get inset a bit across the middle.
For the backs, I decided to leave them open showing the painted wall. I really suck at brad nailing shelf backs because I ALWAYS miss. ALWAYS (see this post for evidence). I wanted the navy paint to show through, because I like white accents. I think the darker background makes the white items on the shelves pop. So I just left the backs as textured painted drywall.
My DIY Built In Bookshelves would have 5 shelves in each tower with the bottom boxes being taller than the top. The height of the top tower shelves are exactly the same as the center. The space between the countertop & the ceiling is about 84″, and the space above the curtain rod to the ceiling is about 24″. Lots of calculating, but it’s going to be so worth it!
DIY Built In Bookshelves – The Materials
Before purchasing my materials, I went through and figured out exactly how much of everything I would need. Here is the supply list of our lumber:
- 4 sheets of MDF
- 12 whitewood 1x2x8s
- 1 sheet of 1/4″ plywood (plus some scrap I already had on hand)
- 12 8′ boards of 1×3 poplar trim
- 2 different types of crown molding.
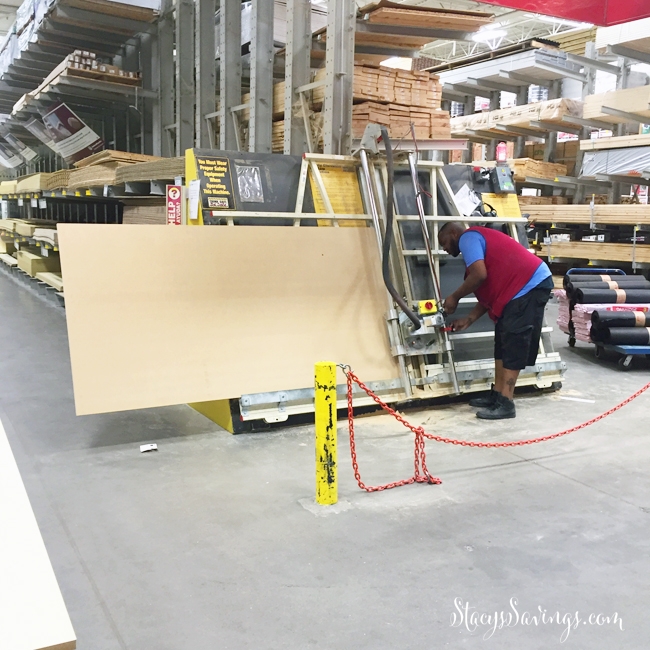
I had Lowe’s cut down all of the sheets of MDF into full-length strips the exact width that I needed. I previously figured out exactly how to arrange the cuts to use the least amount of sheets of MDF as possible. The saw at Lowe’s makes it easy, since we only have a circular saw at our disposal. Doug was grateful to spend the extra 20 minutes to get all of these cuts done for us. It would have taken him all day.

I didn’t worry about the lengths, because we could easily cut down the strips to exactly what we needed later. We use this circular saw.
DIY Built In Bookshelves – Painting the Pieces
With all of the strips cut, I did something that I normally don’t do: I primed & painted everything first. This was the single best decision I made during the entire project. It is so much easier to prime & paint the strips of wood in the garage than it is to paint them all assembled. I highly recommend it!
I laid out each strip in the garage on my Painter’s Pyramids, and rolled everything with a 6″ cabinet roller. It was super easy. I was able to lightly sand, wipe off, & prime fairly quickly. The primer dries fast in the hot Texas Summer. I was able to lightly sand that, clean it off, and get one coat of paint on each strip on the same day that I primed.
I used Benjamin Moore Advance Paint in a Satin finish in Decorator’s White, which is the same color as all of the trim & doors in our house. It’s a fantastic paint for cabinetry, trim, and other projects that you want to be super smooth because it has fantastic self-leveling capabilities. It’s expensive, but the finish you get is worth it. You have to wait 16 hours before sanding/re-painting/flipping. I broke this rule on the last coat on the flip side because I wanted to get started constructing.
I only primed & painted two coats on one side of every strip. Two of my 15″ strips are going to be the exposed sides of my shelving unit. So, I made sure to flip those to prime & paint 1 coat on the side that will be the outside. That way, I can do a quick coat when everything is assembled to paint over caulk & blend everything.
We’re already at almost 1,000 words, so this is probably a good place to stop for today! Sorry for the lack of pictures in this post. I’ll make up for it in the next one for sure!
DIY Built In Bookshelves Update
Want to see the finished DIY Built In Bookshelves? Make sure you check out these posts:
Don’t miss the rest of how this Guest Room/Craft Room Came Together!
- Guest Room/Craft Room Mood Board & Design
- Paint, Window Trim & Cabinets in the Guest Room!
- Update on Guest Room/Craft Room Remodel
- DIY Built In Bookshelves Construction
- Built In Bookshelf Project Complete
- Budget-Friendly DIY Upholstered Headboard
Check out all of the Stacy’s Savings Total Home Makeover posts here!
Leave a Reply