I’m back with another easy DIY Budget-Friendly Custom Kid’s Closet! I love making custom closets because they are usually easy weekend projects.
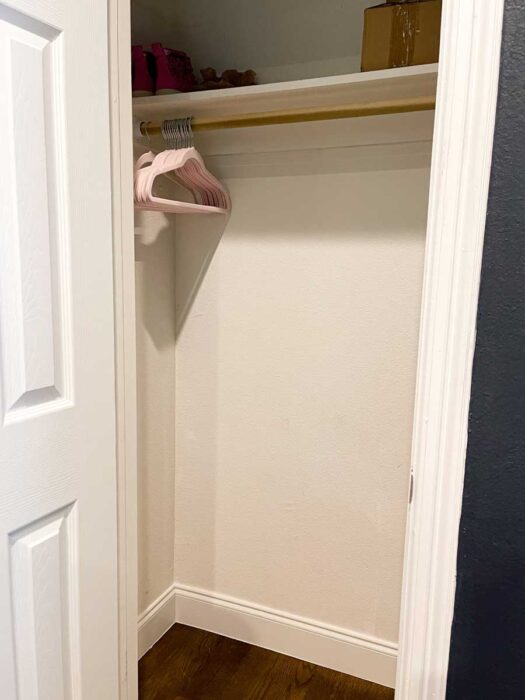
This time, we’re doing the small closet in the guest room. This room will soon be my middle daughter’s room, and she has some specific needs for her space. So I’m designing this closet with her needs in mind. But of course we’re going to make it pretty.
You know my favorite way to make a DIY Custom Kid’s Closet on a budget is to use some sort of shelving unit from a big-box store, right? I mean, I used them in my son’s closet, my youngest daughter’s closet, even in our closet. This time, we’re going to use something different. Something that most of you probably have in your own home: The Cube Shelf.
Cube Shelf Closet

This closet is about 42″ wide, so I’m going to use a 2×2 cube shelf from Target. These units are 30″ wide. This will give us just enough space for a few longer dresses. We’re not planning on hanging much in here other than dresses blouses and jackets. Most of my daughter’s clothes go in a dresser & she’s getting a new one soon that I plan on hacking with a DIY. I can’t wait to show you!
Target was having a sale on storage items at the time, so I was able to snag the white 2×2 cube shelf, 2 blush pink striped bins & some bin labels for 25% off. The total was $65.56 for these items.
Demo & Wallpaper
The first step to this DIY Custom Kid’s Closet is to remove the existing baseboards. I was very careful doing this because I want to reuse as much as I can. I do not want to add baseboards to the budget!
I decided that this closet needed something fun & special along the back wall. I had a lot of this peel & stick wallpaper leftover from my closet, and I thought I would have enough to do the back wall of the closet. Turns out, I almost had enough. I got the original wallpaper 50% off on clearance, but the new roll I got was full price. There’s another $35 added to the project.
We have textured walls, and this wallpaper is thin like contact paper. The texture definitely shows through, but this is a closet so I don’t care. If you’re going to use this in a living space, you definitely need to skim coat & prime your walls first.
It didn’t take me long to wallpaper the back wall & the shelf above, about 20 minutes. It’s important to do this step first, because you can see the wallpaper through the cube shelf. Also, its easier to install without the shelf in the way.
I gave the side walls a quick coat of fresh paint (Benjamin Moore Decorator’s White), and then it was time to build!
Building In the Cube Shelf
The secret to making a DIY custom kid’s closet with a big box shelf is to build the unit into the closet. That means you have to wrap the baseboards around the bottom. I admit, I haven’t done that yet in the upstairs closets because I’m waiting to replace the flooring.
Anyway, the baseboards in this closet are 5 1/4″ tall. So I need to raise my cube shelf that high with a platform.
I found some scrap boards in my garage and built a really rough pallet, basically. Its real rough. but the key is, it’s level. I just needed to make sure it was roughly the same length & width as the cube shelf without going over. The platform has two purposes: to raise the shelf up to the top of the baseboard, and to have something to attach the baseboards to.
I just used my framing nailer & triangle to make this extremely rough platform. It took about 5 minutes. After that, I put that in the closet & used a cabinet screw to attach it to a stud along the back wall. Then it was time to install the shelf!
Finishing the Custom Kid’s Closet
The shelf was easy to build and only took about 15 minutes using the Allen Wrench in the box. I got the shelf on the platform & made sure it was level both ways. Once I was certain it was level, I attached it to a stud in the wall using the anchoring system that came with the shelf. The shelf is not attached to the platform.
Once the shelf was in place, it was time to install the baseboards. I used my miter saw to make the cuts and got it right on the first try! That never happens! I did need one piece that was slightly longer than what I had, but I was lucky to find a scrap piece in my garage to save some money.
Next up, it’s time to caulk! I used some backer rod to fill in the space between the back wall & the cube shelf so that nothing would fall back there. I also used it on the sides where the shelf touches the wall. Backer Rod fills up the space so that you don’t use so much caulk. It also gives you cleaner caulk lines. Its very easy to use, you just shove it in the gap & caulk over like normal.
After the caulk dried, I gave the baseboards a quick coat of our trim paint (Benjamin Moore Advance in Decorator’s White).
It looked great, but something was missing…
Adding the Wood Countertop
The wallpaper is pretty and the white of the shelf with the blush pink & white striped bins was a great contrast, but the closet still needed something. I decided to take a note from my son’s One Room Challenge Bedroom Makeover and stain a piece of panel board to make a countertop. That would break up all of the white & give it a more built in look. It also conceals the visible hardware & protects the shelf top from damage.
Unfortunately, I didn’t have any scraps big enough to complete this part of the project. Add another $25 to the budget for a piece of edge-glued project board. I went with this stain grade 4′ board. There are two types of these with the same item number, so you really want to choose this in person. I personally like the ones with the wider planks for staining vs. the ones that have 1″ planks. If you’re painting, it doesn’t matter.
I cut the board down, scribed the back and side with my compass, and cut the board to size. I had the stain and poly on hand already to save some money. I used 1 coat of Provincial stain and 3 coats of Matte Polycrylic. I used a countersink bit on the underside of the shelf into the wood top (being careful not to go through the top) to drill a hole, and attached the countertop with 2 wood screws. I did one in each cube. Using the countersink bit makes sure your screw heads are concealed.
Final Details
It’s looking so good, but this DIY Custom Kid’s Closet still needs a few finishing touches.
I didn’t like the way that the black bin label holders were looking against everything else. I know that they come in a few different finishes, but my store didn’t have any others. I had some Rub & Buff in Antique Gold on hand, so I applied that and matches the wallpaper perfectly!
Several months ago, I had picked up a pack of blush pink velvet hangers at HomeGoods. I probably should have gotten two packs, and I will forever be looking for blush hangers at HomeGoods.
But there’s one last thing this closet needs…
The Best Light Ever


This closet for some reason doesn’t have any overhead light. I’ve wanted to hardwire a light and a switch in here for years, but it’s 2022 & you don’t have to do that anymore! I found this nifty contraption on Amazon!
It’s a 4000K led light that is rechargable, holds a charge for up to 6 months, has motion detection, and is held in place by a magnet. I held the light centered over the door and removed it from the bracket (the bracket will be off-center on the door). Installing the bracket was super simple with just two tiny screws provided in the kit. Then all you do is turn it to auto mode, and place the light on the magnet. I rotated the light so that it was pointing down toward the clothing rack. That’s it! We have a light!
Reaching in the closet activates the light & it will stay on for about 10 seconds after it stops sensing motion. When its time to recharge, just grab it, charge it & put it back up!
I’ve already ordered one for the linen closet. It’s an Amazon Must Have for sure!
Completed Custom Kid’s Closet
I really love this DIY Custom Kid’s Closet! It only took 2 days from start to finish. Not whole days either. It was a part-time gig. That is about as instant gratification as a room makeover can get!
The whole project cost just about $160 including the light. I was able to re-use some materials from my garage to cut down on the cost. Plus it got stuff out of my garage! I tend to hoard scrap wood…
My daughter loves this space and can’t wait to fill it with her things!
Closets are super fun for me to DIY. I’ve got one more closet makeover left to show soon. Plus, I’m planning on building a whole new closet in our attic project & I can’t WAIT to show you what I do with a space I get to plan from scratch!
Have I convinced you to build in a store-bought shelving unit yet? There are so many ways to hack them!
Leave a Reply