The contractors are starting the Master Bathroom project Monday. So I thought it was a great time to show you guys the bathroom choices and finishes that we’ve made.
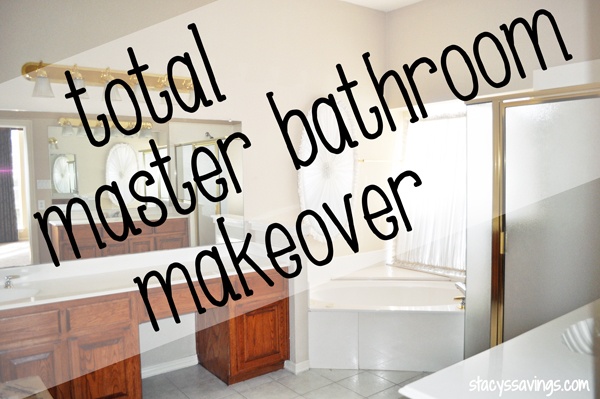
If you missed the first post, with the before pics, click here to catch up!
The Master Bathroom Remodel Plan
The main objective for our entire house remodel is light, bright, airy, and modern, and the master bathroom is no exception. I made modern/transitional finishes & shapes for the bathroom choices, and tried to solve some of the space problems in this bathroom. We’re definitely fixing the leaking & termite problems. Doug and I can’t wait to have a master bathroom again!
Old Floorplan vs. New Floorplan
These layouts above are not exactly to scale, but they are pretty close.

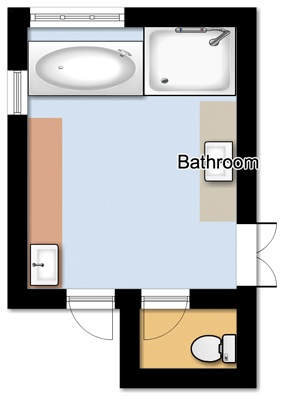
As for the new layout, it’s basically the same as the old one with one major change: bathtub position. Before, the bathtub felt crammed in that corner, and there was a bunch of wasted space and multiple levels of surface. It was just awkward. To fix that problem, we’re turning the tub so that it is in the corner and runs parallel to the window.
In order to squeeze a 5 ft air bubble tub in that way, we had to eat into the shower footprint just a bit. I’m ok with that, because the shower faucet is on the opposite side, so no one was going to be standing right there anyway. Plus, it’s still bigger than our last shower.
This layout will leave me a small alcove of space between the bathtub and vanity. I’m thinking about a garden stool or some sort of bench or bathroom shelving for that space. Not sure yet.
We’re also removing the pony wall between the shower and bathtub, and opting to have the frameless shower glass drop all the way to the bath tub deck. This will visually open up the space and make the shower & tub not feel so cramped. We’re lowering the other pony walls (one at the end of my vanity, and the other between Doug’s vanity & the shower) as well, to open everything up.
Master Bathroom Choices
So, now that that’s out of the way, let’s get on with the fun stuff: the Master Bathroom Choices!
The Countertops & Paint Colors
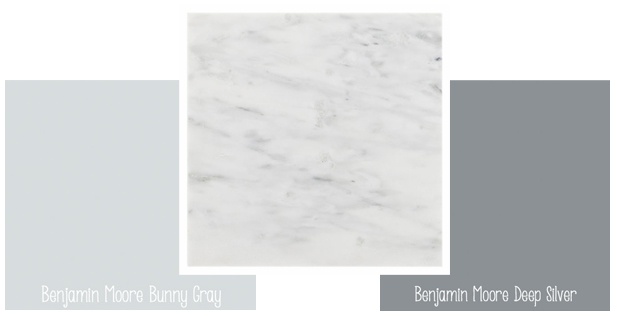
I love love love Carrara Marble. Love it. I don’t care that it has issues, and I would never use it as a kitchen counter, but this bathroom is getting Carrara! I’m so excited about it! I knew I wanted to do Carrera in different parts of the house, and it sort of influenced me on the paint scheme for the whole house remodel.
We’re going with the same Benjamin Moore Bunny Gray color that’s in the rest of the house on the walls in the bathroom, and I’m painting the cabinets Benjamin Moore Deep Silver. The counters will be Carrara Marble slab with rectangle sinks. We’re also going to have the marble as the shower threshold, backsplashes, and tub deck/windowsill (which will now all be one height). The floors are going to be 18″ polished Carrara Marble tiles set on the diagonal. It’s going to be so fancy!
The Shower Tile

The bathroom choices for the shower tile include 3×6 white subway (DalTile’s Rittenhouse) with two 18″ wide niches that are backed in 1″ Carrera Hex Tiles from Floor & Decor. One niche will be on the back wall, and the other will be inside the pony wall on Doug’s side of the bathroom.
A 12″ deep bench topped in a marble slab is going in on the faucet wall. I liked this placement for the bench the best, because the water is going out over the bench. That’s kind of a water-void spot in the shower anyway.
For the floor of the shower, we’re doing the same black river rock that we loved so much in the last house (my feet can’t wait!), only we’re doing a border of subway tile around it. This way, it looks contained and sort of like a mat. It will also make the corners of the shower will be easier to clean.
The Fixtures

For the plumbing fixtures, I went with Delta’s Dryden Line in Chrome. I love the art-deco feel of the fixtures, and my favorite part is they are square but still have some traditional elements, like a curve. We chose handhelds in both the shower and bathtub – a first for us! I’m going to play off the square shape of the fixtures in the rest of the room, with one exception, but I’m saving that for the final reveal! Sorry! Gotta have some surprises!

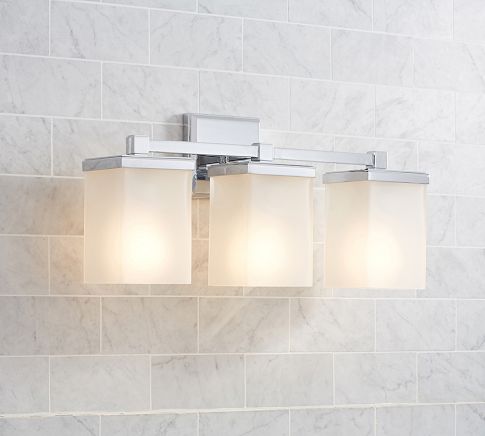
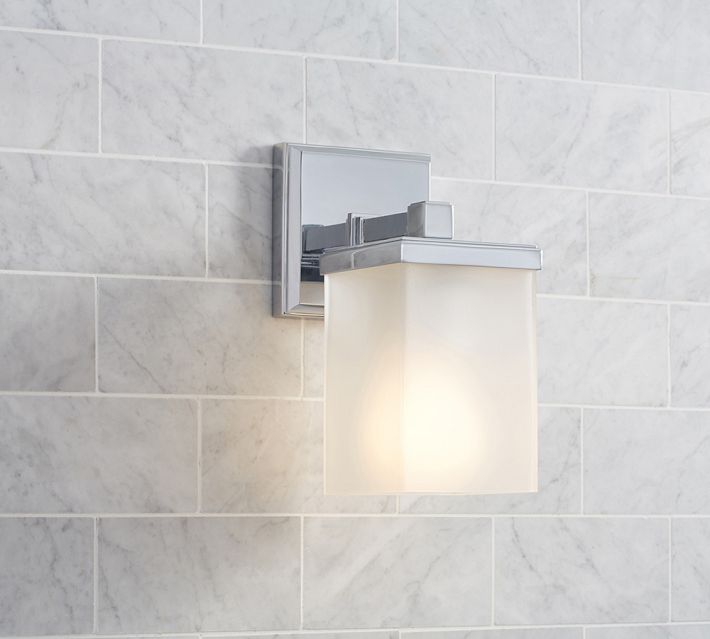
I used our new mover coupon and ordered the mirrors and light sconces from Pottery Barn. With my sink being so close to the wall, I was limited in my mirror selection. I really wanted a tilt mirror, but I couldn’t find one I liked that would fit there, so I went with the Kensington Mirror in Extra Large. It was the right width for my sink area, but still gave me the length I was looking for.
I also chose the Alcott Sconces for the bathroom. I’m not sure when those will go up, because we have to hire an electrician to move electrical boxes and add outlets, so we’ll see when that actually happens. I also want to have some recessed lighting installed, and a new exhaust fan on a timer.
I still need to choose cabinet hardware, but I feel like I have time to do that. It doesn’t have to be done right away. I think I want square knobs and rectangle pulls in a polished chrome finish, but I don’t know if I want hammered or not. Maybe I want lucite or bone & brass? Maybe I’ll have a better idea when the cabinets are painted.
So far, I’m loving the look of all of the bathroom choices I made!
What’s Left To Do
The contractor is helping us with the major stuff, like rebuilding the shower, framing & termite repair, and installing the plumbing and counter tops. Here’s the list of the work that Doug and I have to do:
- Demo the bathroom
- Texture/Prime/Paint Walls
- Install New 5.25″ Baseboards
- Paint Trim & Doors
- Paint Cabinets
- Choose & Install Cabinet Hardware
- Install Blinds
- Make Window Shade
- Hang Mirrors
- Install New Toilet
- Install New Door Hardware
- Build Floating Shelves Above Toilet
- Install Towel Bars/Fixtures
- Decorate
- Final Clean Up
So, maybe Memorial Day was a bit optimistic. That’s a lot of work. Maybe all of that stuff will be done by the 4th of July. Or Labor Day. We’ll see. All I know is, the second that bathtub is hooked up, I don’t even care if the rest is done, I’m taking a bubble bath!
The Budget
This Master Bathroom Remodel is NOT cheap, but I feel like we’re getting our money’s worth. We made bathroom choices and shopped smart to get what we wanted for the best price, short of doing all of the work ourselves. This bathroom is something that we’ve saved up for, so its nice to be able to use that money on something that we’re really going to love for a very long time…because I’m not doing this again!
It’s not all super expensive. We did get some pretty good deals. For example, while the bathtub was a splurge, I found a great deal. I got all of the bathroom faucets, fixtures and the bathtub for the same price that the bathtub was selling for at Lowe’s. We also got Free Shipping on all of it!
Another way we saved was by cashing in a bunch of our Moving Coupons, between PotteryBarn and Home Depot for things like the lights, mirrors and the toilet (which we’re submitting for a rebate with the city). We also took on several of the jobs from the contractor, like the demolition, painting walls & cabinets, hiring out the electrician, installing the baseboards & toilet, and the final clean up. This bathroom is really big, about double the size of our last, so we knew it was going to be a good chunk of change to remodel.
It’s going to look totally different! There was no where to go but up!
What do you think? I can’t wait to see it for real! So far, its just been in my dreams. What are the elements of your dream bathroom? Have you ever taken on a total bathroom makeover like this? Do you have advice? Tell us in the comments!
Update
The Master Bathroom Remodel is complete and it is gorgeous! Make sure you don’t miss a detail by checking out these blog posts:
Don’t forget to check out the rest of the bathrooms that we’ve remodeled! Since this post, we’ve completed the Kid’s Jack & Jill Bathroom & our Disability-Friendly Guest Bathroom!
Don’t miss a thing in our Home Remodel & check out the Stacy’s Savings Total Home Makeover! Follow along on Instagram to see the latest in our DIY Remodel!
Leave a Reply