One of the items I knew I wanted in the new Guest Room/Craft Room was an upholstered headboard. We haven’t had a guest bed in years (and I liked that!) so we didn’t even have any “bedroom” furniture. We were very lucky to get a spare Tempurpedic Full Sized Mattress from my parents, but it didn’t come with a box base or a frame. Sleep Experts had those for about $130, so all we needed was some sort of headboard.
I love the look of upholstered headboards – they are everywhere – but I didn’t like the price. I read around for a while and decided that this DIY Upholstered Headboard was a job I could do myself. After completing 2 headboards in the last 2 months, this is one of the easiest projects I’ve ever done, and it takes less than an afternoon!
DIY Upholstered Headboard Supplies
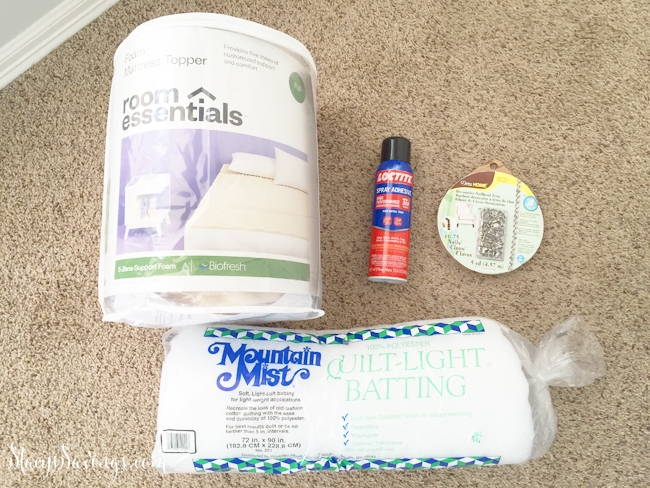
Here’s what I used to make my headboard:
- Sheet of Plywood or MDF
- Wood Screws
- Tools: Jigsaw, Circular Saw, Drill
- Fabric (I used a Table Cloth)
- Foam (I used a bed topper)
- Batting
- Staple Gun & Staples
- Spray Adhesive
- Nailheads/Nailhead Strips (optional)
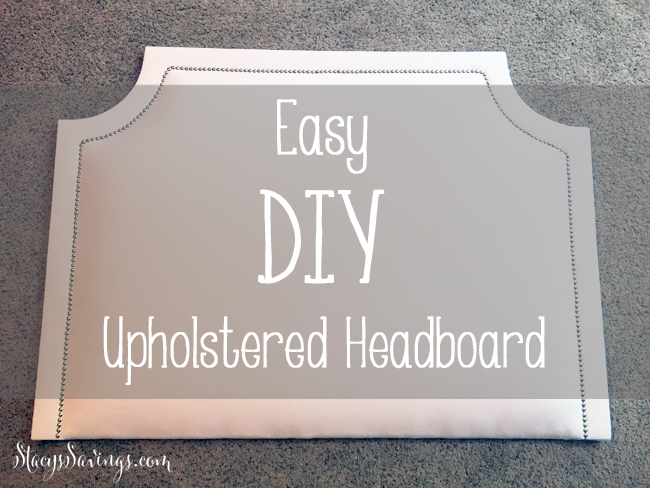
DIY Upholstered Headboard Shape
The first step was deciding on the shape that I wanted. At first, I was leaning toward something with a lot of curves, but then I decided that it would be too hard to make it even and uniform on both sides. I didn’t want a boring rectangle, so I decided to compromise with this Belgrave Shape. I just needed to find something circular that I could use as a template for my corner curves.
Enter the Keg.
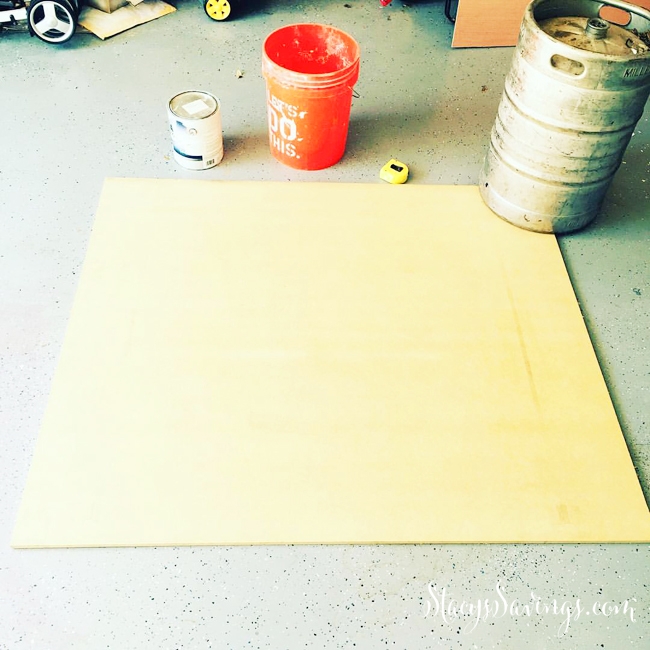
Yes, that’s right. I used a Keg. Out of all of the buckets, paint cans, and trash bins in my garage, an old Keg was the perfect size.
I put the keg it so that the middles of the sides were along the edges of my plywood (cut to the right width for my bed size), and then traced it with a sharpie. I had Doug cut the curve out with the jigsaw, and then I flipped the piece he cut off to use as a template for the other side. Then, he cut of that corner. Shape Done! Easy Peasy!
The headboard is going to hang on the wall, so I cut the length so that it was about 44″ long. I wanted a tall headboard, and this lets the bottom sink about 2″ below the surface of the mattress.
Trimming the DIY Upholstered Headboard
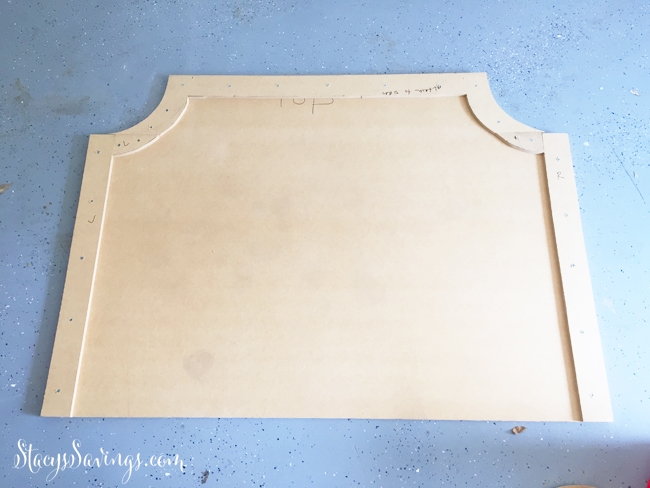
After my shape was cut out, I had Doug trim some of the excess MDF into strips about 3-4″ wide, and used it as a border. That meant cutting two more curves. I then attached those border strips to the base piece using 1 1/4″ wood screws. Since I was using MDF, I didn’t need to drill pilot holes, the screws went right in. You’ll see why I did this in just a bit.
Construction Done!
I brought my headboard inside to do the rest so that the fabric wouldn’t get dirty.
Upholstering the DIY Upholstered Headboard
The Egg Crate Foam Bed Topper is what I used for my padding inside of the border pieces. I picked up this trick from Sarah at Thrifty Decor Chick. It’s a really good tip, because foam at Hobby Lobby isn’t cheap.

I folded the foam in half with the curved side on the top and the open side toward the bottom of the headboard. Next, I put the egg crate side inside so that I had a nice, fluff, solid-surfaced piece of foam. I used a bread knife to easily cut the curves, then I sprayed the adhesive on the board and quickly placed my foam. This stuff sticks quickly, so make sure you’ve got it where you want it.
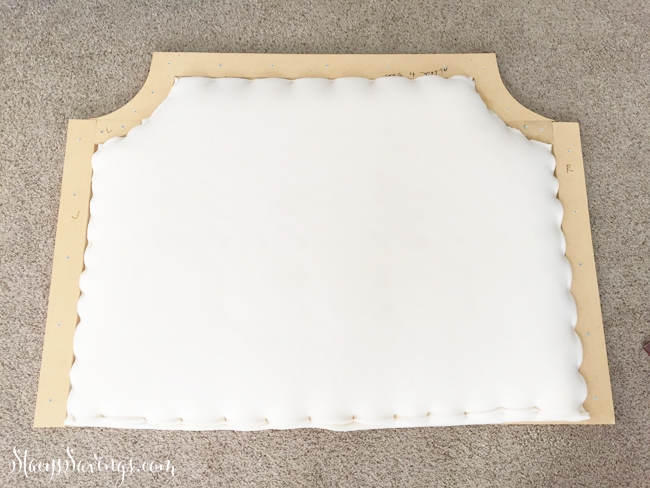
I went ahead and stapled the foam around the edges near the frame pieces to help it sit down better. This is an optional step.
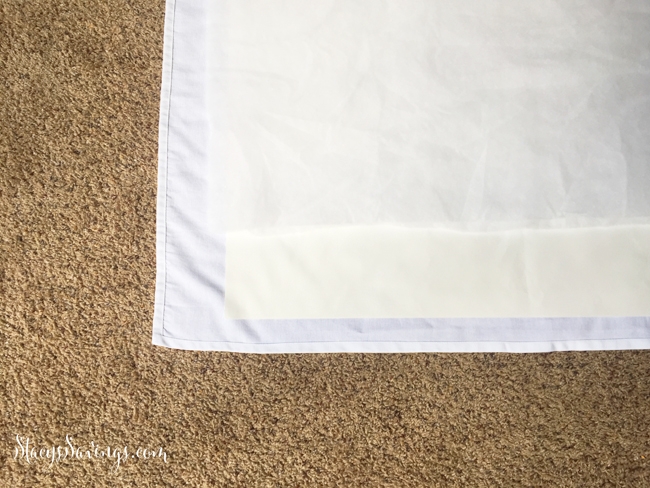
Once that was done, I sat the head board up, then lay down my ironed fabric backside up on the floor, placed the batting sheet (doubled) on top of the fabric, then put the headboard back down on the stack, foam side down.
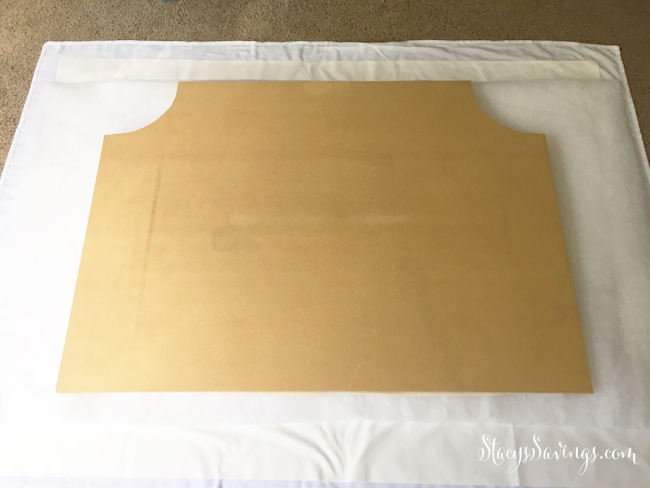
The fabric I chose to use is actually a tablecloth from Target. It’s white, but it kind of has some metallic in the thread. It’s pretty, it’s durable, it was the right size, and it was only $17.
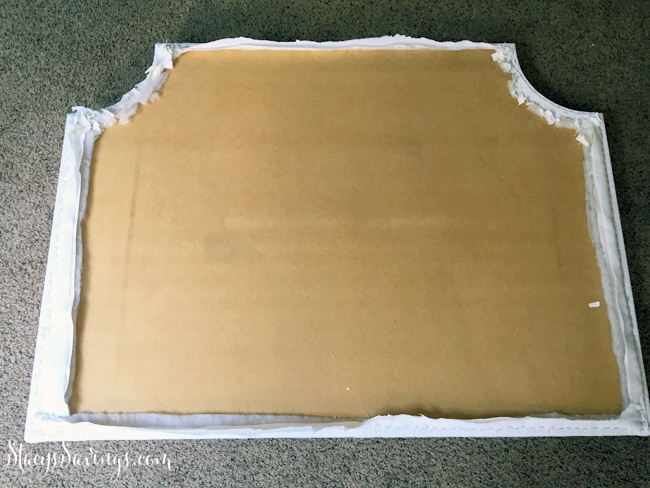
With my layers straight under my headboard, I started attaching the fabric to the back side with the staple gun. I started in the middle of each side, and pulled taut, placing a staple every inch or so. I did this by myself, but you can use a helper.
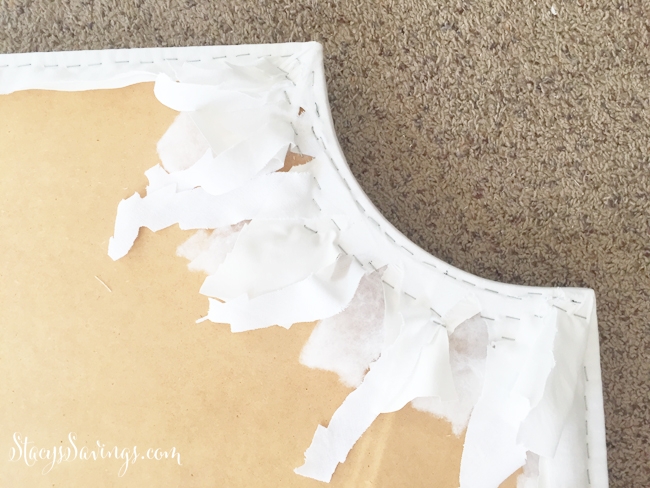
For the curves & corners, I cut the fabric to make it easier to get it to lay flat. It took me about 30 minutes to staple everything.
After I finished stapling everything, I flipped the headboard over, and it looked great! So great, that I didn’t take a picture!
Adding Nailhead Trim to the DIY Upholstered Headboard
I could have totally stopped here and called it a day, but I wanted something a little prettier, so I decided to use some fake nailhead trim. I picked this up at Hobby Lobby for about $10 with a coupon, but you can also find it on Amazon.
It’s fake because the metal trim because the little domes are all attached together, and each 5th one has a hole for a real nailhead. This stuff bends really well, and was pretty easy to use. I placed my trim about 3″ from the edge in order to catch the border pieces that I had installed earlier.
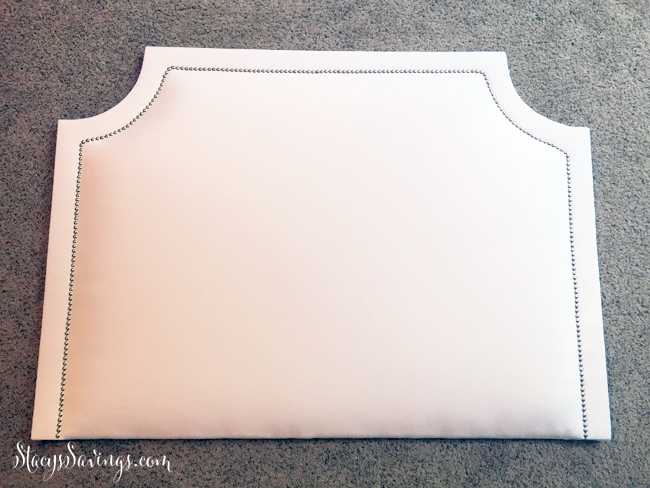
I went slowly in order to keep it straight and even with the sides. It looks great from a distance, but up close, you can definitely tell its fake. I wouldn’t have had the patience to use real nail heads, and I suck at keeping the nails straight, so this option was better for me.
I considered doing two strips of nail heads, but decided against it.
From the first cut of the MDF to here, it took me about an hour and a half. It was super easy! Getting the headboard hung on the wall took about 3 weeks.
Finished DIY Upholstered Headboard
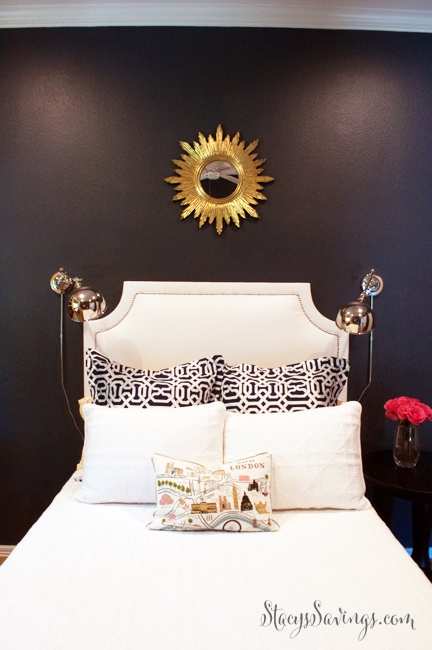
Once I had annoyed Doug enough, we found our studs, figured out where those should be on the back of the headboard (along a level line), and installed 4 heavy-duty D rings. Doug put some screws in the studs, and we hung it on the wall.
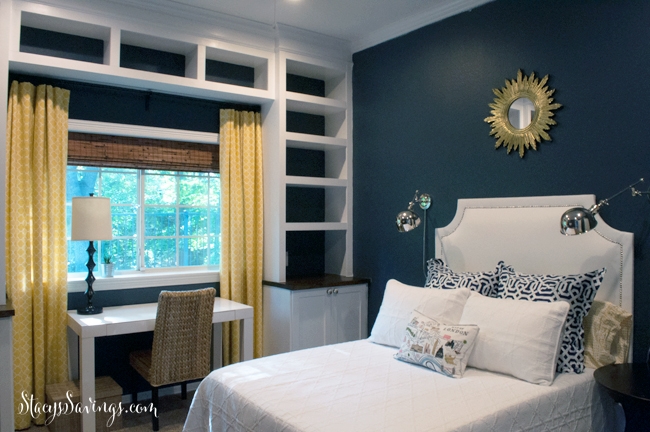
That’s it! Done!
I finished off the bed with these super cute yellow Sabrina Soto Sheets (no longer available) from Target, a Navy & White Geometric Patterned Duvet (not shown) and Euro Sham Set (no longer available) from Pottery Barn, and a White Coverlet & Shams from HomeGoods. I found that cute embroidered London pillow at Marshall’s. The sconces are from Pottery Barn, and the Sunburst Mirror is from World Market.
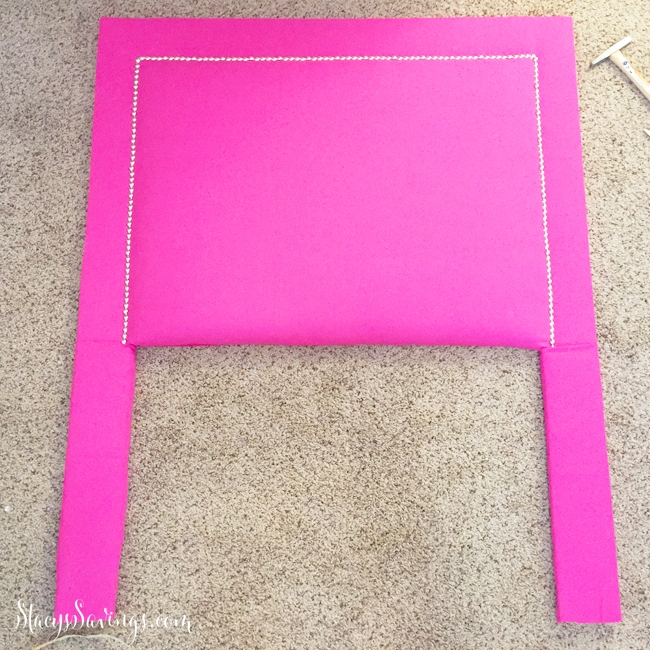
I’m really happy with the way this headboard turned out. I even had enough MDF leftover to make a twin sized headboard for my daughter’s room!
This project cost me less than $100. I had the screws, tools & staples on hand, so I just had to pick up the MDF ($32), batting (about $8), foam bed topper ($20), tablecloth ($17), nailhead trim (about $9), D-Rings ($3), and spray adhesive (about $5). If I had bought this, I would have paid at least $150 plus shipping (but probably more), so I saved a bit of money. Not to mention that I had enough wood leftover for other projects.
Here’s an image if you want to pin for later:
Have you ever made a headboard before? It was definitely one of the fastest projects that I’ve ever done, and it makes such a big impact! Tell us about your projects in the comments!
Want to see more of the Guest Room Remodel? Don’t miss these posts!
- Guest Room/Craft Room Mood Board & Design
- Progress on the Guest Room/Craft Room Remodel
- Update on Guest Room/Craft Room Remodel
- Built In Bookshelves DIY Part 1
- DIY Built In Bookshelves Construction
- Built In Bookshelf Project Complete
Check out all of the Stacy’s Savings Total Home Makeover posts here!
Leave a Reply