There’s been some Jack & Jill Bathroom Remodel Progress in the last two weeks.
If you’re just now joining us on this journey, be sure to check out why we’re doing it, what we’re doing, and how we’re doing it. Also, make sure you’re following me on Instagram to see the latest in our home remodel.
Now that you’re up to speed, let’s proceed to the bathroom remodel progress!
Bathroom Remodel Progress
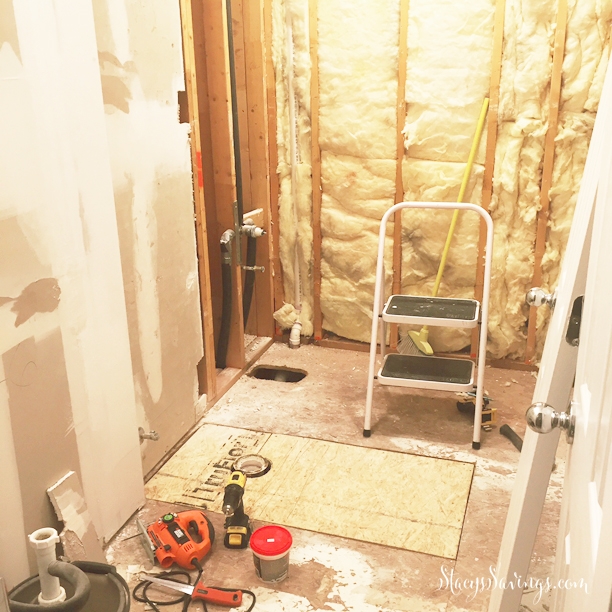
Anyway, since we last left you, the bathroom was basically a blank slate. All of the demo work was done, the walls & ceiling were repaired, and the rotted parts of the subfloor replaced.
Our main goal is to get a working toilet in this space as soon as possible, because this is the only bathroom on the second floor. To do that, we knew we were going to have to go out of order on some of the main remodel items.
I decided to go ahead and prime, texture & paint the walls & ceilings while the room was empty, mostly because texture is messy business. I used Homar Knockdown Texture Spray can & knife as well as their ceiling texture. It was super easy, but hard to photograph.

With the texture done, I was able to paint. It took less than a gallon for two coats on the walls and ceilings. I used Benjamin Moore Ultra Spec Eggshell in Decorators White, like I did in my Daughter’s Room. The doors & trim still need another coat in Decorators White Satin Benjamin Moore Advance. They seem to be a bit yellower than the walls.
That’s a lot of bathroom remodel progress! It’s really starting to take shape!
New Light Fixtures & Marble Hex Tile Floors
We replaced the light fixtures once the painting was done. We had changed these out a few weeks ago, but took them down to make texturing & painting easier. Now they are back for good! I think that bathroom remodel progress is what officially took this from a construction zone to the getting pretty phase!


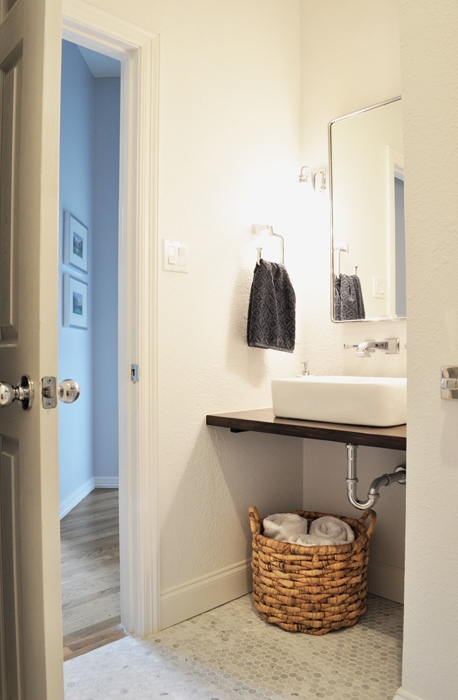
In order to get the toilet installed, we had to tile the floor, even though the bathtub and the cabinets weren’t installed. We built our cabinet platforms to mark that space, and we marked the width of the bathtub on the floor, then laid our backer board and tile slightly ahead of that line.
This was our first time tiling an entire floor, and it was easy, but physically hard work. We borrowed a wet saw from a friend, so we didn’t need to buy or rent any new tools to complete this part of the project. That was nice!
Having the floors in is definitely bathroom remodel progress!
IKEA Kitchen Cabinet Vanities

We picked up our cabinets at IKEA, did a bit of hacking, and installed them on some platforms that we built out of 2x4s. This topic is worth a full post, because we did so much more than just putting them together out of the box.
We installed the cabinets on my daughter’s side last week, but we waited to install my son’s cabinets until the tub was installed yesterday. They are in place now, but not permanently installed. I need to do a bit more tweaking on the hack before we can bolt them to the rail.
Plumbing

The plumber has been here twice so far, and is coming back tomorrow. That part is taking longer and costing more than I had anticipated. Last week, he moved the pipes on my Son’s side so that we could have them inside the middle cabinet. Yesterday, he installed the bathtub, and he replaced the toilet flange. We couldn’t get the toilet installed yesterday, because I needed to add a few tiles to the floor that I thought would be hidden by the toilet.
We were slightly too far off on our tile floor once the tub was installed, but because we used small mosaic tiles, I was able to chip out the last line, and install larger pieces one by one. It took about 30 minutes to do.
Framing the Door

Last night, we made some more bathroom remodel progress. We were able to repair the door casing that we had to pull off the studs to get the old tub out, as well as replace the molding and rehang the door. I busted out my new finishing nail gun for this job, and it literally took seconds to get that door molding and some of the baseboards up. I wish I had that when I was working on the bathroom downstairs. You should totally get a finishing gun! So easy!
What’s Next
As you are reading this, I’m out shopping for countertops and sinks. Tonight, I’m grouting the new tiles and we’re going to fix & install my son’s cabinets. Tomorrow, the plumber is coming back to get the toilet installed, install new sink shut off valves & work on the shower plumbing.
Where’s my Ron Paul Meme?

Oh, you know what else is done? The Dining Room Ceiling!

I’ll detail that in the texturing how to, when I get around to doing that one.
Here’s what’s left:
Remove Wall & DoorwayRepair Walls & CeilingPrime, Texture & Paint- Paint Doors & Trim
Tile Floor- Tile Shower
- New Countertops & Sinks
- Paint Cabinet Doors & Drawer Fronts
Replace Light FixturesAdd Recessed Lighting Over Shower/TubAdd Shower Niche- Install Toilet
- Mirrors
- Decorate
It’s really coming along! We’ve really made some bathroom remodel progress! I think I can start to see a little light at the end of the tunnel! I want this bathroom done by the time the kids start school, actually before then, so we only have a few weeks left! There are a few things slowing us down. Home Depot doesn’t have the shower tile in stock & money for the countertops. This bathroom is already running about $800 over my $5,000 budget.
Update
This project is complete! Make sure you check out all of the posts so you don’t miss a thing! This was the first time we’ve ever remodeled a bathroom on our own (except plumbing), and we learned a lot. Plus, we were able to do it on a crazy low budget considering we had to replace everything including two separate vanity areas.
- Why We’re Doing This Jack & Jill Bathroom Remodel
- Kid’s Bathroom Demo & Choices
- Bathroom Remodel Subfloor Repair
- Completed DIY Kid’s Bathroom Remodel
Have you ever done a total bathroom remodel? How long did it take you? Did you run into any snags? Did you bust your budget? I was on target until the Plumber went over my estimate. Tell us about it in the comments!
Check out all of the Stacy’s Savings Total Home Makeover posts here!
Bing says
Hi
What type of floor tile did you install. Thanks.
Stacy says
Hi!
We used the 1″ marble hex tile sheets from Floor & Decor.
Thanks for reading!
~Stacy
alicia szemon says
Looking good so far! keep it going!!!(: