Today, I’m going to show you some of the Jack & Jill Bathroom Remodel demo, plus some finalization of color choices.
If you’ve been following along with the drama of our kid’s bathroom, you know that we had a leak into our dining room. We’ve got a plan to remodel the bathroom & fix the problems so we can get our house back together. Since then, we’ve done some of the work!
Bathroom Remodel – Demo Started

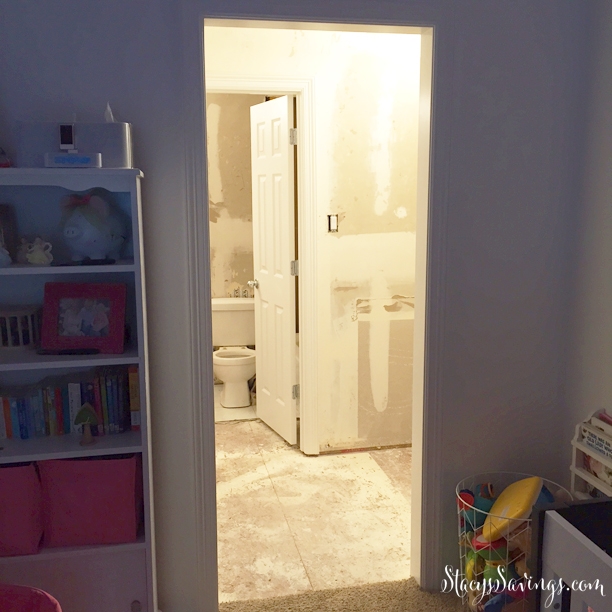
The first step to fixing the subfloor issue was to have our plumber come out to move lines, cap valves and help us disconnect the bathtub. After that, we were able to finish our demo. We took everything out. Cabinets, the toilet, the tub, the flooring – everything gone. All that’s left is the plywood subfloor, the drywall, and the shower studs. Talk about a blank slate for our bathroom remodel!
***If you’ve just eaten, you might want to skip the next two pictures. Don’t say I didn’t warn you. ***
***Seriously, its gross.***
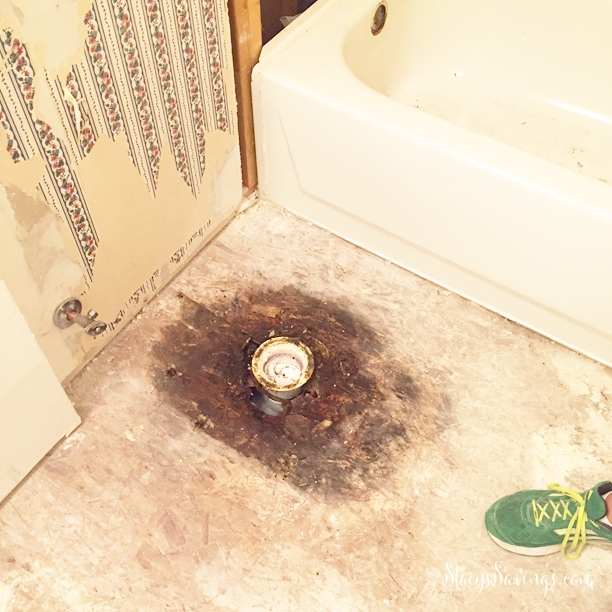
Don’t say I didn’t warn you.
When we first found the leak, we called our home warranty company (American Home Shield). They had a plumber come take a look & he determined that the uneven subfloor was the root cause of the leak, not the plumbing. Because of that, they denied our claim. Our plumber took a look and determined that the cause of the leak is actually the toilet flange. The original toilet flange was laid too low for the tile floor. This means the wax ring couldn’t seal properly. Basically, the toilet has been slowly leaking for the last 20 years since the house was built.
You hear that? AHS was WRONG. They should have covered the claim because it was due to plumbing, not carpentry. I called them and told them that. They didn’t seem to care too much, but they credited me a service call ($100 value). Whatever.
Moral of the story, Home Warranties are scams. Use a budget system like YNAB, set up a sinking fund, and self-insure stuff like this. Then you can use the best contractors to fix your problems.
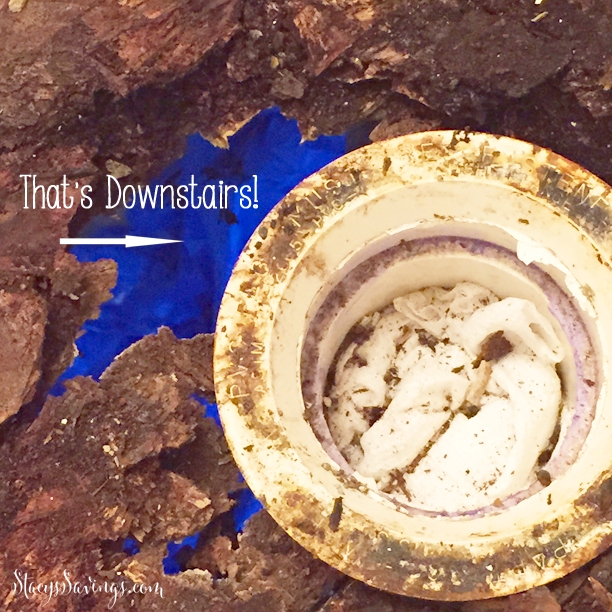
With the flange gone, we found massive wood rot. Since we cut out some drywall in the dining room ceiling to inspect, you could actually see all the way down to the dining room from the rotted holes under where the toilet was. The blue in that picture above is the tarp covering my china cabinet downstairs! So basically, there was nothing holding the toilet up but concrete backerboard. Nice.
Repairing the Subfloor
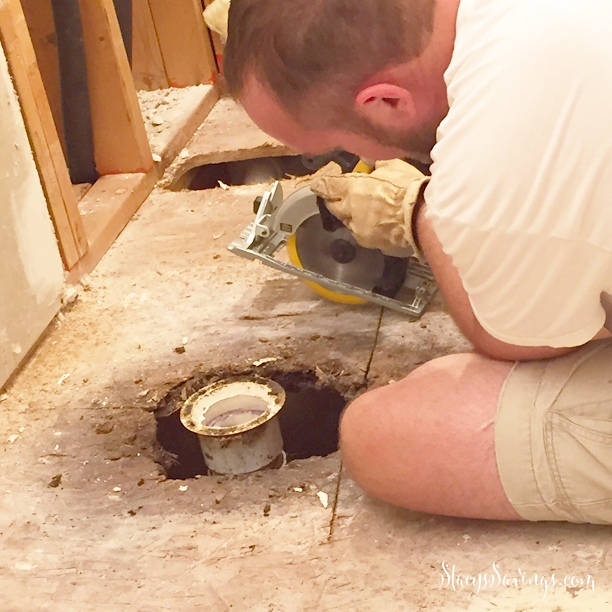
Anyway, the first order of business in getting our bathroom remodel going was to remove the rotted part of the subfloor. Doug did that with our circular saw set at a depth of 3/4″.
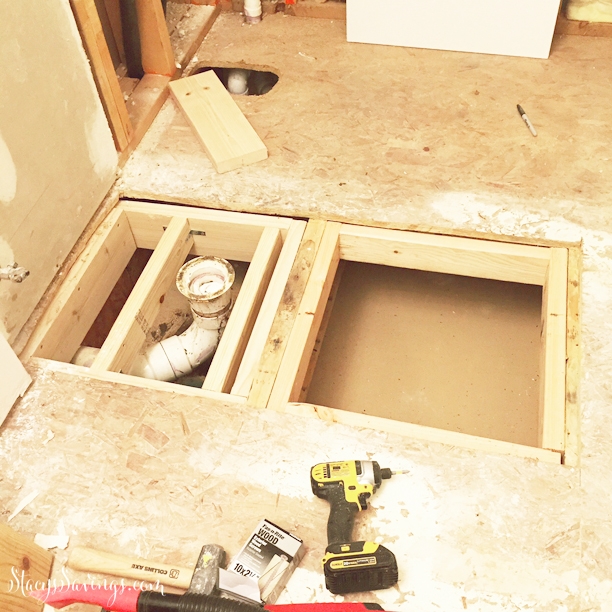
He built some boxes with 2x4s to secure to the floor joists so that we’d have something to attach the new floor to.
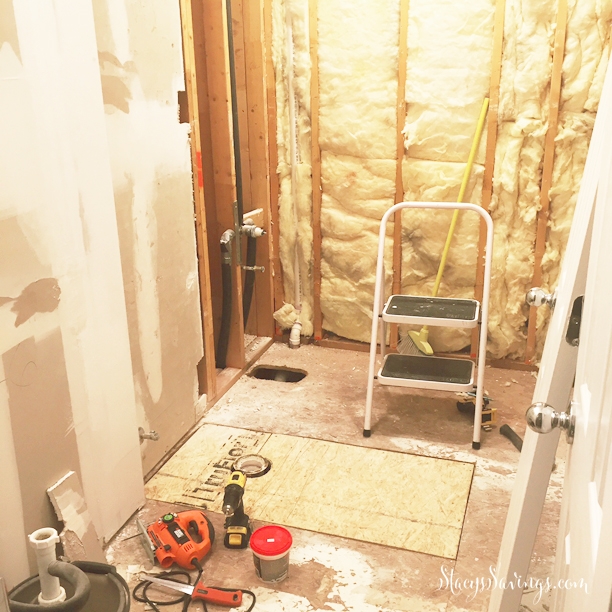
Then, we replaced it with a new piece of subfloor using our new framing nail gun. We picked up a sheet at Lowe’s for about $30. We didn’t need a full sheet, but we can use the rest in the future. There are several spots upstairs where the floor squeaks.
Drywall Repair
I finished the wall & ceiling repairs, primed, textured and painted. Like the drywall, the texturing was intimidating, but I figured it out after a little practice. Just having the walls painted and the light fixtures back up was nice. It was like a formal transition between the demo/fixing phase into the rebuilding/putting back together phase of the bathroom remodel. I don’t have any pictures yet, because I had to fix some spots int the drywall, and I need to retexture them and paint the whole thing.
What’s Next
Before we can really get going on this bathroom remodel, we need the bathtub. Once we get that, we’ll know the footprint for the floor. We decided to wait until today to order the Bathtub & the Toilet, so we could get 5% Cash Back during the Discover Card Cash Back Home Improvement Bonus that started today. Hopefully, the tub shows up by early next week, so we can get started on the floor & get the toilet installed.
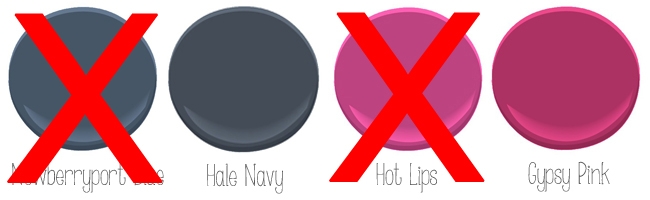
We’ve been pretty busy the last two weeks, so waiting to order the tub and toilet was fine. Now, we’re anxious to get this bathroom back in order. We’re going to go pick up the cabinets this weekend, I’ve started getting quotes on quartz countertops, and I need to order the doors & drawer fronts.
We decided to do custom doors & drawer fronts from Scherr’s, since they make them with all of the correct boring for IKEA cabinets. I’m just going to go with a solid wood shaker style, which will look awesome after I’ve used my Critter Paint Sprayer to paint them in our chosen colors of Benjamin Moore Hale Navy & Gypsy Pink.
I’d really love to get this bathroom remodel finished before the kids start school. We’re hitting up the Pottery Barn Outlet next week, so I can get new towels and check out the accessories to make this bathroom look awesome!
Update!
The Kid’s Bathroom Remodel project is complete! Make sure you check out all of the posts so you don’t miss a thing!
This was the first time we’ve ever remodeled a bathroom on our own (except plumbing), and we learned a lot. Plus, we were able to do it on a crazy low budget considering we had to replace everything including two separate vanity areas.
- Why We’re Doing This Jack & Jill Bathroom Remodel
- Jack & Jill Bathroom Remodel Before Pics & Inspiration
- Jack & Jill Bathroom Remodel Progress
- Completed DIY Kid’s Bathroom Remodel
Have you tiled before? Have any tips? We’re excited to get started, but nervous because we haven’t done it before. Tell us what you know in the comments, or just leave us an encouraging note!
Check out all of the Stacy’s Savings Total Home Makeover posts here!


Leave a Reply