~This is NOT a sponsored post. I purchased this Critter Spray Gun with my own money, and I’m posting a review just because I want to. This post does contain affiliate links. I will receive a small commission if you use my links to purchase products, however, your price does not change.
Hi! I’m taking a little break, working on the bathroom and the garden. The bathroom job reminded me of when I was painting the cabinet doors in our Jack & Jill bathroom. This post is pretty popular here on the blog, so I thought I’d repost it for my new readers! Be back next week! ~ Stacy
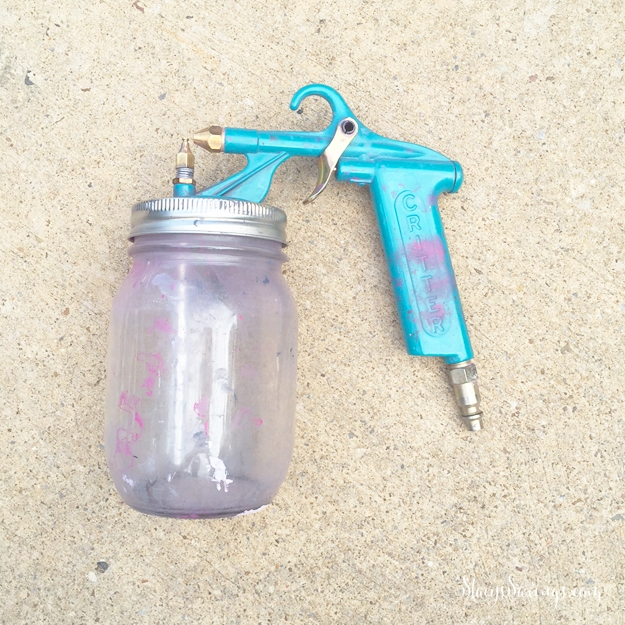
A few weeks ago, when I was ordering tools to help us with the bathroom remodel, I decided to purchase a Critter Spray Gun. At $40 on Amazon, it was the highest rated paint sprayer on their website. I had also read a ton of blogger reviews, including Jenny’s at Little Green Notebook. I was sold on the Critter Spray Gun for my first foray into the world of paint sprayers.
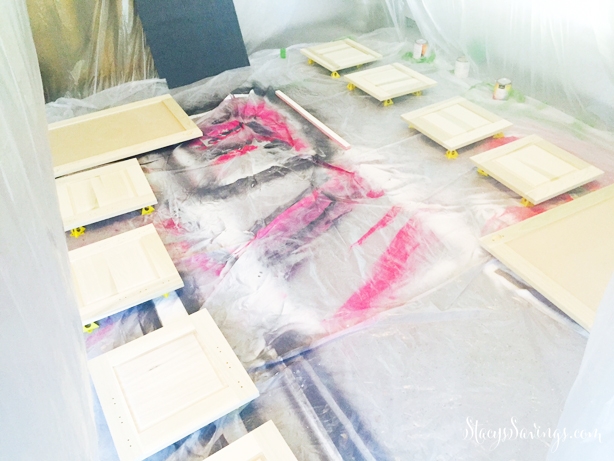
For this particular job, I was just spraying 2 cabinet doors, 8 drawer fronts, and some trim. Not too big of a job. The only tricky thing was that I was using 2 different colors: 5 doors were going to be navy and 5 were going to be pink. I was confident that the Critter could handle it.
The Critter
The Critter Spray Gun attaches to your air compressor (I have this one). It uses pint-sized mason jars to hold the paint, which is awesome. I picked up a case of mason jars at Kroger for about $7. That way, I could have both of my colors and a jar of water ready to go.
The Critter sprays in a small circle pattern. I had never used a paint sprayer before, but I was yearning for that factory finish on these cabinet doors & drawer fronts, since they were going to be the “pop” of color in this all white bathroom. The problem was, I didn’t have any room in the budget to outsource that job. So in came the Critter.
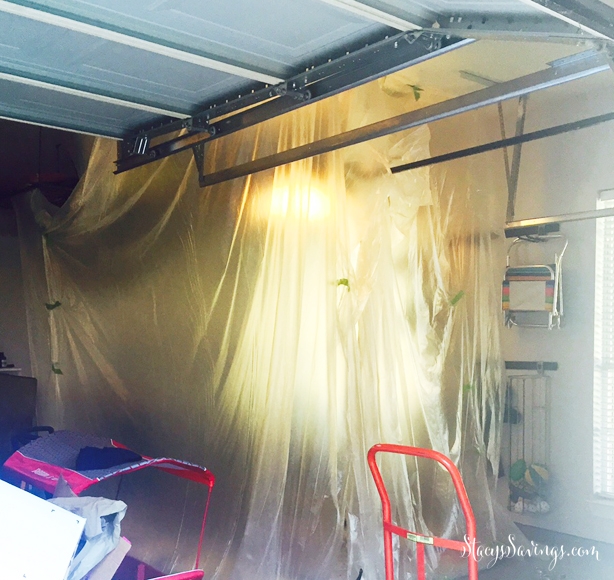
I set up a little spray booth in my garage, and I purchased 4 sets of Painter’s Pyramids. These are little yellow pyramids to hold your doors off of the floor. It says you can paint both sides of the doors at once, which I thought was too good to be true. Turns out, it was. I did like how they kept everything up off the floor though.
Priming
I started priming on the back sides first. That way, if anything bad happened, it would be on the backs where its not seen all of the time. Another reason I did that so that the last coat of everything would be on the fronts so that they could cure facing up.
I used Zinzer’s Cover Stain Primer in the Critter Spray Gun, and achieved a fairly even coat the first time. I decided only to do one coat of primer on both sides of everything to see if the claim on the Painter’s Pyramids was legit. That was probably my first mistake.
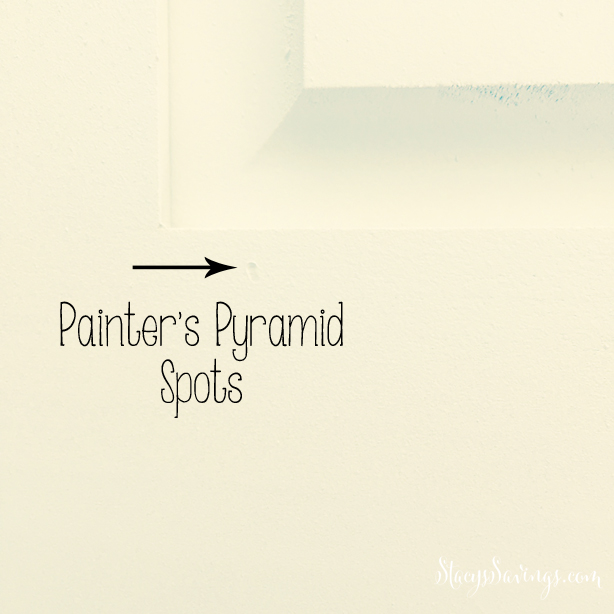
For the priming, I decided to test out the “paint both sides at once” promise of the pyramids. I sprayed one coat on all of the doors, flipped them, and then sprayed the backs. When the doors were dry, I did notice little dimples in my primer from where the pyramids were. I wouldn’t recommend trying to paint both sides at once. That was probably my second mistake.
The Critter Spray Gun cleaned up from the oil-based primer fast with a little paint thinner, some shaking, a pipe cleaner, and spraying. It took about 5 minutes. The pipe cleaner speeds things up a bit
Painting
For this project, I used Benjamin Moore’s Advance Paint, which is the best for cabinets. It self levels, and its just wonderful. I used it in the Master Bathroom on those cabinets with a foam roller and a Purdy brush. Those turned out fantastic, but since we were ordering Solid-Wood Shaker Doors and Drawer Fronts from Scherr’s, I really wanted to get that smooth factory spray finish.
I had read to dilute the paint a bit with Mineral Spirits, but I also read that many people didn’t thin the Advance at all. So I chose not to, mostly because I didn’t have any Mineral Spirits laying around. The Advance dries to the touch in 4-6 hours, and is ready to sand & apply another coat in 16 hours. Several blogs I had read doing 3-4 coats in a day with a sprayer, saying that the sprayer puts on less paint and dries faster. There were also some bloggers sticking to the instructions on the can, which say to wait 16 hours between coats.
I decided to split the difference and paint the backs of the doors & fronts, wait 7ish hours, then flip and paint the fronts. That was probably my third mistake.
Sensing a pattern here?
The first coat looked great right after I sprayed it. Since I was going from the white of the primer to the color of the paint (1 door & 4 drawers in Hale Navy, and 1 door & 4 drawers in Gypsy Pink), it was easy to see where to spray. I painted the detail parts like the edges and the shaker trim first, and then I tried to do thin coats that overlapped from side to side. This worked fairly well with my compressor set to about 30 PSI.
Cleaning
The Critter Spray Gun was easy to clean between colors. You can spray it clean. I preferred to attach a jar of clean water, shake it while covering the spout and the hole on the top, and then take it apart and clean everything with a pipe cleaner in the sink. It seemed to go faster that way.
The next morning, I looked at the cabinets and they had a great finish, but were a little blotchy and could use a second coat. I figured we were going to have to do 3 coats, but was hoping to get away with 2. I lightly sanded everything, cleaned them, and then set out to do the same thing as before: paint the backs, let them dry 7 hours, flip them, paint the fronts, let them dry overnight. That was probably my fourth mistake.
Yeah.
Problems
The next morning, I thought the drawer fronts looked pretty good. The back sides looked FABULOUS! Nice, smooth & glossy. The fronts of the doors were still a little blotchy, mostly because they were so big and it was hard to see my spray pattern on the second coat since the color was the same.
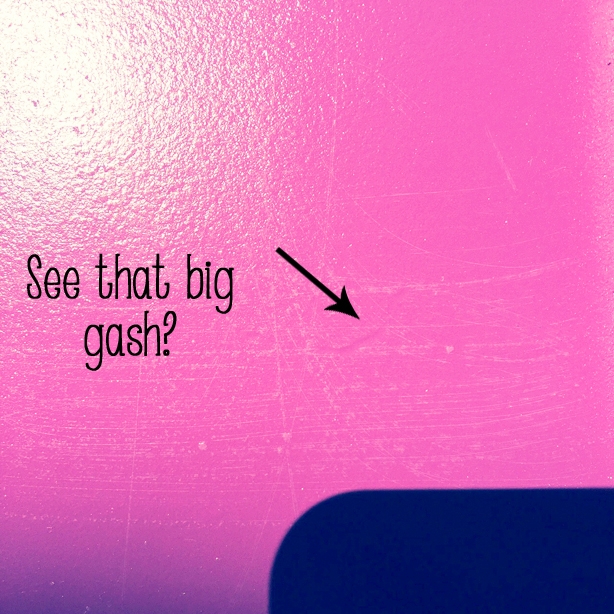
I went to lightly sand them for the third & final coat. I had decided that the backs looked fine, so I was only going to do the fronts on this coat. While sanding, I started to notice the dimples. Lots of dimples. Some looonnnggg dimples. These were from the Painter’s Pyramids.
I guess the door slid around or something while I was painting, because two of the Navy fronts had 2″ long dimples. No problem. I just lightly sanded, added some wood filler, sanded that down, cleaned them up, and set off to paint the third coat. BAD IDEA. SUPER BAD IDEA.
More Problems
When I went out in the evening to check them, I noticed that the patched spots were not covered very well. So I lightly sanded the fronts of everything, and painted a 4th coat.
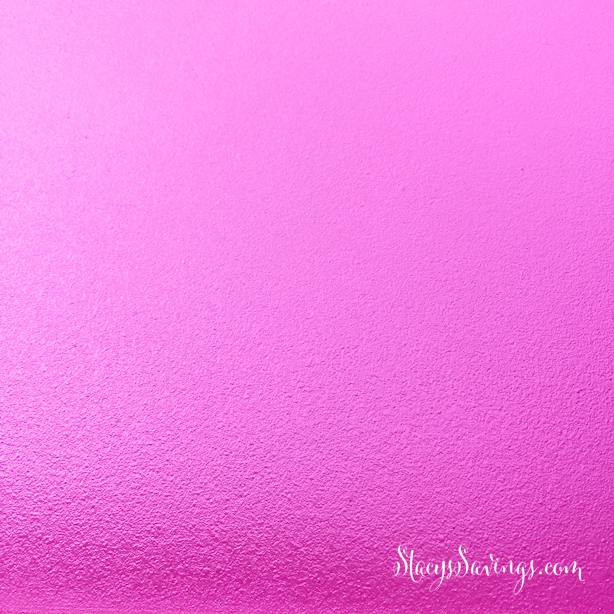
The next morning, the fronts weren’t glossy. They were kind of rough. I was devastated. I was so hoping to have the same glossy finish as on the backs, but with 4 light coats of paint, it wasn’t happening. It was starting to get really frustrating, and I was also starting to run out of paint. At $25 a quart each, I didn’t want to buy more paint. I would need 2 pints, and this bathroom is already busting the budget.
I decided that I was going to sand down the fronts really really well, try to get them as smooth as possible without stripping down to the wood, and then repaint the fronts one last time. After that, I was going to be done. I would have to live with whatever it looked like.
So that’s what I did. That day, I left them to dry, and then I didn’t even go peek at them for 2 days. I was just hoping that they would be acceptable, because I wasn’t painting them again. I also knew that I had some blotches from where I had tried to fix overspray on one drawer front, and I was just going to have to live with it.
Even More Problems
Well, I’m a little too OCD for that. I checked on them the next day, and they didn’t have the shiny finish. Well, the pink drawers were fine, but the rest weren’t. They were ok in the detailed parts, and I assume because I went slower there and they got more paint.
So I swiped them with 320 fine-grit sandpaper, wiped them down and sprayed one more coat on. I had to go buy more paint at about $24 a quart, bumping the over-budget bathroom project up another $48.
Solution
For this coat, I tried to replicate how I did the earlier coats: slow, even, and pointing the gun perpendicular to the door. I think the problem that I had was once I got to the 3rd coat, I started freaking out about running out of paint. I ended up going too fast. Since I had more paint than I needed after getting the additional quarts, that problem was eliminated.
I did very slow passes with the Critter Spray Gun, and the doors looked nice and sleek when I finished painting each door. I used almost 40 psi of pressure. Then, I tested several different positions of the needle to find one that didn’t have too much splotchiness around the edges. It just takes very slight turns to make a big change. On this coat, it wasn’t spitting as much as on earlier coats.
Results
Now, the test was how would they look when they were dry?
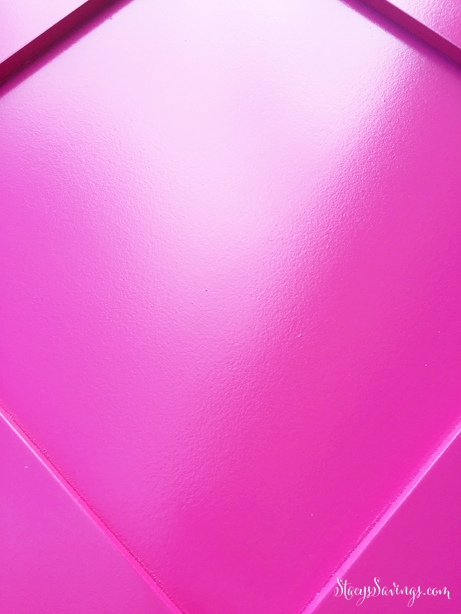
I checked on them the next day, and they were PERFECT. That’s good, because I wasn’t painting them again, and I was serious this time.
The counters were installed today, so I went ahead and installed my daughter’s drawers and door.
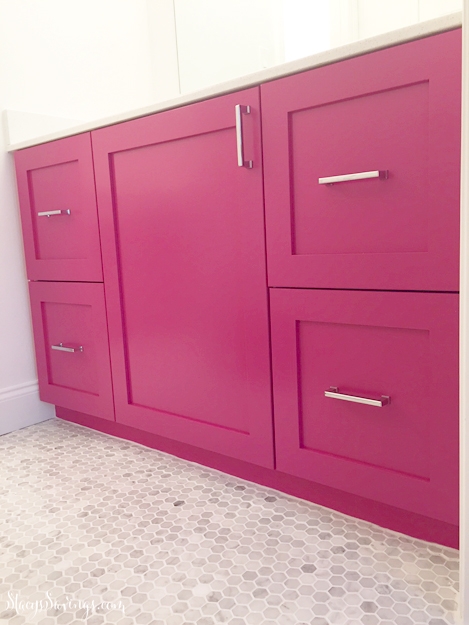
OMG I LOVE THEM!!! She squealed with joy when she saw her pretty pink cabinets! I still need to adjust the drawers and door a bit, but I’m really pleased!
Look at that shine!
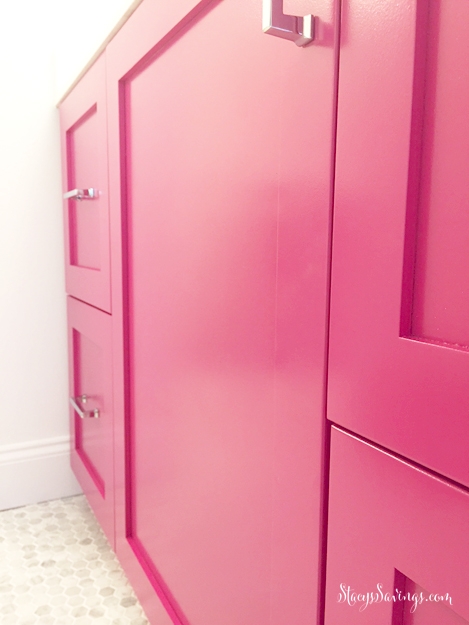
Can you believe little old me did that all by myself? I can’t either!
The bathroom is done and we’re so happy with it! Check out the DIY Jack & Jill Bathroom Reveal!
Tips for Success With The Critter Spray Gun
If I had to paint cabinet doors with the Critter Spray Gun again (which I will probably next year when we work on the office), here’s my strategy:
- Stretch your hamstrings and shoulders before each step. Also, budget for a reflexology appointment.
- Painter’s Pyramids are great for keeping stuff off the floor. I would either lean the doors against the wall, or make sure I pointed the gun straight down at them if they were on the floor. On the pyramids on the floor, you don’t have to worry about runs like you do with them upright. Even though they leave dimples, if you do the backs first, they won’t dimple the finish on the fronts.
- Prime the backs first using slow, overlapping strokes. Wait 1 day.
- Lightly sand, clean, then prime the backs again using slow, overlapping strokes. Wait 1 day.
- Clean the fronts & edges. Prime them using slow, overlapping strokes. Wait 1 day.
- Lightly sand, clean, then prime the fronts again using slow, overlapping strokes to achieve an even cover. Wait 1 day.
- Lightly sand, clean, then paint the fronts using slow, overlapping strokes. Wait 1 day.
- Lightly sand, clean, then paint the fronts again using slow, overlapping strokes. Wait 1 day.
- BACKS ARE DONE!
- Repeat the painting-only process above on the fronts over the next 3 days.
- Let cure 3-5 days before installing.
That’s 2 weeks people! I think I’m going to start that before any cabinet construction begins. That way, I’m not getting antsy to install doors and drawers on finished cabinets, because there aren’t any.
The stretching is key. I feel like the Hunchback of Notre Dame.
Scherr’s
As a side note, the doors from Scherr’s are beautiful! You can customize the type of wood, and they pre-bore the holes to match up with the Ikea cabinet frames. I just sent them the order list with all of the pieces we bought at IKEA. Then, they sent me a quote for the doors. They gave me a 3 week turn around time frame, but they ended up shipping early. I got them about 2 weeks after I ordered.
The price was more than fair for the craftsmanship and attention to detail. The 10 pieces cost about the same as the total for the cabinet frames + hardware, including shipping. Plus the doors & drawer fronts were carefully wrapped and cushioned for shipping. I can’t wait to work with them again in the future!
Final Thoughts
Overall, I think the Critter Spray Gun is great for small jobs, but it takes a bit of getting used to. For $50, you can’t beat the price. I wouldn’t use it on huge jobs, like painting an entire kitchen of cabinet frames. But, for small jobs like furniture or a few doors, it works well.
If you decide to try out the Critter Spray Gun for yourself, you’ll need an air compressor, a hose, and some couplers. You might want to invest in a spare parts kit, because the cork ring is a little delicate.
I’ve since used the Critter on several cabinet projects in my home, including the Home Office Built In Credenza & the Guest Room Built Ins!
Have you ever used a paint sprayer before? What kind do you love and what kind do you hate? What was your experience? Do you have any tips? I must say, the painting part of the process is MUCH faster than rolling it. Also the clean up isn’t bad at all with this particular sprayer. I’m pretty happy with the quality finish I got with this $50 Critter Paint Sprayer! I hope you do too!

Dianne says
What PSI did you end up using? 40? Just got a Critter for a closet remodel and are having trouble getting good coverage. May have the PSI too high
Stacy says
Hello! Thanks for your question! Yes, I tend to use somewhere right around 35-40psi. It take a lot of testing with scrap cardboard. You have to test the psi, then twist the little spout, change the psi, twist the spout. Usually right before you get frustrated, you find the magic spot! I find it depends on the paint I use, the temp outside, the humidity, etc, but it’s usually between 35-40.
It’s a $45 paint sprayer, so it takes a little bit more work to get right, but totally worth it!
Thanks for your question!
~Stacy
Margaret says
They look great! What color paint did you use? I really like it!
Stacy says
Hi Margaret!
For my Daughter’s Vanity, we used Benjamin Moore Gypsy Pink. On my Son’s Side, we used BM Hale Navy.
Thanks!
~Stacy
John Hewetson says
Extremely helpful. I am a cabinet Carpenter that has a phobia about spray painting ( maybe overstating this but the thought of it does make me anxious because of the timing aspect and “one shot” nature of this process). Your shared experience has been tremendously helpful so I will watch your site for future articles that relate to cabinet finishes and other tips. Thank you so much.
Cheers John
Stacy says
You’re welcome! I, too was freaked out by spraying my cabinet doors, but I completely sprayed a large piece of cardboard to perfect it before starting on my doors to build up my confidence.
Thanks for reading!
John says
How come Jenny uses 90pse and you use 30 to 40psi? Something isn’t adding up vs your article and hers.
Stacy says
I’m not sure! Maybe because she thins her paint and I don’t? I just play around with a piece of cardboard, and it always seems to be better around 30-40psi for me. I use 90psi for my nail guns. I always suggest testing on a piece of cardboard to make sure the spray and finish are what you want first. Hope that helps! Thanks for the question!
~Stacy
Scott Wilcox says
I just bought a Critter and am trying to use it. I can’t seem to get as much material out as some of the videos I have watched. I’m only spraying a circle about 1.5″ at 6″. I turned up the air and ended up with more paint but little air bubbles throughout. I have tried moving the nozzle up and down but not getting much change. I’m spraying latex and adding flowtrol to it to thin it down. Not sure how much to thin though.
Thanks!
Stacy says
Hi Scott!
The Critter takes a bit to get used to, but there’s definitely a sweet spot, and you know it when you find it.
I’ve never added Floetrol. In fact, I’ve never thinned my paint, but I’ve only used Benjamin Moore Advance, Which is a water-based alkyd. I wouldn’t thin it too much. That may be the bubble issue.
What pressure do you have the air at? I’d get a big Amazon box and play with the air pressure. I haven’t sprayed in a while, but I want to say I don’t go higher than 30 or 40. Maybe 20. I’d have to go look at the compressor. You’ll know it’s right when it doesn’t sputter and the spray is more concentrated.
Hope that helps! What are you painting?
~Stacy
Scott Wilcox says
I’m painted a piano bench. The Flotrol helps the paint lay flatter and takes a little longer to dry. I was pushing about 60 psi. When I tried lower psi there was hardly any paint. When I bumped it up I got more paint but also the bubbles. It didn’t look to bad the next day though. The Flotrol helped give it time for the bubbles to escape before drying. The paint was a water based alkyd as well (Sherwin Williams) but the more I thinned the better it seemed to spray.
Stacy says
Yeah, I’ve heard of Flotrol before, but I’ve never had to use it. Glad you got it going!
Allen says
The cabinet that you bought from Ikea, were they form the kitchen section or bathroom section of IKEA?
Stacy says
Hi Allen!
These are the IKEA Sektion Kitchen Cabinets. I haven’t worked with any of the bathroom cabinets yet, but if I ever get to remodel the guest bathroom, I’m planning on a Godmorgon hack in there for a tight spot.
Thanks for stopping by!
~Stacy
krystel says
the critter paint sprayer sounds really fantastic and smart as well as smart
john hutchens says
The Critter sprayer sounds like a great tool for small things. You did an awesome job. great project.
Stacy says
Thanks! Yes, its perfect for small furniture or cabinets. I wouldn’t paint a wall with it.
Kristin K says
Practice makes perfect! It takes a lot of mistakes before you get the handle on any new project! I know, I’ve been there myself! But, in the end, everything came out just the way I wanted it to!! Just as you did! Your bathroom cabinets and drawers look fantastic!!! Way to go!!!
Stacy says
Thank You!
daisy reyes says
i m happy for you
you did really good job
thank for sharing he post
Stacy says
Thanks!