This is one of those posts that I wrote a draft of a long, long time ago, but I never got around the editing the (horrible) photos. I did this front door repair project before I had a nail gun, which would have made it so much easier! It was one of my very first construction projects at the house, and I was so proud of myself! It definitely gave me the confidence to tackle the bigger projects that would come later, like my Built In Shelves in the guest room/craft room. So, I hope you enjoy this little post on how I brought our Front Door back from the dead. ~ Stacy

When we moved in, our front door was in serious need of repair. We never saw this issue the two times we walked through the house, and our awesome Home Inspector missed it too. When I went to unlock the door the very first day we had the keys, I noticed one of the bottom panels of our solid wood door was loose. Someone had actually stained the footprint of the missing moulding so that the fact it was missing wasn’t even noticeable. Yikes. This probably should have been a warning.
The door stayed like that for a while. I was trying to figure out if we should just replace the front door or repair it. Replacing an 8′ solid wood door sounded expensive. So I decided to fix it. While I was at it, I changed the color, because I the red stain clashed with the house.


The front door is a 6 panel solid wood door. The panels are loose so that the door can expand and contract with the weather, and they are held in by molding on the front side of the door. Since I couldn’t find an exact match for the original molding,I had to remove all of the molding on the other 5 panels so that they’d all match when I was done. That was going to be the only way to fix the door.
I went to a local millwork store to pick out my new moldings, in the hopes that they would have more choices than our local big box store did. They have a ton of different items here, from moldings, to casings to windowsills and even doors. This is where I buy my windowsills and casings when I case the windows. I now remember I’m still missing a post on that.

Once home, I measured for my miters, making sure to measure both the inside corners and the outside corners for a perfect fit. I made all of my cuts, then started my front door repair project. I used Gorilla Glue Epoxy on the moulding, then secured it to the door, not the panel, with 2″ finishing nails left over from the bathroom baseboards. If I was doing this today, I’d use my nail gun! ~Future Stacy
It took me all day to get the new moulding on the door for all 6 panels. I made sure to attach everything to the door so that the panels & door could still expand & contract with the changing weather. The next day, I filled in gaps and nail holes with wood putty & sanded everything down, including the rest of the door, with my Black & Decker Mouse sander.

I wanted to change the color of the door from a red stain to something more dramatic. We’re limited to what colors we can choose in our neighborhood, so I took a look at the bricks and chose Sherwin Williams Black Magic in their Emerald base. There are a few bricks in our house that are black, and a few that are grey. Eventually, I want to paint the siding and garage doors grey, so the black was a good, bold choice for the door.
Since I was changing the color of the door, that meant I needed to repaint the shutters as well. So, we ended up doing that the following weekend. We had to get some 2×8 and 2×4 boards to repair warped and damaged pieces of the shutters, but that was an easy fix with some wood screws we already had on hand. All we did was remove the shutters, painted them, and then put them back! Easy! Sidenote: we might have hired someone to do the upstairs shutters. Shh!!
That got us from this
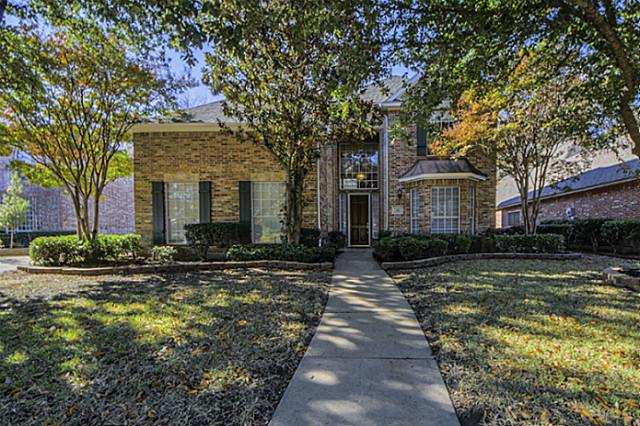
To this!
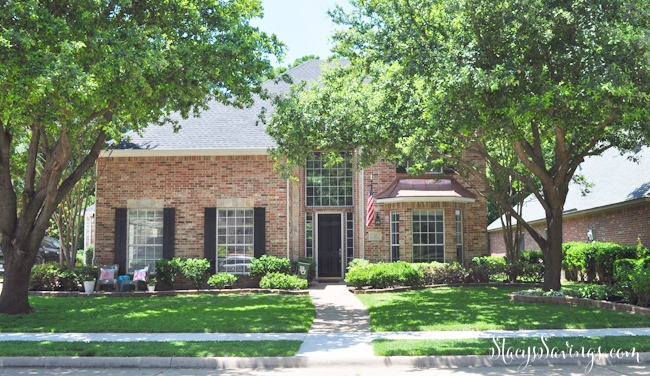
I think the front of the house looks so much better! The green shutters bothered me since we moved in, and the door is so much more secure. I like how the black contrasts with the brick and the trim colors, and I love how it matches the random black bricks in the house. All of the molding, shutter boards, and paint cost about $150 total. Much cheaper than a new solid wood front door which would be over $1,000!
Eagle eyes may notice a few changes to the front of our house other than the front door repair. Shortly after moving in, we had the large Magnolia tree removed. It was too big and too close to the house. We also had the Live Oaks trimmed back to allow more sun so the grass could grow. In December, we replaced the copper over the bay window. We actually had the whole roof & all of the gutters replaced, as a result of a hail storm about a month after we moved in. It totaled our roof, and did significant damage to my car. We chose to go with a darker charcoal roof. I think it ties in nicely. I love the new copper!
Since this post was originally written in 2015, and its now 2018, I’ve done a few things to the front yard. One of the things I did was replace all of the door hardware. This front door had antique brass (the color, not the age) hinges, a plastic doorbell, and a brushed nickel handle. I’m not a brushed nickel person, I like polished chrome. I found a deal on this handleset with deadbolt, and I picked up a Polo interior handle to match the rest of the house. It has my favorite SmartKey system so you don’t have to get a locksmith. You can change the locks yourself!

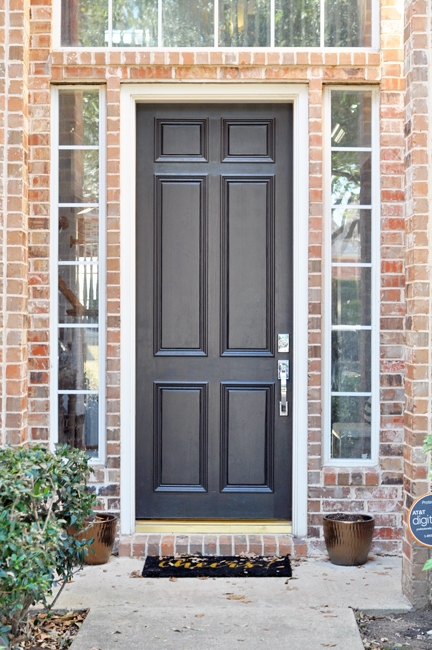
It’s almost like the chrome handle makes the door come alive, don’t you think? I’d love to change the threshold, but we’re going to do that when we get the weatherstripping redone. I may spray paint it. We’ll see.
I picked up some Baldwin Chrome Hinges & doorbell (because Ring doesn’t make a polished Chrome version. I always use Baldwin hinges on exterior doors. One tip is to triple check the pattern, shape and size of your hinges. There are many different kinds, and I’ve ordered the wrong ones before.
Changing door hardware is so easy. I even have a post all about how to change door knobs. It’s a relatively inexpensive project that makes a HUGE impact.
Another project we completed during this time was our front yard patio. We love this and used it so much that the chair seats wore out this winter! We’ve ordered some Polywood Adirondack Chairs from Target that will hopefully last longer. Around that time, we also had our sidewalk fixed, resodded the yard, and replaced our exterior lights with lanterns and a matching flushmount from Shades of Light.
Here’s the list for the front of the house:
Front Door Repair & Change ColorRepair Shutters & Change ColorReplace Copper RoofReplace GuttersDarker Roof- Plant New Landscaping
- Construct New Flowerbed Borders
Install New Chrome Handleset for Front DoorReplace Front Door Hinges with Chrome HingesNew Chrome DoorbellRe-sod Yard- Add River Rock/Flagstone Walkway from Driveway
Seating AreaPorch PlantersRepair Sidewalk to Remove Trip Hazards- Repair/Paint Mailbox
- Paint Siding & Garage Doors
Replace LanternsInstall Flaghanger- Cedar Fence/Gates
- Bathroom Windows
- New Windows without Mullions
- Plantation Shutters
- Landscape Lighting
It really feels like we’ve done a lot of work on the curb appeal! I’m itching to get the landscaping done, but I’m afraid the County Appraiser will do his drive by and judge my book by its cover, jacking up our property taxes. That project may be the very last thing we ever do.
In the end, it was so worth it to complete this front door repair myself. We saved so much money, and it looks great!
What is your favorite front door color? I’ve always gone either black or navy. I’m so jealous of those with bright and cheery front door colors. We’re not allowed to do that in our neighborhood, but I’m not sure I’m bold enough to pull off like a yellow front door. Would you have saved or scrapped this front door? Tell us in the comments!
Check out all of the Stacy’s Savings Total Home Makeover posts here!

JW says
The black door is spectacular! We have such a similar front door area that we must live in the same area! Thank you for sharing your work and ideas.
Stacy says
Thank you! Maybe! It’s more likely that its just builder-grade 1990’s suburban design. LOL.
~Stacy