One of the projects that I’ve been meaning to blog about is my Dining Room Remodel. The dining room remodel was full of DIY projects that I mostly did on my own. I’m so excited to give you all of the details on how this dining room remodel changed the way we feel about our home.

I completed this project way back in Feburary of 2020, just before COVID Quarantine. The timing was essential because we had our hardwood flooring finally refinished over Spring Break.
If you follow me on Instagram, you’ve already seen the finished space. This post will explain why and how I did everything in this dining room remodel.
But I’m getting ahead of myself. Let’s start at the beginning.
The Dining Room Before
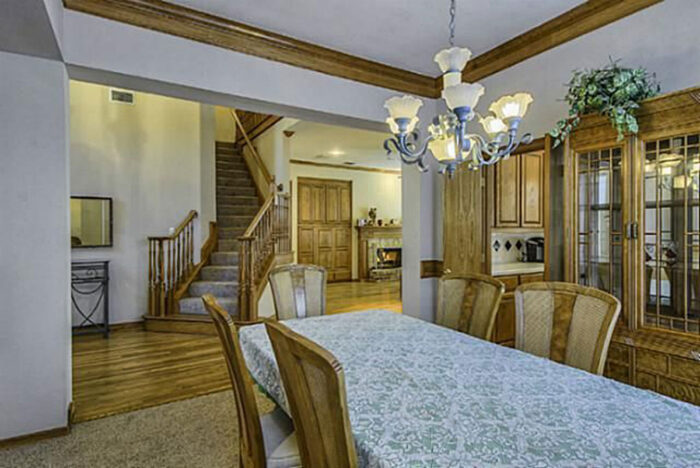
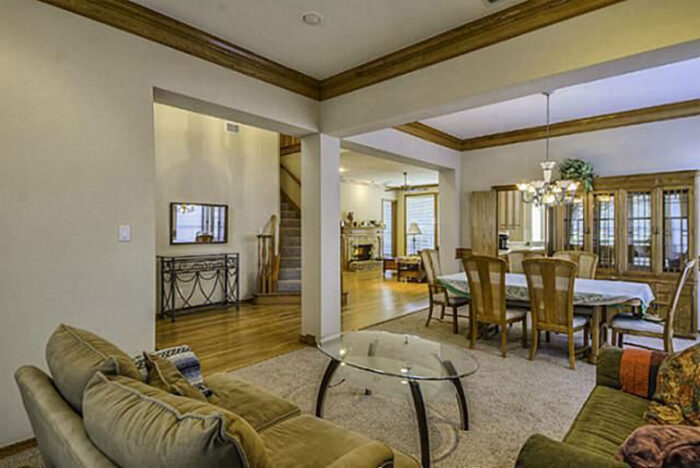
When we moved into this house in 2014, the dining room was open to the formal living room. I finally bought the sideboard that I’d been wanting forever, but I only had one wall to put it on. It made the room feel cramped on that side.

In 2016, we converted the formal living room to a home office by having a wall installed between the two spaces. This created an alcove of sorts, where I’d always planned to move the sideboard, but never did. I also finally swapped out the ugly green light fixture for this pretty capiz shell rectangle chandelier that I found on sale.
In 2019, when we remodeled the kitchen, we had to have some hardwood floors patched from where there used to be walls and cabinets. Those would have to be refinished with the rest of the existing hardwoods so that they all looked original. We wanted to remove all of the carpet on the first floor so that the hardwoods would all match. That meant it was time to do the dining room remodel.
The Dining Room Remodel Plan

The first thing we did was swap out that hideous light fixture with this capiz & chrome chandelier. I just couldn’t look at that massive, leafy, green fixture anymore.
I’d always known that I wanted to do some sort of wall treatment in this room, and then paint the top of the wall a contrasting dark color.
We have our old kitchen table from World Market in here now, but the plan is to eventually get the table that matches our sideboard. Another thing I want to do is case the windows like I’ve been doing all over the house as we remodel. Pretty white curtains on a chrome rod would frame the window wall.
For the decor, I wanted to do something a little different, like bringing in some more classic & vintage decor. Maybe throw a little boho in there as well.
I did need to have my handyman come out and build a little extension on to the existing post to make the alcove centered with the room. I could have done that, but I hate doing drywall.
Once that was done, it was time to get started on this dining room remodel.
The Dining Room Wall Colors
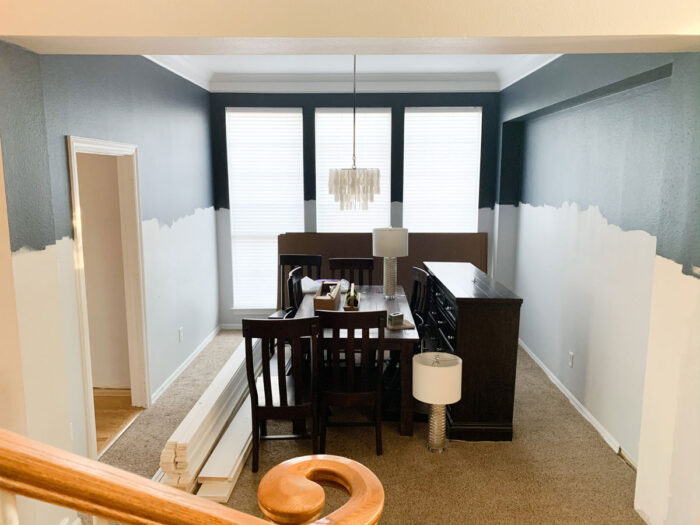
The first step in my DIY Dining Room Remodel was to paint the upper portions of the wall. I marked where I wanted the top of my board and batten to be, and I made sure to paint slightly below that line. This helps keep touch up painting minimal.
I knew that I wanted white board & batten, so I stuck with my favorite Benjamin Moore Hale Navy for the paint color in this room. We’ve previously used it in the Guest Room/Craft Room, Home Office, Master Closet, My Kid’s Bathroom and My Son’s Room. I like to repeat my favorite colors around the house to keep the color pallete consistent.
With the painting done, it was time to start on the Board and Batten Wall Treatment.
Board & Batten Wall Treatment
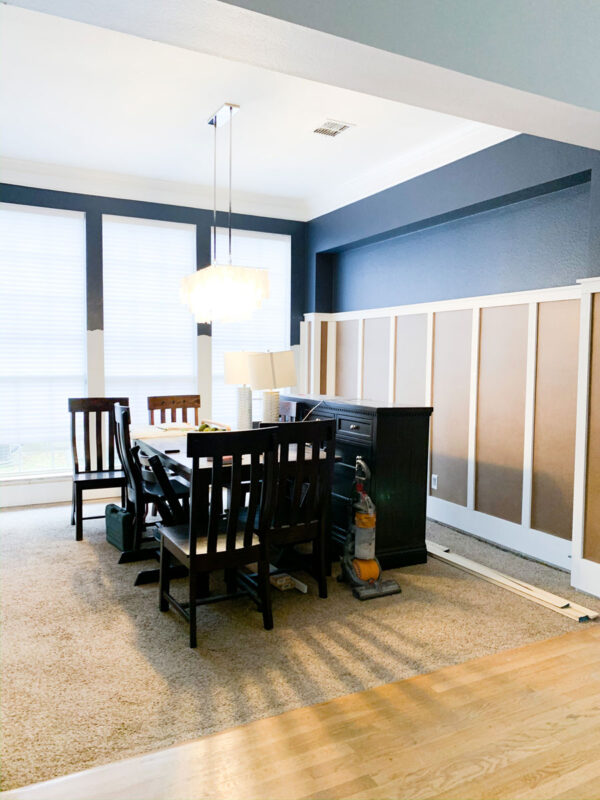
For this Board & Batten project, I used 1×3 primed pine with a 1×2 cap. I knew I wanted my treatment to be about 6′ tall, so I measured my walls and determined that the vertical boards would look best spaced about 18.5″ from each other.
For the base board, I wanted the same 1×3 reveal on the bottom as was on the vertical boards and top board. But with the new baseboards being 5.25″ tall, that meant some extra calculating. I used a 1×8″ board around the bottom, and I installed it a couple of inches off the floor to ensure that I had that 2.5″ reveal above the baseboards.
Since we live in Texas, we have those lovely textured walls. In some parts of the country, you can just put 1x3s on the wall and call it board & batten, but not here. Wall treatments don’t look as good with knockdown wall texture showing through. We had to address the texture.
We decided to use cheap brown panel board and cut panels to fit inside our installed boards. I did it this way so that the 1x3s were only sitcking out 1/2″. That way, the the 1×3″s along the door casing wouldn’t stick out further than the door trim.
Window Casing & Treatments
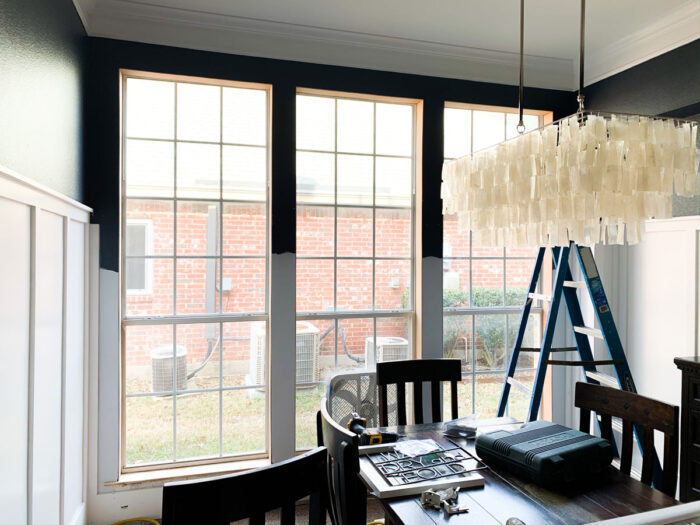
I’ve been slowly casing all of the windows in our house to match the ones the builder did in the Living Room. So far, I’ve done this in the playroom, the guest room, the laundry room, and the kitchen.
Our old shades were cloth shades that collected so much dirt and couldn’t be cleaned. I took those out to case the windows.

This is an easy job, but its a little time consuming and meticulous. I get my molding & windowsills at a local millwork shop so that it matches my existing door trim & window moldings. You could use 1x3s for a more farmhouse look.
When I do the Master Bedroom Windows, I’ll be sure to do a write up about exactly how I case my windows.
Caulking, priming & painting, and these windows are cased!
I added this beautiful chrome curtain rod and rings in between our window casing and chunky crown molding. The curtains are from IKEA. I hemmed them to fit with my sewing maching.
Facebook Marketplace Doors
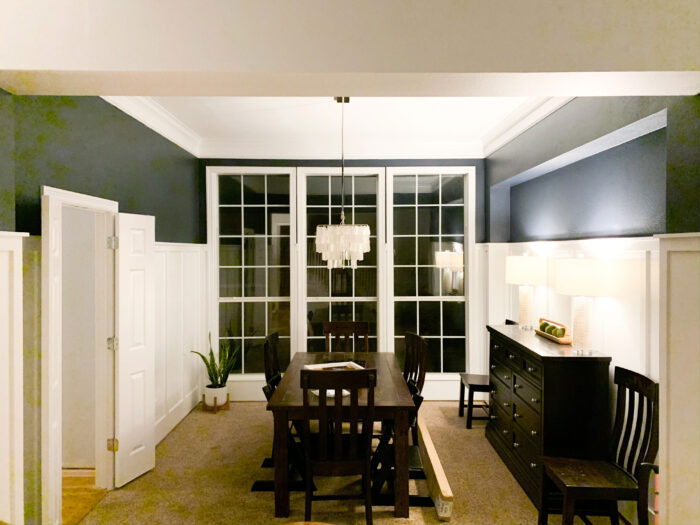
When we first moved into this house, we had split doors between the dining room and kitchen. The doors were plain wood hollow core slab doors, and I hated them. So I took them off and we never replaced them.
For years I looked for a pair that matched our paneled doors in the rest of the house, but had no luck. Finally, I found a pair on Facebook Marketplace for $25. I painted them, added new chrome door knobs and ball catches on the top, and they look like they’ve always been here!
Hardwood Floors
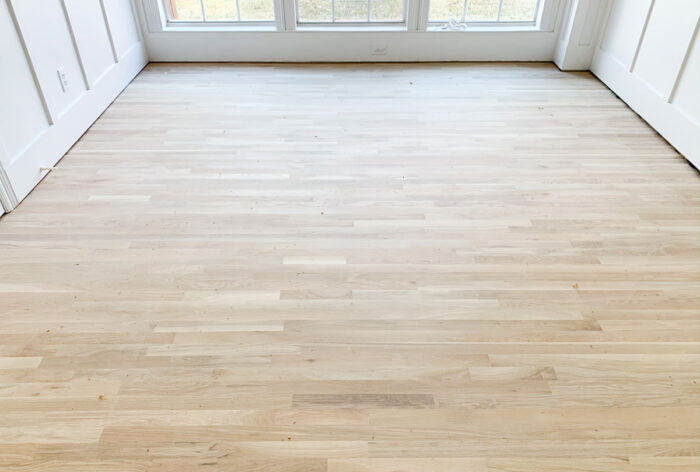
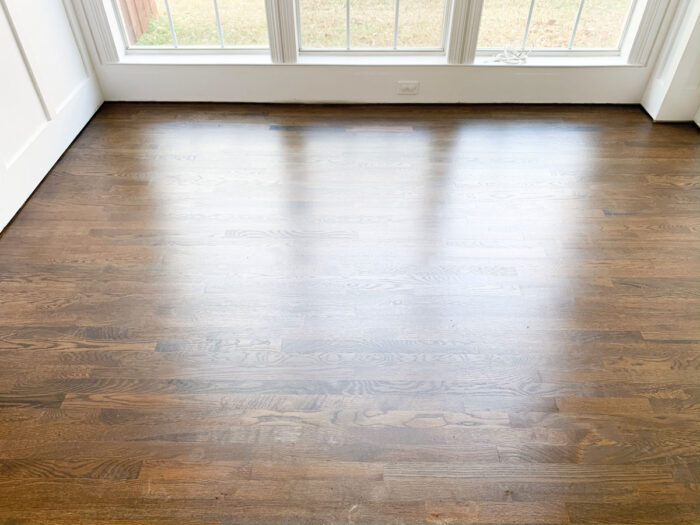
The Board & Batten walls are a huge improvement, but the biggest change in this space was the flooring. Getting rid of the carpet, along with its sunken transitions, made this space feel like a part of the rest of the house.
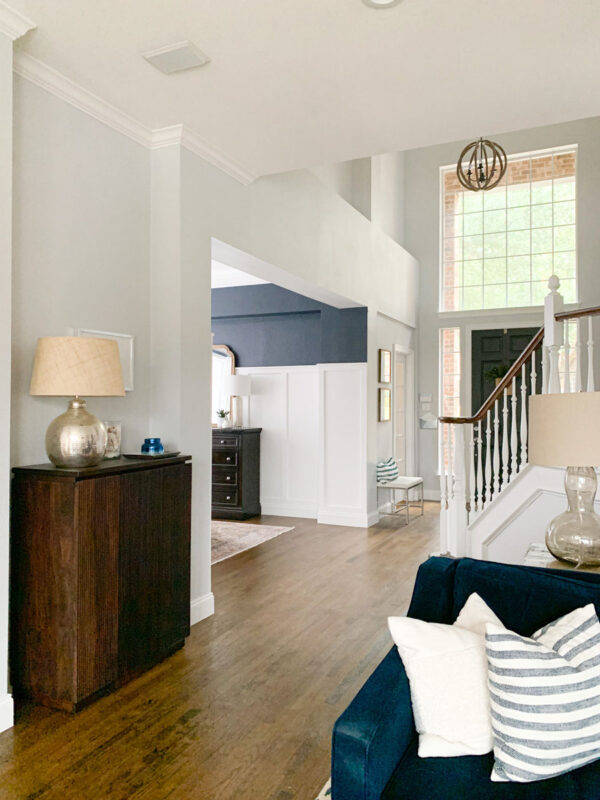
The cohesive flooring is a total game changer in our Home Remodel & I hope to get a blog post about that process up on the blog this spring.
Dining Room Decor

My style started to get a bit more boho starting with the Dining Room Remodel. The main driver is this amazing rug! I love the classic but vintage look to it, and the colors are fantastic in this space! Plus, it’s not a budget buster.
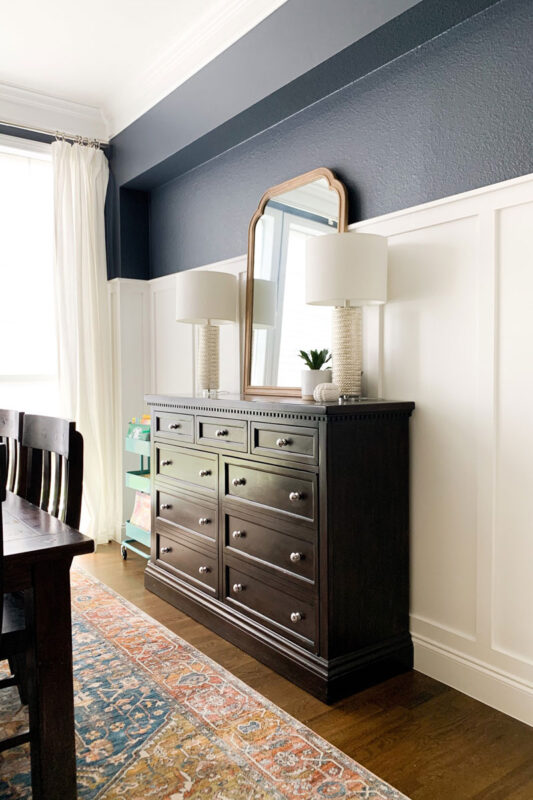
I finally found the Target mirror that everyone is obsessed with, and it was the perfect way to mix in a little lighter wood with all of the dark & medium brown tones throughout the room.
The lamps were the buffet lamps that I’ve had for years. These mercury glass textured lamps were a Home Goods find shortly after we moved in to this house.
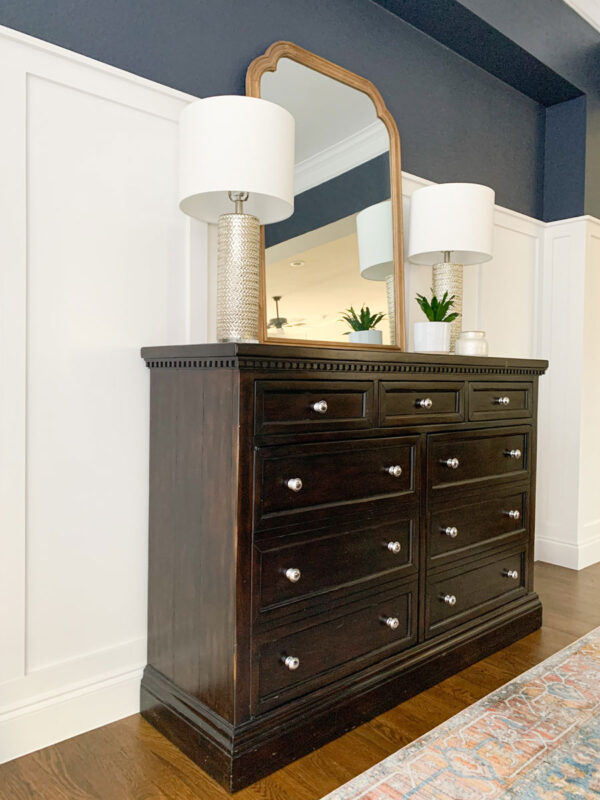
I swapped out the knobs on my favorite sideboard for these hammered polished chrome knobs. You may recall that I used these on the Built In Bar in the living room. I decided to have the Bar knobs match the kitchen hexagon knobs. So I brought those 6 in to the dining room and ordered some more to complete the look.
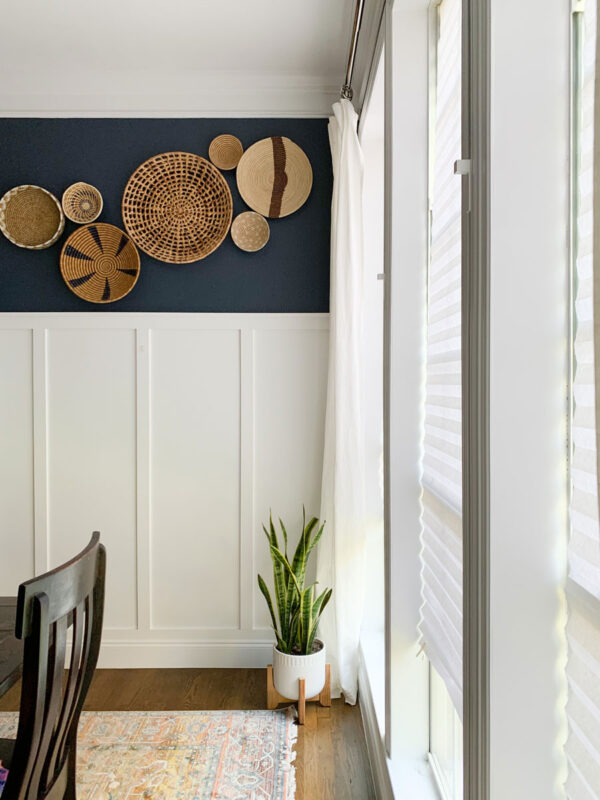
The Basket Wall is probably my favorite thing in the room. I love the way basket walls look, and I was able to find several perfect ones at HomeGoods, Target, and even on Amazon. This boho look is a little out of the box for me, but I really love it.
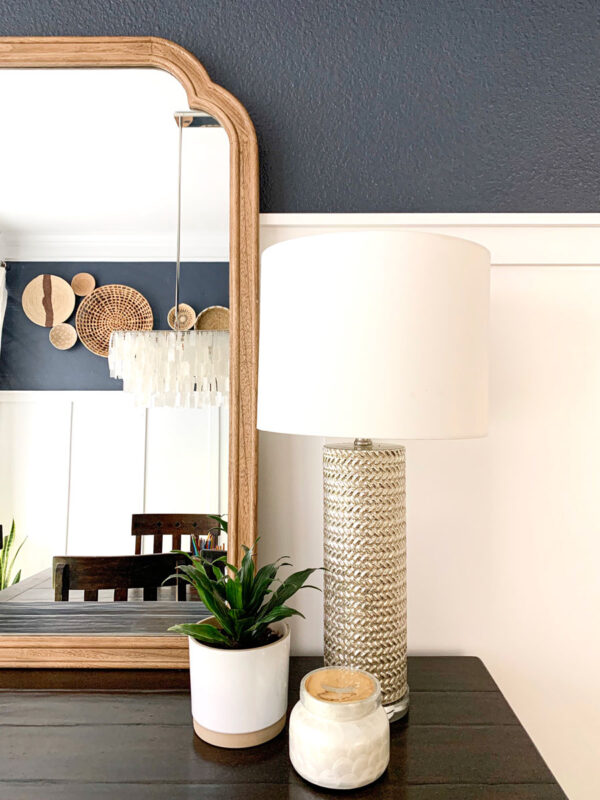
I brought some green in with some plants like Severus, my snake plant. His pot is from HomeGoods. I also have a little tropical plant from Ikea on my sideboard. A capiz shell version of my favorite candle ties in with the chandelier.
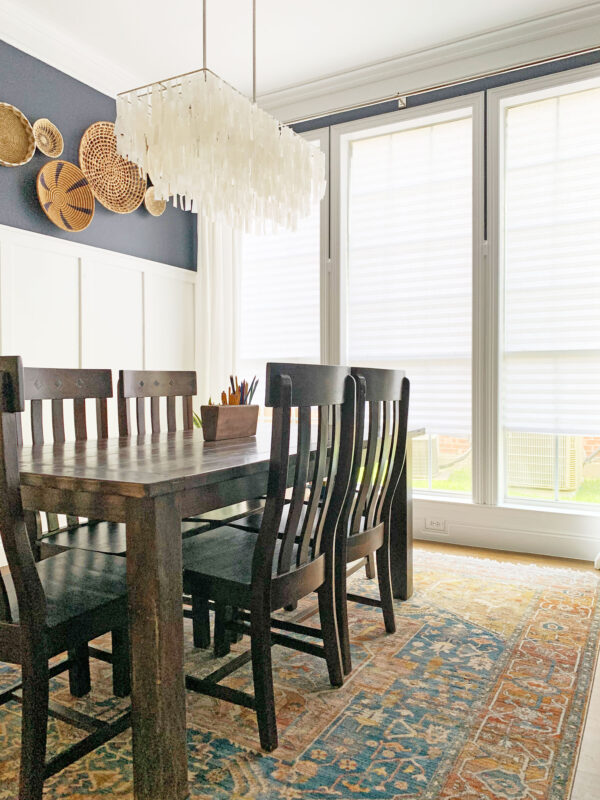
The colorful vintage-looking rug ties everything together and makes the room feel complete.
The decor in this room is my favorite in the whole house. I just love the way this dining room remodel turned out.
Dining Room Turned Homeschool Room
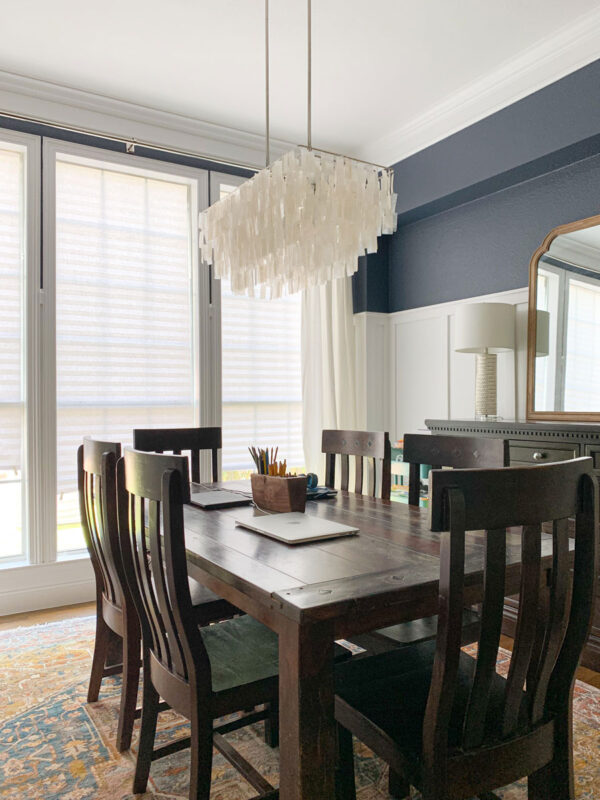
The reason why it took me so long to post this reveal – almost a year after it was complete – was due to COVID. You see, the floors were refinished over Spring Break, which meant that this room became affectionately called the Homeschool Room right away.
You can see our set up in this photo. We still keep our rolling cart of homeschool supplies in here for easy access to workbooks and other study materials. You can see it over there behind the chair.
I’m so glad that this room was completed prior to COVID. I don’t think it would have survived 12 weeks of homeschooling in an ugly space.
Dining Room Remodel Budget

Normally, this type of room remodel with no new furniture wouldn’t cost that much. However, all of the millwork for the window adds up fast, as well as the upgrade to primed pine for the wall treatment and the panel boards we had to use. You could definitely do the board and batten treatment much cheaper by ripping down plywood.
This room clocked in at $1,059.89. I generally try to keep room transformation budgets around $1k, so I’m pleased with this. I kept track of my spending by using a separate Remodel YNAB budget for the project. Read more about how we use YNAB to save money here.
I’m not including the hardwood floors in this budget, because that was more of its own whole house project.
What’s Left
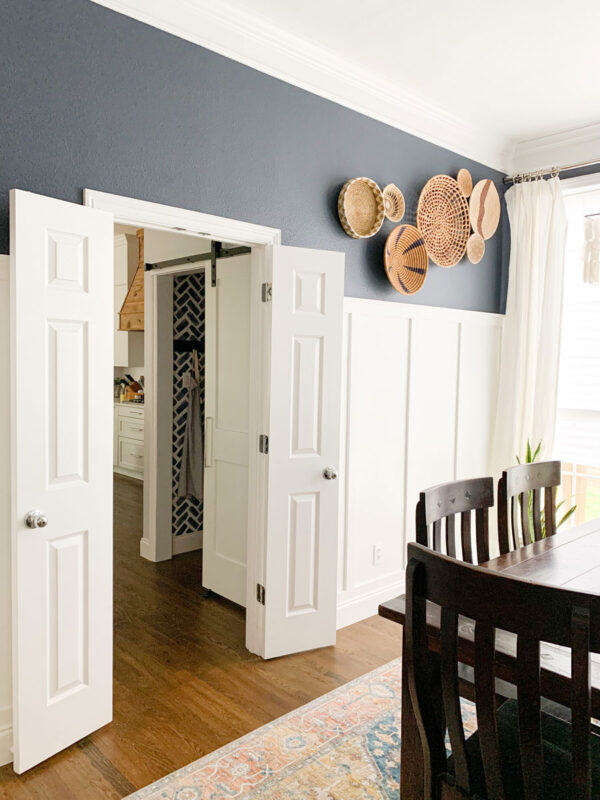
No room is ever truly done, and that’s the case with this Dining Room Remodel. There are still a few things that I really want to do.
- New Dining Room Table & Chairs
- New Windows
- Plantation Shutters
- Faux Ceiling Beams?
I’m hoping to get the new windows and shutters at the end of this year. We also want to tackle the landscaping outside of these windows to camoflague our neighbor’s HVAC units and give us something pretty to look at while dining.

Like something you see? Shop the post! I’ve linked exact and similar items below!

So what do you think of my Dining Room Remodel? What’s your favorite part? It’s so hard to choose. I’d love to hear your thoughts in the comments!
I hope this post has inspired you with some dining room remodel ideas for your own space!
Want to see more? Don’t miss a moment of our DIY Home Remodel!


Julia Ball says
Love your remodel! Where did you get your dining room pendant light fixture?
Stacy says
Thank you Julia! Here is an affiliate link for my dining room chandelier https://rstyle.me/+QY3y2TUSQ-ggMquPi4ejHg.
~Stacy