I’ve been teasing this Laundry Room Remodel Reveal post for months, and y’all have totally hung in there. So props to you! Here’s the real story.
I finished the laundry room back in January and took pictures to post on the blog. After editing photos, I decided that a fake plant from Target would be just perfect on my shelf, and that it was a NEED. After that, I decided that it wasn’t really finished because I still needed to do touch up paint, I hadn’t purchased a hanging bar, and I needed to fix a tile screw up. Plus, all of the pictures that I took in January weren’t good anymore because of the new fake plant that now sits on my shelf.
So after all of that, we had to move out of the house to get our floors refinished, and then COVID QUARANTINE. At least with the quarantine, I finally had the time to finish all of the tiny little things – even the tile screw up.
Now, the Laundry Room remodel is really done. I even purchased the hanging bar. I still need some artwork and a snake plant, but whatever. That’s a post-quarantine project.

If you’re following me on Instagram, you’ve already seen some of the almost-done pics. Here’s what it looked like the 13th week of the progress on the blog.
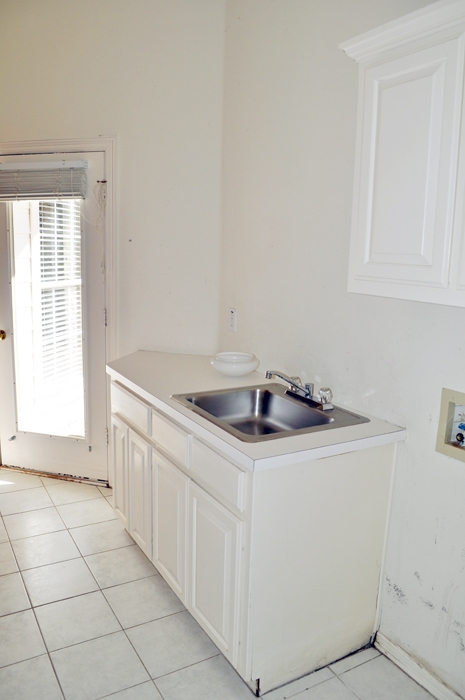
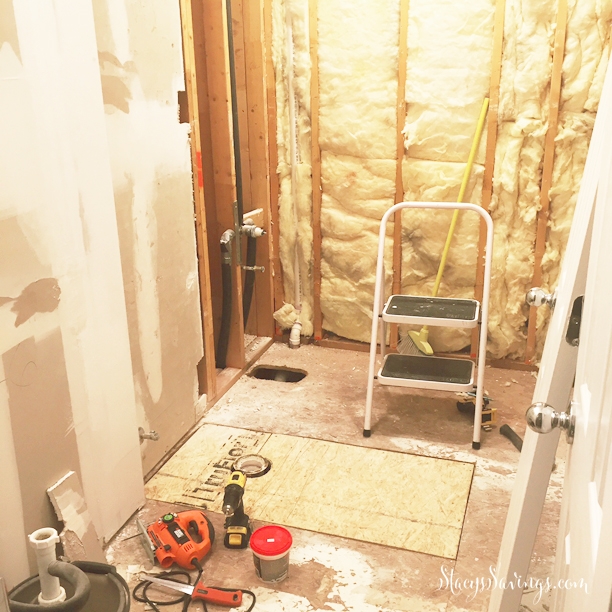
The Old Laundry Room
But we really need to go all the way back to the beginning to get the full Before and After Effect. This room really sucked. It was bad. The storage was inadequate and pitiful. The room was depressing. Everything was disgusting. It felt like a cave.
I’ve known exactly what I wanted to do in this room to fix all of the issues for a very long time. We just needed to wait for the right time in our budget and the remodel of the rest of our house.
If you’ve been around here for a while, you know that I did a Phase 1 Laundry Room Makeover shortly after we moved in. The Phase 1 Makeover included Fresh Paint, a couple of floating shelves, and a little $10 DIY shelf to cover the gap behind the machines.
What We Wanted
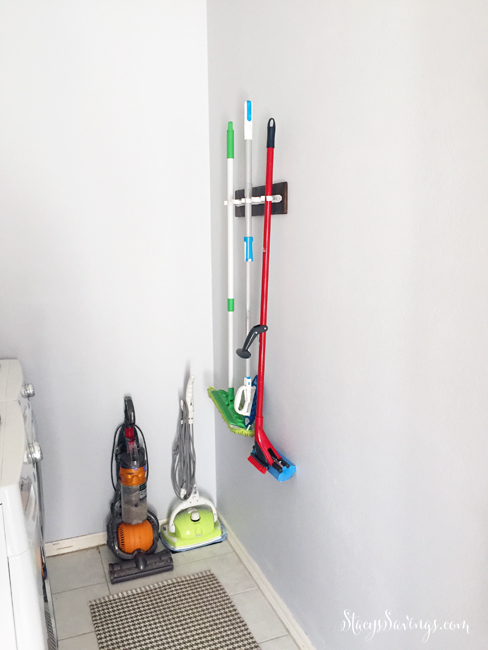
Our Laundry Room pulls triple duty, and the laundry room remodel needed to address all of those functions. First, we absolutely need storage for tall cleaning items: a vacuum, mop, broom, somewhere to put a step stool and a drying rack. These were things that were just out in the old laundry room. In the Phase 1 makeover, I made a little wall rack for the mop and broom, but I still had to look at it.
We also need storage for my cleaning supplies. Like in the pantry, we keep a small stockpile of cleaning supplies. I like to buy my supplies when they are on sale. I do not like to not have what I need and then have to pay full price for it. That’s not how you save money.
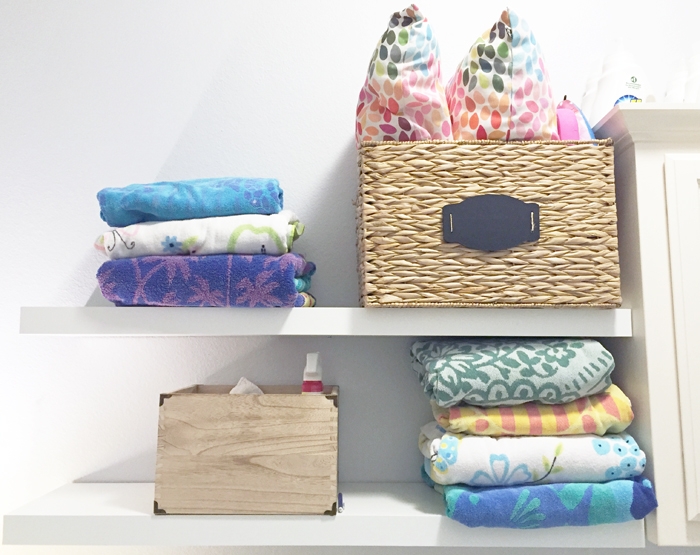
Besides cleaning and laundry stuff, we also store pool towels, pool toys and goggles in here. The patio door in here is the best access to the bathroom from the pool. So this felt like the most logical place to store that stuff so that it wouldn’t get damaged outdoors.
Finally, obviously, we do laundry in here. Lots and lots of laundry; at least one load per day.
That’s a lot of stuff to store in one laundry room. Fortunately, this laundry room is skinny and long, but tall. I knew we had to go vertical with our storage. The tiny little 4′ tall, 10″ deep cabinets we had weren’t cutting it anymore.
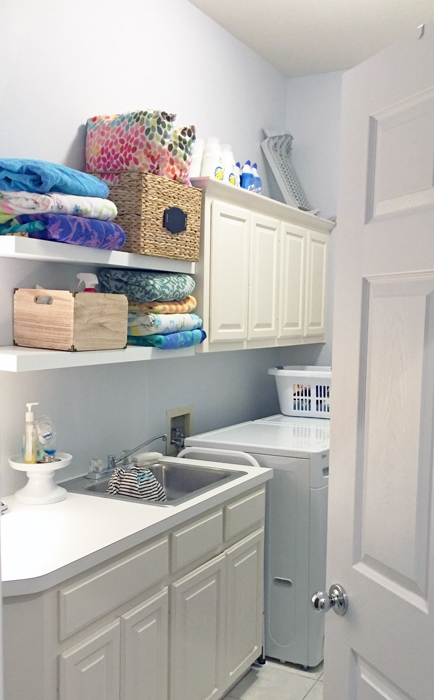
The New Laundry Room
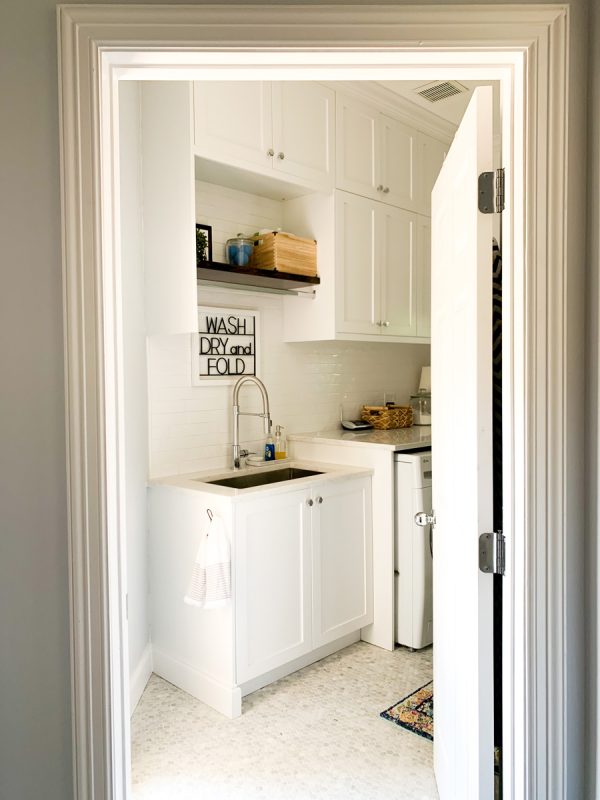

We are so happy with the new laundry room! I thought about exactly what I wanted in here, told our designer, and we were able to fit everything in the design.
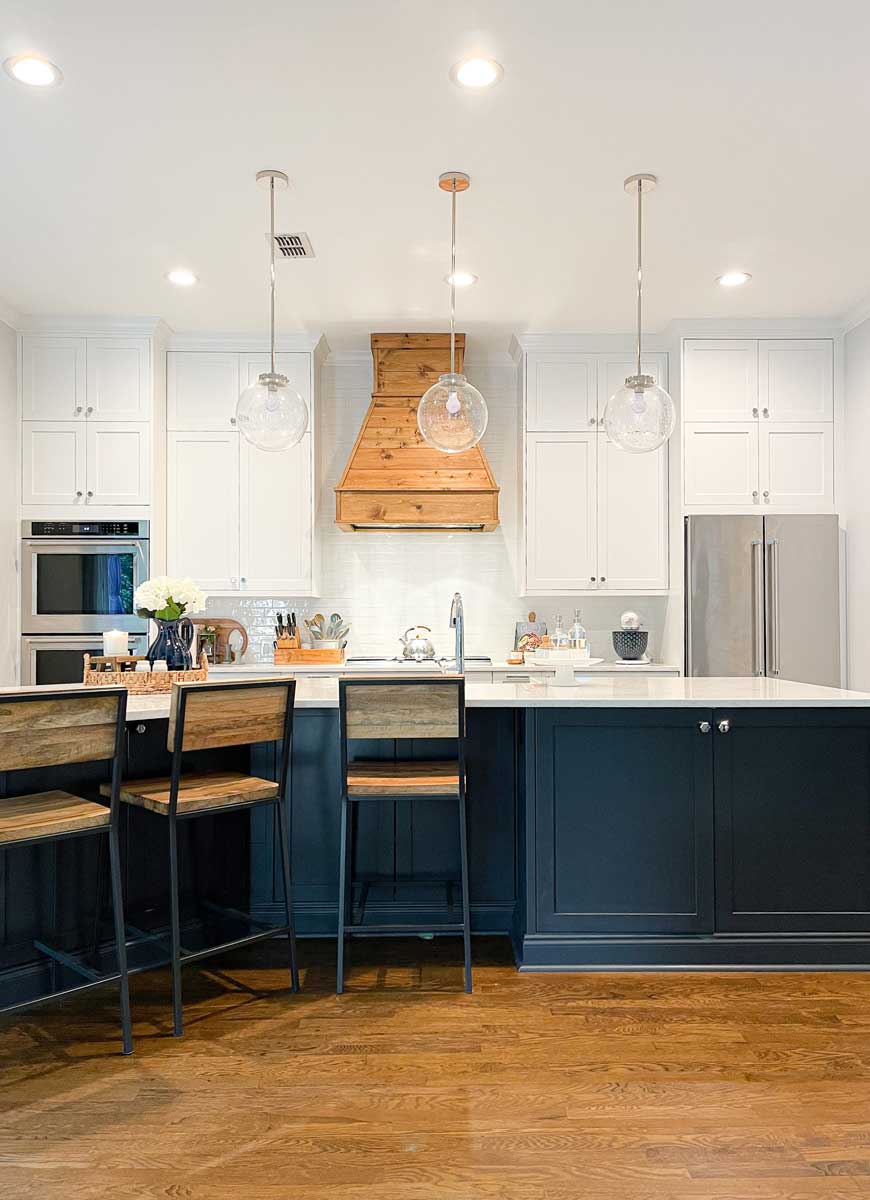
The laundry room remodel happened at the same time as the kitchen remodel. We knew this room was going to have the same finishes and look as the kitchen. We also used IKEA Sektion Kitchen Cabinets in here, just like in the kitchen.
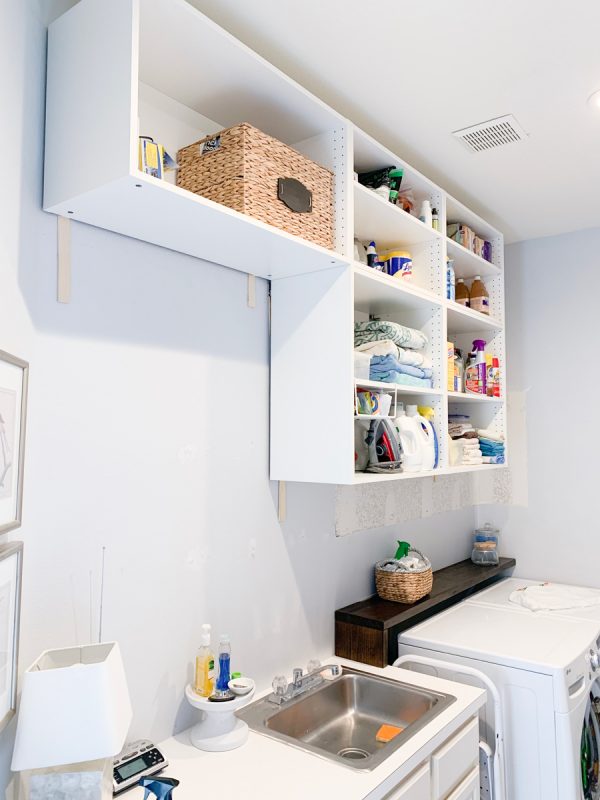
It was a crazy time in our house, but it was so much better that way. We actually hung several of the laundry room cabinets WAY before we even started packing up the kitchen, as you can see in the photo above from May 2019. I had ordered all of the IKEA stuff a few months before we started the kitchen & laundry room remodel project in order to take advantage of the IKEA Kitchen Sale. So one day last Spring, we decided to hang the upper cabinets. They didn’t have doors for months, but we got to store stuff in there, and that was great.
We also took this opportunity to replace the patio doors with ones that didn’t leak and had low-e glass.
We did all of the work in the laundry room remodel ourselves except a few things. First, we hired out the window & door work. That required framing, brick work, and window installation. That’s way out of my wheelhouse, and I have no desire to learn how to do any of that. We also hired out the floor tiling to the same guys that did our Guest Bathroom a couple of years ago. We had the same situation in the laundry room that we did in that bathroom, where we had to have them raise the slab by about 1″ before tiling. This way, the finished tile floor would be the same height as our hardwoods in the hallway. The last things we hired out was the plumbing & a little of the electrical work.
The Cabinets
We knew we wanted to shift everything away from the back corner in order to fit in some tall storage. Because of the location of the existing plumbing and the size of our sink cabinet, we didn’t have to move any plumbing. That would have made this room WAY more expensive.
We installed an 18″ wide IKEA Sektion Pantry Cabinet to serve as our tall utility storage. We brought this cabinet out to the front of the machines, which is about 31″, but IKEA cabinets are only 24″ deep. So this entire column of cabinets has a giant void in the back that we can’t use. That’s ok, because the dryer vent runs back there.
We were able to use 30″ wall cabinets and hang them so that the tops were the same height as the top of the pantry cabinet. From there, we were able to put 20″ cabinets above that.
The Sink Area & Backsplash
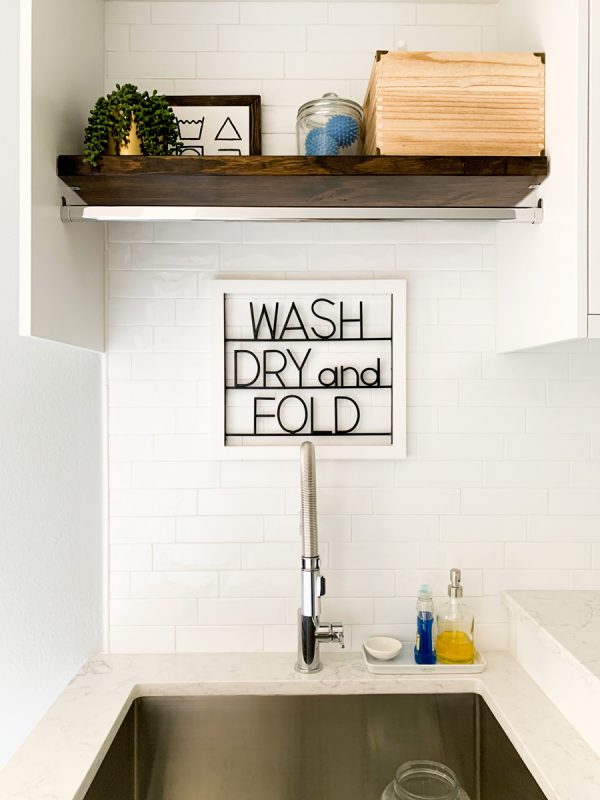
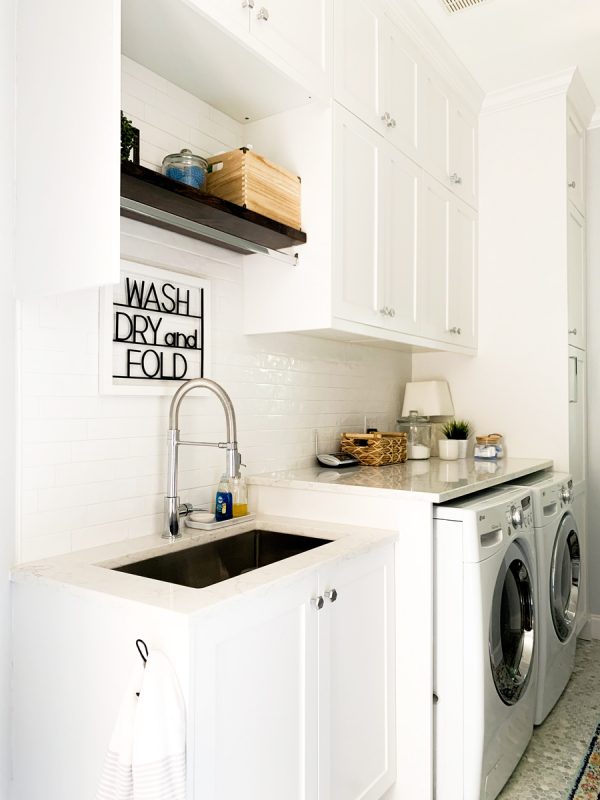
The sink in the old laundry room was small and shallow. Our designer suggested this deep sink, and I’m so glad she did. This is the deepest sink I’ve ever had. It’s a whole foot deep! I keep a glass jar in here to soak stained items in OxiClean or to wash delicates. We’re also loving the industrial faucet. It’s so much more versatile than the old fixed one was.
We knew we wanted a hanging rod over the sink for drying things or ironing, but I decided to put an open shelf in there at the last minute, and I’m so glad that I did. We really needed a little open storage, and I love the warmth of the wood against the tile backsplash. I installed the hanging rod below that, and it has plenty of space to hang things while ironing or hanging to dry.
Speaking of tile backsplashes, this is the same handmade 3×8″ white subway tile that we used in the guest bathroom shower and in the Kitchen Remodel. I love love love this tile. It’s less than $1 a piece, and its handmade, so it has those beautiful waves and imperfections that bounce the light. It is amazing. I bought all of this tile last year when Lowe’s had 20% off tile. I’m waiting for this same sale so I can get more to tile the pantry backsplash this year!
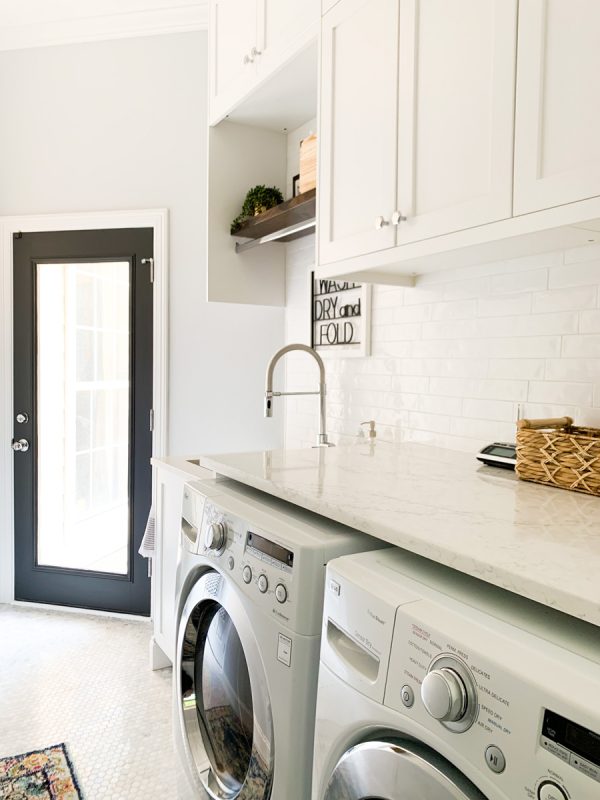
The Countertops

I really wanted some counter space in this laundry room, since we didn’t really have any before. We had enough of the slab leftover from the kitchen to do the whole laundry room for no additional cost.
Having a place to fold laundry has been a total game-changer. No longer are we dumping an entire load on the guest bedroom to be forgotten for days on end. I absolutely love the countertop over the machines. We keep this lamp on most of the time. We also have a basket for lost socks, our emergency radio, my favorite candle, a jar for oxiclean, and a container for pods or cleaner tabs.
The Floor

Getting the tile level with the hardwood in the rest of the house is amazing. Our daughter uses a walker, and eliminating that tripping hazard has been so nice. Plus, the hex tile looks better than the old boring tile did. You know I have a thing for hexagons. This marble hex tile is from Floor & Decor, and it is the same one we used in the Master Bathroom, Kid’s Bathroom, and Guest Bathroom.
The Hook Rack

I made this 9 hook Farmhouse-Style Hook rack all by my self for about $35. I showed you how I made it in this post. It’s super easy. Or you could buy a smaller one at Hobby Lobby for $80. Your choice. 😉
We use this hook rack to air dry things, for wet pool towels or swimsuits, and even to keep our pool bag ready to go. The hanging basket keeps goggles and small pool toys like rings and our favorite super cool light-up skipping gems.
The Window

Going ahead and replacing the window in here was a wonderful decision! This wall is at the back of our house, and overlooks the creek in the back. It’s beautiful and peaceful and I wanted to see it while I was folding clothes. I absolutely love to have the window open while I’m folding clothes. It’s so nice to have natural light and fresh air in this space. We used a window from Window World, which is who we will be using to replace all of the windows in the house when it comes time to do that project.
The Budget

It was really hard to keep up with the budget across these two massive projects, because so many of the materials were purchased for both rooms. I tried to allocate percentages of things, like the countertops, but I don’t know if my allocations were accurate.
Overall, I think we spent about $13,000. Here’s the breakdown:
Window Install: $1800
Tile Installation: $2320
Plumbing: $500
Tile & Tiling Materials: $1535
Quartz Countertop: $2320
Patio Door: $795
Sink/Faucet/Knobs: $1174IKEA Cabinets: $694
Cabinet Doors & Cover Panels: $1333
Paint/Trim/Misc: $430
I know that seems like a lot to remodel a laundry room. This room is big – it’s about 12 feet long, 7 feet wide, and then 10 feet tall. My original budget was $10,000. I could have stuck to that budget if I had chosen to tile the floor myself and maybe gone with a cheaper sink or faucet or floor tile. But we decided that spending the extra money was worth it in the end to get exactly the look we wanted. We really hate tiling floors. Especially ones that need 1″ of level concrete underneath them. No thanks.
In Conclusion
I love doing laundry now. Seriously. It is so much easier for me to do this dreaded chore now that everything has a place to call home. Having folding space is amazing. Having hanging space is amazing. Everything is amazing!
I’ve been dreaming about this space for 6 years, and its so fun to finally see in real life the image I’ve had in my head all of this time.
Here’s some of the items that we used in the Laundry Room if you’re interested:
Want to see what’s inside all of those cabinets & how I organize everything? I’m opening every door in the Laundry Room Organization post & showing you my favorite organization tips and products!
What do you think? What would you have done in this space? Tell me in the comments!
Our DIY Kitchen & Laundry Room Remodel Series
This project was part of our larger DIY IKEA Kitchen & Laundry Room Remodel Series! Check out the progress from start to finish by reading all of these posts!
- It’s Kitchen Remodel Time! The Budget, The Plans & The Laundry Room
- 3 Weeks Into Kitchen Remodel
- 9 Weeks Into Kitchen Remodel
- 13 Weeks Into Kitchen Remodel
- Our IKEA Kitchen Remodel Reveal!
- DIY Walk In Farmhouse Pantry Progress & Reveal!
Want to see what else we’ve done to our house?
Check out all of the Stacy’s Savings Total Home Makeover posts!

Ragan says
Hi there – great renovation! did you stack an additional cabinet on top of your tall cabinet near the window? I can’ t find one on IKEA that is that deep. Did you use a 15 inch depth and just have a larger void than you do behind the 24″ deep tall cabinet? Thank you!
Stacy says
Hi Ragan,
Yes, I used the 15″ deep cabinet on top and just have a bigger void back there. You could probably make a franken cabinet somehow with the sides of an over the fridge cabinet and the top and bottom of a skinny base cabinet if you wanted to. Or you can just build a custom cabinet to avoid the void. 😉
I put my Little Green Machine in there, so it doesn’t need much space. It would be hard to get into the depth of that cabinet at that height anyway. Also, that whole stack of cabinets is pulled out from the wall anyway to be the depth of the washer & dryer. Also, our vent line runs behind it.
~Stacy
Patrice G. says
Hello, your laundry room is exactly what I’ve been searching for. Can you tell me the height of the tall cabinet and the width of your wall cabinets. Also did you use an ikea cabinet frame for the covering where the metal rod is? Or did you make this open enclosure?
Stacy says
Hi Patrice,
The IKEA cabinets come in several different widths and heights so that you can fit your space. My broom closet tower is 18″ wide, and my uppers are 30″ wide. The bar space is just a longer cover panel on the top cabinet that extends down, and the rod is between the two cover panels.
Hope that helps!
~Stacy
Alex V says
Hi Stacy, I just wanted to thank you for posting these with such detailed instructions and pictures. I made our pantry look amazing basically following your template (which was easy since the size of the room was almost identical to yours) and though my laundry room is much smaller your ideas have given me the inspiration needed to redo that space in a much more beautiful and practical way. I feel like your organizational and aesthetic philosophy is so similar to mine that it feels like your remodel projects are custom-tailored for my needs! Thank you so much!
Stacy says
Hi Alex,
That made my day! Thank you so much! I’m glad that you have found inspiration in my projects! Enjoy your new spaces!
~Stacy
Erin says
Hey Julie! Love your laundry room! what did you use for the panel between your lower cabinets and your washer and dryer to support the countertop?
Thank you
Stacy says
Hello!
We used 3/4” mdf on each side. I think the countertop installers put a stud across the back as well.
Hope that helps!
~Stacy
Bethany says
Hi! What wall cabinet depth did you use? Thank you!
Stacy says
Hi Bethany,
IKEA Cabinets only come in 15″ depths for the wall cabinets.
Thanks for your question!
~Stacy
Allie says
Hi Stacy! So beautiful. May I ask what you used to build the boxes around the Washer/Dryer? Is that also some refitted ikea cab? Trying to achieve the same thing our laundry room remodel. Thanks!
Stacy says
Hi Allie,
Thank you! We just made some panels out of mdf for the sides and screwed them into the cabinets. There’s also a 2×4 along the back wall supporting the countertop.
Hope that helps & good luck with your project!
~Stacy
Lise Fairhurst says
hi Stacey, lovely job! can you tell me what color paint you used on the cabinet doors and what countertop you used. ( I know it’s leftover from your kitchen but hopefully you still have this info)
thank you
Stacy says
Hi Lise,
Thank you so much! The paint color & quartz details are in this post: https://www.stacyssavings.com/our-ikea-kitchen-remodel-reveal/
Thanks for checking out the blog!
~Stacy
Crystal says
Love this! The appliance storage is perfect!! What is the pantry cabinet called at ikea?
Stacy says
Hi Crystal,
I think they call them tall cabinets. It’s part of the Sketion kitchen cabinet line.
~Stacy
Susan says
Love your laundry room! Quick question… where did you end up storing your vacuum cleaner and broom/mop? I’m assuming the tall cabinet in the back? I’m having that same issue….
Stacy says
Hi Susan,
Thanks for the kind words! Yes, the vacuum cleaner & mop is in the tall cabinet at the end. I’ve got an organization post coming soon that will open every door. Stay tuned!
Thanks for checking out the blog!
~Stacy
Julie says
This is so beautiful! My laundry room is laid out just like this and it’s still 1981 decor with cabinets practically falling off the wall. To say we need a remodel in there is an understatement! Your laundry room is a great inspiration for me. I love everything about it! Can you link the sink you used? I need a small, deep sink as well since that’s where we wash our little dog. Great job on this – so impressive!
Stacy says
Hi Julie!
I’m so sorry for the delay. I was trying to hunt down the exact sink. We ordered all of our sinks and faucets through a showroom and used our Kitchen Designer’s discount. I couldn’t find the exact sink, but this one is really close. It’s the same size as ours, but it looks like it comes in a lot of different sizes. The best part about this one is it is 1/3 the price of the one we bought! Wow! Here’s an affiliate link for you –> https://shopstyle.it/l/bhhXu
Thank you for the kind words, and I’m glad my space is an inspiration to you! Good luck with your project!
~Stacy