A few weeks ago, I told showed you our plans for to remodel the Master Closet. Our goal was to have a Semi-Custom Closet without the Custom Closet Price Tag.
If you’ve been following along on Instagram, you’ll know actually have a Master Closet again! This isn’t the reveal post, per se, because I still have a lot of trim work & organizing to do. But, the contents of the closet are inside the closet now and not all over my bedroom anymore.
I couldn’t do this post the way I really wanted to, which was empty it, gut it, build it while empty, take pretty pictures of empty wardrobes, and then reload. I just don’t like stuff where it doesn’t belong. So, I actually built this closet while most of the stuff was still inside. It was a bit tricky.
The Master Closet Materials

In the last post, I told you that we were waiting for the PAX to be included in an IKEA Family Sale. Well, that happened around January 7th, so we went to IKEA and spent about $1600 on various Pax & Komplement components. We had to purchase 11 Wardrobes. We actually purchased 12 because I broke one. #oops
Master Closet Prep
Before I could start building, we had a lot of prep work to do in the closet.
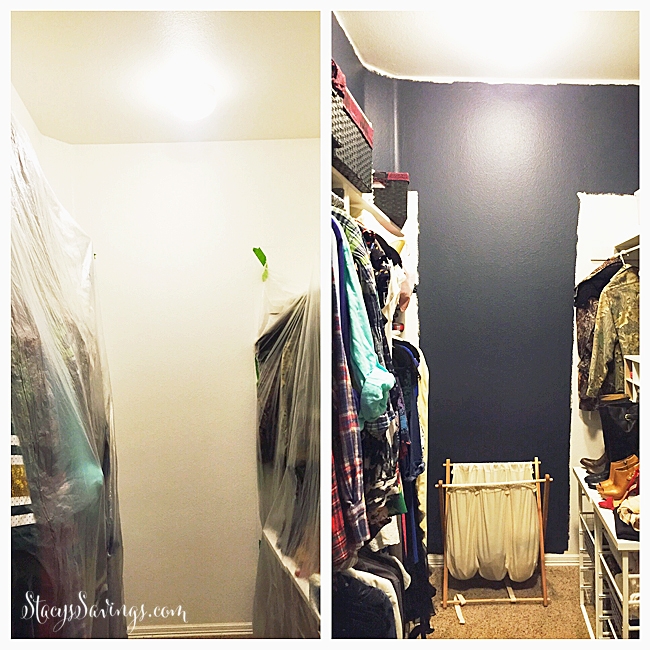
First, I wanted to paint the walls, install crown molding, and install can lights. I measured & marked where the wardrobes would go & painted around that. I didn’t want to waste paint where it wouldn’t be seen. We went with Benjamin Moore Hale Navy again. I just love that shade. We also painted the ceiling a bright white.

We also pulled up the carpet, pad & tack strips until we were left with a bare slab floor. Eventually, we want to put hardwood floors in here, but that won’t happen until we do the kitchen & refinish all of the floors. When we get the new hardwood floors in here, they will nail them into these subfloors.

We didn’t want to put the wardrobes on top of carpet that would be removed later, so we went ahead and removed all of it and laid the subfloor needed for the hardwood across the entire closet floor, on top of a vapor barrier, of course.
Building the Pax System
Once that floor prep was complete, it is time to start removing the old shelving and building the Pax wardrobes.

I stared with the side that would eventually hold all of our clothes. I moved all of that stuff to the bedroom, demoed the shelving, and then built the 5 wardrobes for that side. They fit perfectly. There wasn’t even an extra 1/4″.

I was able to build these 5 wardrobes all inside the closet. I then attached them to each other and installed them in about 3 hours, pretty much by myself. It wasn’t too bad at all! Then, I installed all of the interior fittings, and moved the clothes back into the closet.
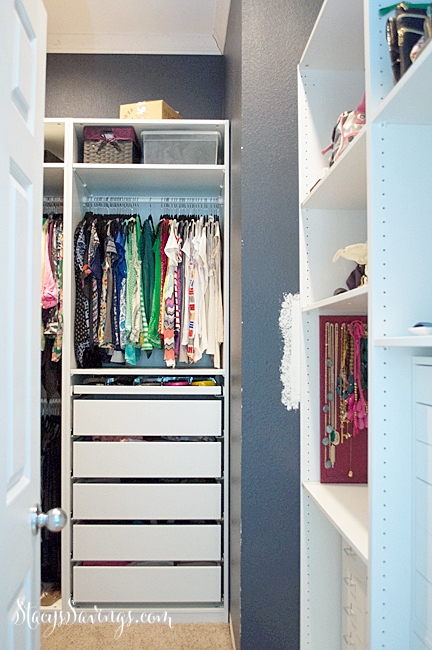
My part of the clothing side has 5 drawers, and I was able to get EVERYTHING that was in my dresser in the bedroom into these drawers. The dresser is now empty! I can now dress inside my closet, and I don’t have any peep shows to the neighbors across the creek! Hurrah!
The Shoe Side of the Master Closet
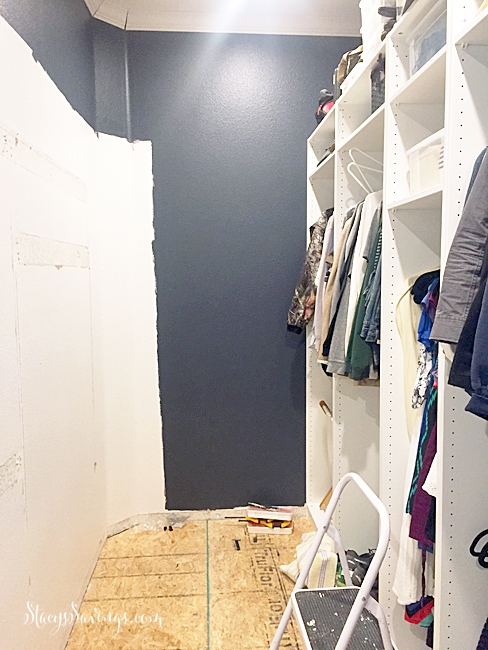
Next was the shoe side. I moved all of the shoes and things that I had there on top of the wardrobes that I had already built. Then, I demoed those shelves and stared building the Pax. I was able to build all of these inside the closet, but it was even tighter this time. They are really big, 93″ tall, so you may need to build them in an adjoining room.
For the first wardrobe on the right, I needed to reinforce the floor of the wardrobe, because this one is going to hold our gun safe. The gun safe is super heavy, and the bottom of the wardrobe is particle board.
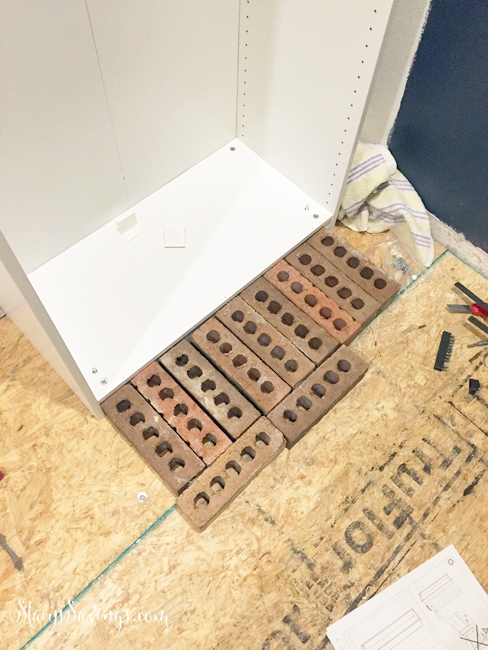
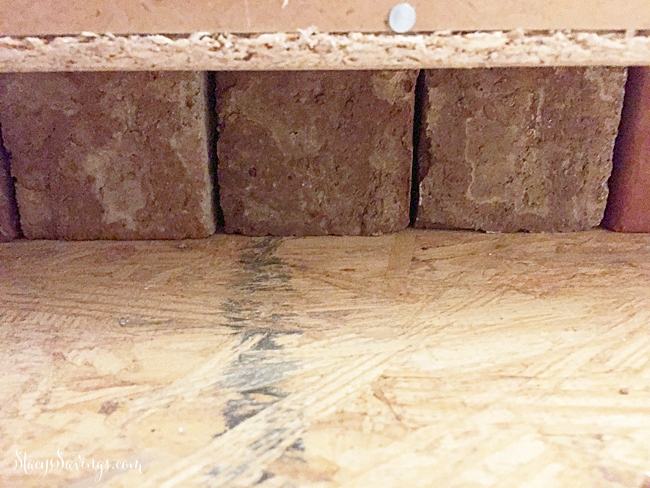
The void underneath the wardrobe was exactly the same height as a brick on its side, and we have a ton of bricks. I was able to line the entire void with bricks, even getting the feet of the wardrobe to slide into one of the holes in the brick. The base should be good for the heavy safe now.
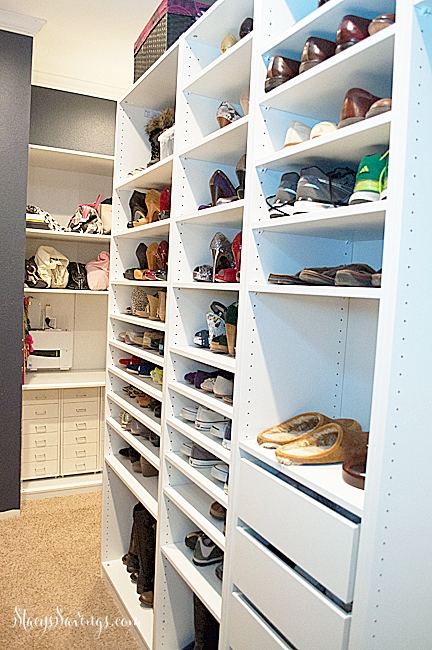
After reinforcing that wardrobe, I built the other three, installed them to each other, and installed them to the wall. Then, I put all of the shelves & Doug’s drawers in, and moved all of our shoes back inside the closet.
Cutting Down a Pax Wardrobe

The last area of the closet was the accessories area. This was the tricky one, because we had about 3″ less space than what 2 wardrobes would be. We ended up buying a 39″ wardrobe and cutting it down with a circular saw so that it would fit.
The 39″ one is the one I broke the first time. This wardrobe has a bunch of issues. Not only did it need to be cut down by about 3″ in width, but I needed to cut a hole in the back so that the wardrobe would fit over our alarm box. I broke the first one because I tried to move just the frame into the closet from the bathroom, without the back installed. I thought it would be easier to install the back inside the closet. Totally wrong.
Its not a total loss, because I’m planning on salvaging some of the side pieces of that broken wardrobe for some future hacks.
We bought another one, cut it down, used a forstner bit & dowel hole guide (new tool!) to replicate the original holes, and got it put together. Once we moved the completed wardrobe inside the closet, I backed it up to the alarm box and marked the top & bottom. Using my 2′ level, I drew lines, then I used a box cutter to cut the hole out of the back of the wardrobe. Easy peasy.
The bottom of this wardrobe holds my Helmers full of Nail Polish, so its heavy. I also used bricks under this wardrobe.
The Last of the Accessories Area Wardrobes
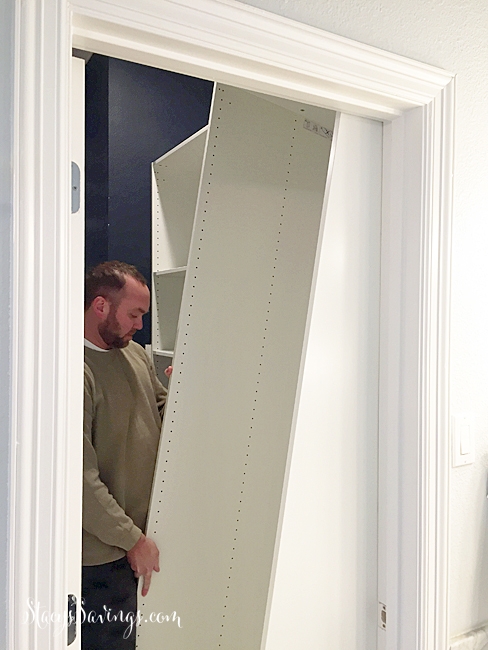
I built the last wardrobe, which will hold my 2 Alex drawer units, put some bricks under it, and then we carefully got them in place. These were super tight. We had to remove the door casing and push to get it in. It was a very tight squeeze. They aren’t going anywhere.
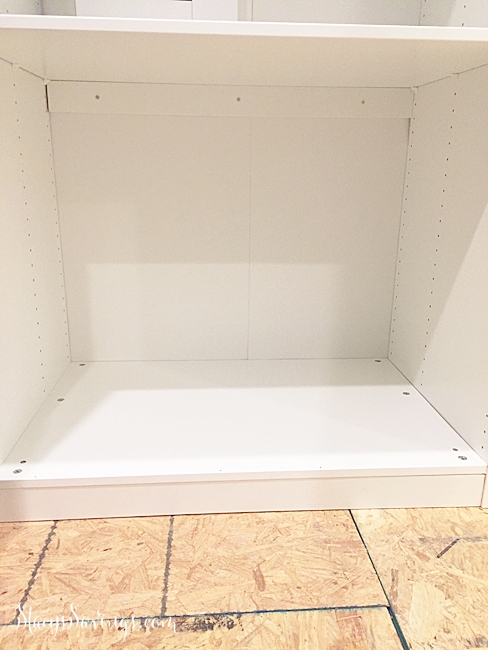
Once we finally got those in, I secured them to the wall & to each other. I used one of the pieces of the wardrobe I broke to use as a cleat under the first shelf so that it would have more support. This where the bottom of the hole that I cut in the back of the wardrobe. This wardrobe is wide, and I didn’t want it bowing. I want to do a hack here, with a vertical piece on top of this shelf, and I thought the cleat would help stabilize the shelf.
The Master Closet Wardrobes Installed


After that, I installed all of the shelves & moved my stuff back in.
Then I did my “yay, everything is back in the closet” happy dance!
So that’s where we’re at now. It’s far from complete, and I’m not sure when we’ll be able to start finishing it. Maybe this weekend. We’ll see.
It’s also not perfectly organized, so forgive me. Doug refused to Konmari his clothes, and he hates Huggable Hangers, so he feels like his stuff is cramped. I’m just letting that marinate. I think he’ll come around on the purge. Hopefully, it will happen before the final reveal.
We’re going to go HomeGoods this weekend & see if we can find a full length mirror for the end wall. I’ve never had a full length mirror before. I’m pretty excited about it! I also want to see about finding some light colored boxes or bins and a new hamper. I have a cool hook rack for the wall, but I can’t put that on until I install the new baseboards.
What’s Left To Do in the Master Closet
Here’s what’s left to do in here:
- Finish Painting/Paint Touchups
- New Baseboards
- Install Crown Molding
- Install Plywood & Frames for Molding Shelf Topper
- 2 Wardrobe Hacks
- Caulk & Fill Holes
- Paint Trim
- Decor (Full Length Mirror, Matching Bins, Pouf/Stool, Art, Hamper
I’ll be honest, I’m not real motivated. Maybe after I go to HomeGoods, I will be. We’ll see.
It is really nice having everything in the closet. I actually like getting dressed in the morning. Doing the Konmari Method with my clothes before building this closet made a huge difference. I really love everything in my closet now! More shoes need to be purged, though. I thought I would have extra space left over for more shoes, but I don’t. The whole space is full! Having all of my shoes together on the same wall is probably the best part about the whole makeover. My prior system was not working.
Update
The Master Closet Project is complete! Make sure you don’t miss a thing in this DIY by checking out all of the Master Closet blog posts!
Have you organized your closet for the New Year? It’s such a nice feeling! I have always loved organizing closets!
Check out all of the Stacy’s Savings Total Home Makeover posts here!
Leave a Reply