The new office project is sort of at a stand still for now, but I got Doug all moved in there, so I’ve been concentrating on getting the guest room/craft room remodel going.
If you missed the first post about this room, check it out here.
Update: This room was completed in 2017. It looks amazing! Make sure you read all the way to the bottom so you don’t miss the rest of the Guest Room/Craft Room Remodel Series! It’s full of fun DIY projects to make your home look amazing!
Emptying The Guest Room/Craft Room
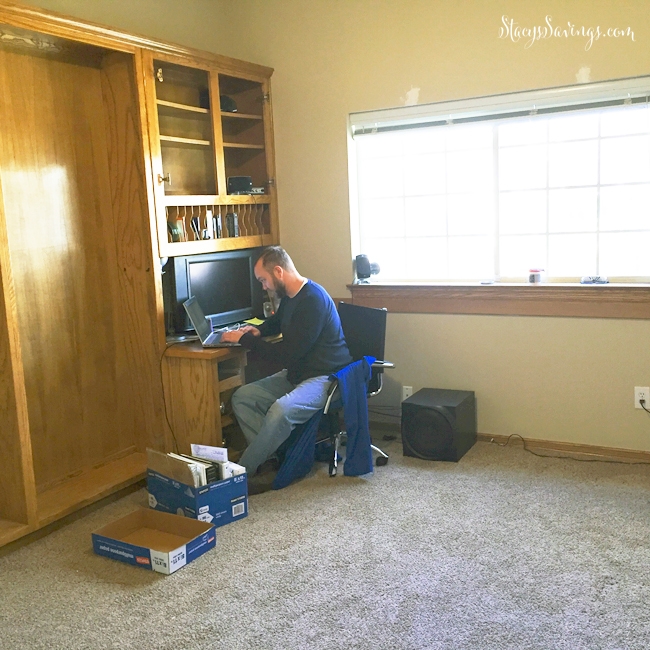
I think the hardest part about this guest room/craft room remodel was getting Doug, the squatter, to finally move out. You can see I started removing things around him until he had no choice…
Once I got him out, it looked like this:


Guest Room/Craft Room Remodel Demo
The first thing we did in our guest room/craft room remodel was demo. Demo included removing the exsiting built ins & the chair rail, and stripping the wallpaper that was on the bottom half of the wall.
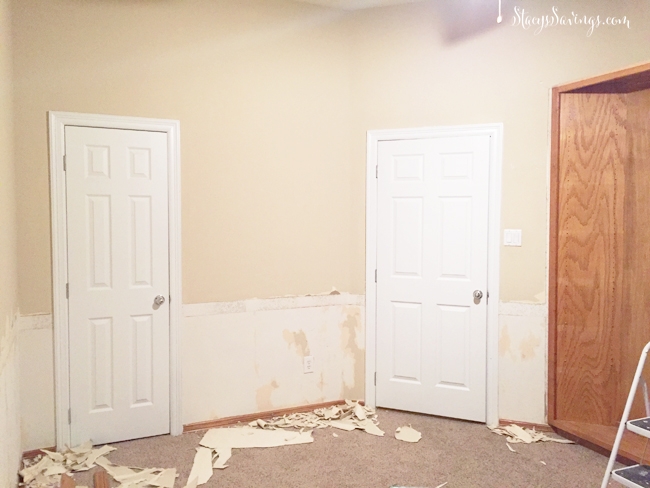
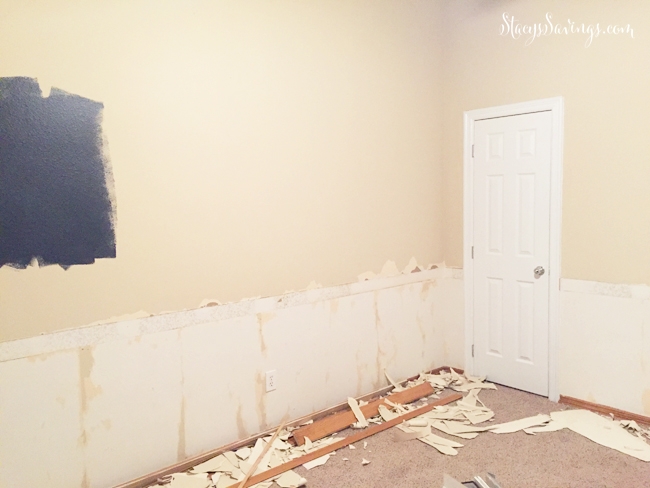
The wallpaper had been painted over, but it came off fairly easily. I ended up doing a thin layer of joint compound over where the wallpaper was to even out any dings. I probably should have done it a second time, but I was getting anxious to get this show on the road. Isn’t that always the case with these projects?
Preparing the Guest Room/Craft Room Walls


Since we needed to retexture the bottom of the wall to match the top, I decided to invest in a hopper gun. Spraying texture with a hopper connected to my air compressor always intimidated me. I found a decent deal on one on Amazon (this one). I also picked up some texture mix at Lowes for about $13.
The hopper did not come with instructions, but if you have any experience with hooking things up to air compressors, you should be able to figure this one out. Basically, you tighten the collar over the bottom of the funnel on top of the gun, and you need a coupler to hook it to your compressor hose. I have this set of compressor accessories, and one of those worked. The air compressor that I linked to in the first sentence comes with some accessories that might work.
Be prepared to practice on some cardboard to get your spray pattern down before you attempt your walls. It’s a bit tricky to get it right.
This is what the guest room/craft room looked like when I was done texturing:

I really should have invested in this hopper gun a long time ago. I would have saved so much money on the bathroom projects and the new office wall by doing it myself. The texture only took about 10 minutes to spray, I just went in an up and down pattern, and it was super fun! It was also super messy, but whatever. It was really fun. I highly recommend it!
Painting the Guest Room/Craft Room Walls

I let that dry overnight, and the next day, I painted my first coat of paint. Normally, I would have primed the texture first, and I definitely should have, but again, I wanted to get going. I purchased HGTV Ovation paint + primer from Lowe’s so I could skip the priming, and had them color match to Benjamin Moore Hale Navy. BIG MISTAKE. I should have primed it with Kilz and then driven the extra 8 miles to Ace to get the real Benjamin Moore paint.
Forgive me for my rant, but HGTV Ovation paint sucks. This pains me to say, because I love and respect HGTV, and I was so disappointed that their paint was so awful.
First, the color match was a bit lighter than the Hale Navy I already had on hand. That’s not the paint’s fault. Different brands have different bases. Second, the finish (eggshell) shows differently on the wall where I rolled vs. where I cut in with my 2″ trim brush. The areas where I brushed were darker and shinier than the rolled areas. Also, if I didn’t do ceiling to floor strokes, and I did Ws instead, you could see the areas across the wall where my patches stopped. Third, its been a bit dusty in that room since I painted, and the dust won’t wash off easily. Last and worst is that every time I barely hit the wall, the paint chips off. I will never buy this paint again.
Now, back to the room!
Casing the Guest Room/Craft Room Window

Right about now is when I decided that I wanted to case the window. We have 3 cased windows in our Living Room area, and I love them! Casing all of the windows in the house before we get custom shades & shutters is on my to do list. With the baby coming in 7 weeks, this will be Doug’s sleeping area, so I need to order a blackout shade for in here. So that’s what led to me casing this window now.
I picked up a window sill at a local millwork shop (Lowe’s sells 5 1/4 deep ones, and I needed one a bit deeper), and that cost me about $15. The only other materials I bought was a sheet of 1/4″ plywood from Lowe’s (approx $13) for the jamb extensions. I only used a bit of the sheet of plywood, so I think I can get jamb extensions for 4-5 more windows out of it. Coincidentally, this is also the same plywood that I used for the faux shiplap in the master bedroom & on the kitchen island.
I used old door casings that I had saved from the doorway we removed in the kid’s bathroom for all of the trim, and cut everything to size with my circular saw & miter saw. I nailed it all up with my nail gun in about 20 minutes. After caulking, priming, and 2 coats of paint, I’m ready to case all of the windows! It looks great and was super easy!
New Guest Room/Craft Room Lighting & Built In Cabinets
Next, Doug painted the ceiling a bright white (it was creamy gross), installed 4 6″ LED recessed can lights, and put up a new white ceiling fan. After that was done, we cut the carpet where our cabinets were going, and installed moisture barrier and subfloor. We’re going to be putting hardwood floors in here eventually, so we wanted to put them on the same level subfloor that those would be. That way, the toekick space wouldn’t shrink when the wood was laid down.
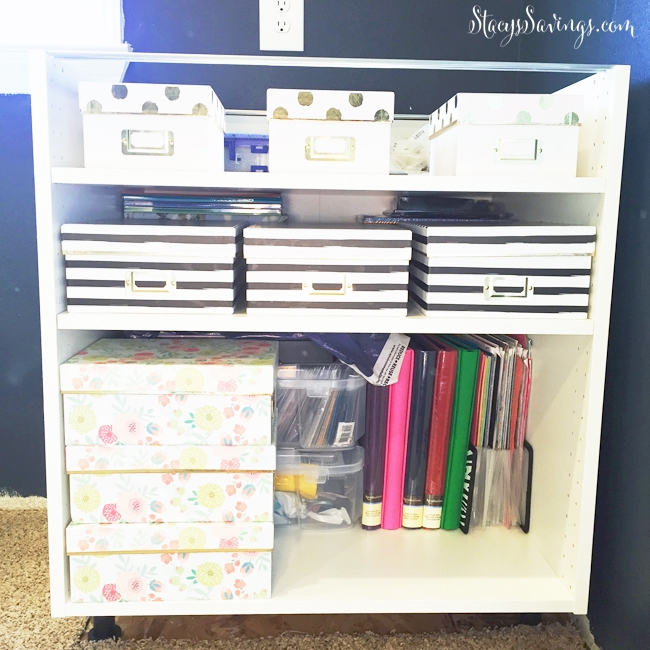
Our next step was to assemble the two 30″ IKEA Sektion cabinets that will eventually serve as the bases of my built ins I’m going to build this summer. I went with 24″ deep cabinets, as the room is deeper than it is wide. I’m going to be able to store so much crafting stuff! I’m so impatient, that I went ahead and used one of the cabinets to stash all of the displaced crafting stuff that’s been sitting in my breakfast nook for the last 2 weeks
Baseboards & Carpet Patch
Following installing the cabinets, its time to get the baseboards in place. I used some scrap pieces of wood that were the same thickness as the panels & toekicks I will be using to serve as spacers. I ended up using the same baseboards from the room that I removed & cut down to fit the cabinets, plus a piece from our master closet (that is usually hidden behind clothes). In order to prime and paint those this week, I prepped them by filling the nail holes and sanding.

The last step to getting this room back together was to patch the carpet. Luckily, I had cut a 1 foot wide strip from the office, and I was able to use that and a puzzle of pieces of the padding that we removed for the cabinets to patch the carpet. This was interesting. Tack strips are basically impossible to nail into the concrete, so we ended up pulling the concrete nails and adhereing them to the slab with Liquid Nails.
I used my box cutter to cut the patches. Then, I duct taped the pad pieces to the existing pad, and used carpet seam tape on the seam between the existing carpet and the patch. I put a bunch of heavy stuff on it overnight to help the seam tape take.
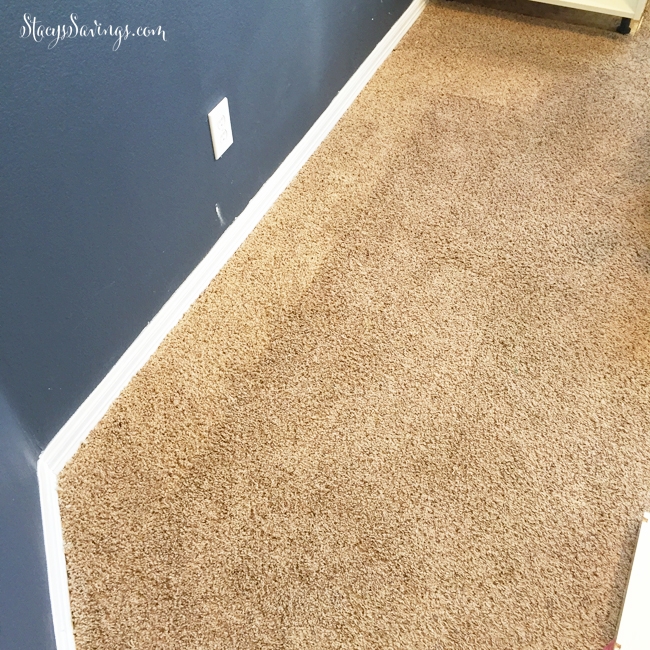
The patch looks pretty good for a first timer, if I do say so myself! I’m pretty proud of it! I had the seam tape on hand from another project, and since I used leftovers of carpet and pad, I didn’t have to spend any money on that project! Those are always the best!
By the way, check out those paint chips! #thispaintsucks
What’s Next for the Guest Room/Craft Room Remodel
That’s where we’re at now. I want to get all of the baseboard painting done today. Then I’m going to get started trimming out the cabinets with fillers, toekicks, and panels. Doug’s also going to work on my countertops for this room this week.
It’s been a lot of work at 8 months pregnant, and slower than I thought, but I’m starting to see the light in this room. We need to get the carpets cleaned in the whole house before I bring the bed in here. I also need to save some more money so I can get a headboard (or make one) and some new pretty bedding. We’re going to order the cabinet doors in a few weeks, but I don’t know when I’ll get the time to get them primed, painted and installed. We have less than 2 months until the baby is born, and I don’t think that is a project that Doug will want to do. So that may get done in the summer.
Here’s my list of projects for this room:
Demo Built Ins and Remove WallpaperRepair Walls & TexturePaint CeilingInstall 4 Recessed LED LightsInstall New White Ceiling FanPaint WallsAssemble & Install CabinetsCase Window- Custom Bamboo Shade w/Blackout Liner
Install Baseboards, Caulk, Prime & PaintPatch Carpet- Trim Cabinets
- Build, Stain & Install Countertops
- Add Closet Shelving
- Add Closet Light
- Furnish & Decorate
- Built In Shelves
- Add Crown Molding
- Replace Carpet with Hardwoods
- Replace Window
How Much This Part Cost
Seeing it in a list like that makes me feel like I haven’t done that much in there. Between the paint, cabinets, and other miscellaneous trips to Lowe’s, we’ve spent about $319. Cabinets take up the majority of the money spent ($174). The rest includes the wood for the countertops and about $100 in organizational stuff from HomeGoods (I couldn’t resist). The $319 number also includes some updates to the closet in this room which I’ll cover in another post.
Some of the stuff on that list, like the Built In Shelves, Crown Molding, Window & Hardwoods are a ways off. Some years off. But, I think I can realistically get this room to a usable space in about a month or so. I’m excited!
Have you ever taken on a project like this before? What room did you renovate and what did you do? Tell us in the comments!
UPDATE
This project is complete! Make sure you check out all of the Guest Room/Craft Room posts so that you don’t miss a single detail of this creative DIY space!
- Guest Room/Craft Room Mood Board & Design
- Update on Guest Room/Craft Room Remodel
- Built In Bookshelves DIY Part 1
- DIY Built In Bookshelves Construction
- Built In Bookshelf Project Complete
- Budget-Friendly DIY Upholstered Headboard
Check out all of the Stacy’s Savings Total Home Makeover posts here!

Leave a Reply